
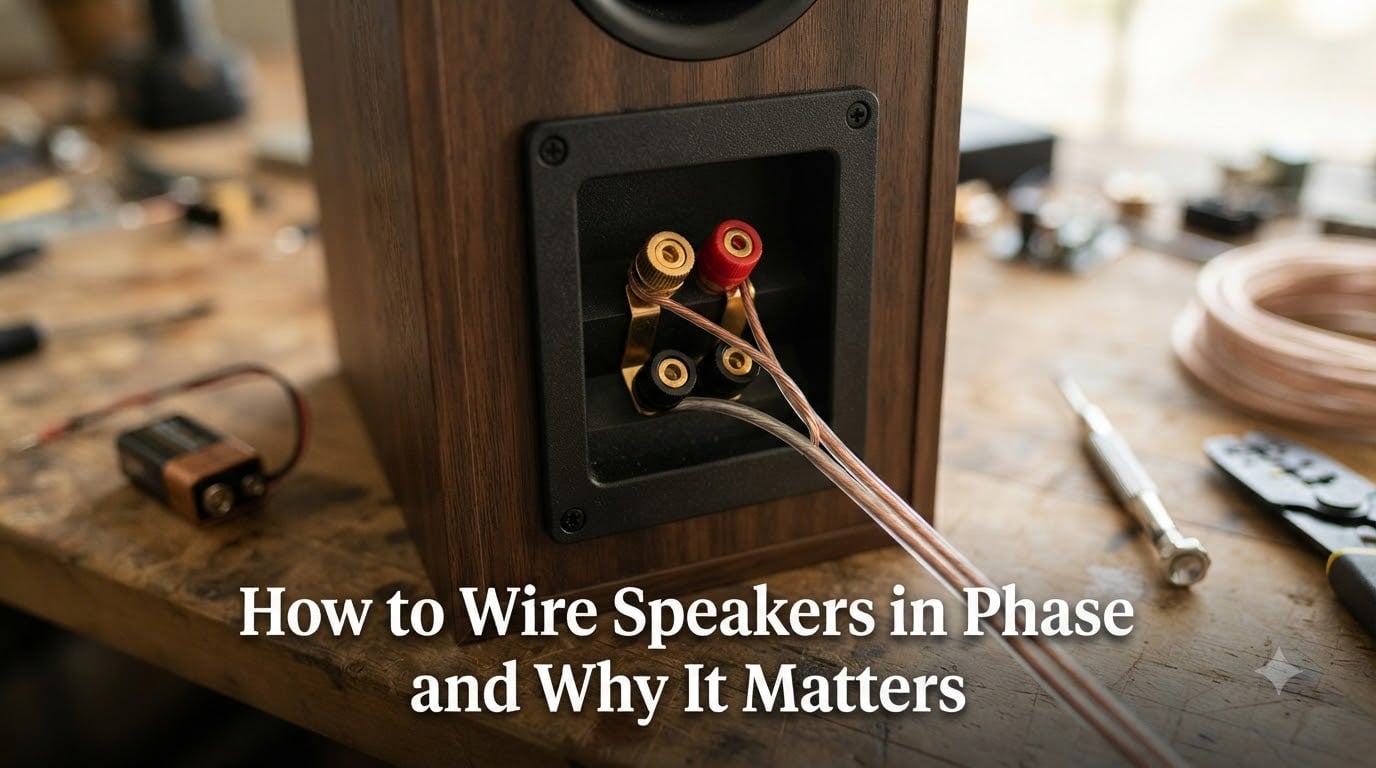
If your music sounds thin, hollow, or oddly vague in the middle, the problem may not be your speakers or your amp. It might be that you forgot to wire speakers in phase. I learned this the hard way after moving my bookshelf speakers and reconnecting them by memory. The bass vanished, the vocals sounded smeared, and I almost blamed the speakers.
Wiring speakers in phase simply means matching positive to positive and negative to negative between your amplifier and each speaker. When done correctly, both speaker cones push out and pull in at the same time. That synchronized movement is what gives you tight bass, focused vocals, and a proper stereo image. In this guide, I will walk you through what phase means, why it matters, and exactly how to test and fix it in your home theater, stereo, or car audio setup.
Table of Contents
What Is Speaker Phase and Polarity?
Speaker phase describes whether two or more speakers are moving in the same direction at the same time. Speaker polarity describes whether each individual speaker is wired correctly to the amplifier. Both terms are often used interchangeably, and getting them right is the foundation of good sound.
Every speaker has two terminals, usually marked with a plus (+) and a minus (-), or a red and a black indicator. The positive terminal of the amplifier should connect to the positive terminal of the speaker. The negative terminal of the amplifier should connect to the negative terminal of the speaker. If you maintain this on every speaker in your system, all the cones will move together and you are “in phase.”
Definition: Wiring speakers in phase means connecting the positive (+) terminal of each speaker to the positive (+) output of your amplifier, and the negative (-) to negative, so all cones move air in the same direction at the same time.
There is also a deeper concept called acoustic phase. Even with correct polarity wiring, room placement and crossover filters can cause phase shifts at certain frequencies. For most listeners, getting the polarity right solves 90 percent of the problems. I will explain the rest later in the article.
Why Speaker Phase Matters for Sound Quality
When two speakers are in phase, their sound waves add together. The compression wave from one cone reinforces the compression wave from the other, which is what you hear as full, punchy bass and clear mids. When speakers are out of phase, one cone pushes while the other pulls. The waves partially cancel each other, and you lose energy at specific frequencies.
The most noticeable effect is on bass. Low-frequency waves are long, so a 180-degree shift between two woofers can cause severe cancellation at the listening position. Many listeners describe out-of-phase bass as “thin,” “anemic,” or “missing.” I have heard systems where simply swapping a single wire made the bass reappear like someone had turned on a subwoofer.
Stereo imaging suffers too. When speakers are out of phase, the center image (think vocals, lead guitar, dialogue) sounds diffuse, distant, or even pulled away from the center. Sound staging collapses because the cues your ears use to place instruments in space depend on consistent timing between the left and right channels.
The 83% Rule for Speakers Explained
The 83% rule is a guideline that states roughly 83 percent of what you hear in a stereo mix comes from one channel at a time, while the remaining content is shared between both. Because most material is mono at any given instant, reversing the polarity of even one speaker can destroy the parts that should be centered. Vocals and lead instruments typically sit dead center, and those are exactly the elements that suffer most when phase is wrong.
This is why many listeners notice a problem with vocals and imaging long before they think to check phase. If your favorite singer’s voice sounds like it is sitting behind the speakers rather than between them, phase is the first thing I would check before swapping cables or upgrading gear.
Signs Your Speakers Are Out of Phase
Before you grab any tools, listen. Out-of-phase speakers give very specific symptoms. Here is what I look for in my own systems:
- Thin or weak bass: Kick drums lack punch, bass guitars sound hollow, and movies feel like they are missing their explosions.
- Diffuse or smeared center image: Vocals seem to come from everywhere and nowhere, like the singer is standing behind a curtain.
- Reduced dialogue clarity: In home theater setups, actors’ voices become harder to understand, especially at lower volumes.
- Strange “hole in the middle” effect: Sit exactly between your speakers and the music sounds quieter than it does off to one side.
- Instruments appearing outside the speaker boundaries: Sounds that should be between the speakers instead leak to the far left and far right.
If any of these match your setup, do not blame the speakers yet. Reverse one of the wires and listen again. If the symptoms flip or get worse, the polarity is the issue. If they improve, you just fixed it.
How to Wire Speakers in Phase: Step-by-Step
This is the core of the process. Take your time with each step, especially the terminal identification. I have walked dozens of people through this, and the most common mistake is rushing the first step.
- Turn off all equipment. Power down your amplifier or receiver and unplug it from the wall. Working with live gear is unnecessary and risks a short.
- Identify the positive and negative terminals on your amplifier. Look for binding posts or spring clips. The positive terminal is almost always red, wider, or marked with a “+.” The negative terminal is black, narrower, or marked with a “-.”
- Identify the positive and negative terminals on each speaker. The same color rules apply. On the back of most speakers, you will see two posts with “+” and “-” symbols, or a red dot and a black dot.
- Prepare your speaker wire. Strip about half an inch of insulation from each end of the wire. If your wire has a marking like a stripe, ridge, or different color conductor, pick one to be your positive side and be consistent.
- Connect positive amplifier terminal to positive speaker terminal. Twist the bare wire strands tight, insert into the binding post or spring clip, and secure it firmly.
- Connect negative amplifier terminal to negative speaker terminal. Use the opposite conductor or the unmarked side of the wire.
- Repeat for every speaker in the system. Consistency matters. If you used the striped wire as positive for the left speaker, use the striped wire as positive for the right speaker too.
- Double-check before powering on. Tug gently on each connection to make sure nothing is loose. Stray strands of wire touching the other terminal will cause a short.
- Power up and listen. Play a track with strong vocals and bass. Sit in your normal listening position and confirm the center image is solid and the bass is full.
That is the entire process. Nine steps and you have correctly wired speakers in phase. The next two sections cover how to confirm your work with a simple battery test or a multimeter.
How to Test Speaker Polarity With a 9V Battery
The 9V battery test is the most popular method for verifying speaker polarity, and it is the one I recommend to anyone who is just starting out. It takes about 30 seconds and requires nothing more than a fresh 9V battery and a moment of attention.
- Disconnect the speaker from the amplifier. Pull the wires off the back of the speaker. The battery test is done only on the speaker, not through the amp.
- Hold the speaker so you can see the woofer cone clearly. Make sure you have a clear view of the cone, ideally from the front.
- Touch the positive battery terminal to the wire you believe is positive. At the same time, touch the negative battery terminal to the wire you believe is negative.
- Watch the cone. If the polarity is correct, the cone will push outward (away from the magnet) when you make contact. If the polarity is reversed, the cone will pull inward (toward the magnet).
- Reverse the wires and try again. The cone should now move in the opposite direction. The wire that pushed the cone outward is your positive wire.
- Mark the positive wire. Use a small piece of tape or a marker so you never forget.
Keep contact brief. A 9V battery will not damage a typical speaker driver, but holding the connection for more than a second or two is unnecessary. A quick touch is enough to see the cone jump.
Tip: If the cone barely moves, check your battery. A weak 9V produces a small movement that is easy to miss. I always keep a fresh battery in my toolkit specifically for this test.
Using a Multimeter for Polarity Testing
A multimeter offers a more precise alternative to the battery test, especially if you want to confirm polarity on wires you cannot easily see moving. You will need a basic digital multimeter with a DC voltage setting.
- Set the multimeter to DC voltage, around the 1V to 20V range. Most meters have a “Vdc” or “V with a straight line” setting.
- Insert the leads into the speaker wire ends. Red lead to one conductor, black lead to the other. It does not matter which is which at this stage.
- Gently press the woofer cone inward with your fingers. As the cone moves in, watch the multimeter display.
- Note the reading. If the meter shows a positive voltage, the red lead is on the positive wire. If it shows a negative voltage, the red lead is on the negative wire. You may need to reverse the leads to see a stable reading.
- Label the wires and repeat for the other speaker. Both speakers should show the same polarity pattern.
This method is especially useful for in-wall or ceiling speaker installations where you cannot see the cone. It is also more reliable than the battery test for very small drivers that barely move. The downside is that you need a meter and a free hand to push the cone.
Series vs Parallel Wiring and Phase
When you connect multiple speakers to a single amplifier channel, you usually choose between series and parallel wiring. Both work, but they behave differently in terms of impedance, power handling, and how they interact with phase.
- Series wiring: Connect the positive terminal of the amplifier to the positive terminal of Speaker A, then connect the negative terminal of Speaker A to the positive terminal of Speaker B. Finally connect the negative terminal of Speaker B back to the negative terminal of the amplifier. This doubles the total impedance.
- Parallel wiring: Connect both speakers positive terminals to the amplifier positive, and both speakers negative terminals to the amplifier negative. This halves the total impedance.
From a phase perspective, the rule is the same in both topologies: positive to positive, negative to negative. The signal arrives at each speaker with the same polarity, so the cones move together. The main difference is what your amplifier sees in terms of load. Most amplifiers are rated for a minimum impedance, often 4 or 8 ohms. Wiring two 8-ohm speakers in parallel gives the amp a 4-ohm load, which can overheat some amps if they are not rated for it.
Series wiring keeps impedance higher and is safer for older or budget amplifiers. Parallel wiring gives each speaker more power but demands an amplifier that can handle the lower load. Either way, if you maintain consistent polarity, your speakers will stay in phase.
Subwoofer Phase Switch: 0 vs 180 Explained
Many powered subwoofers include a phase switch on the back panel, usually marked 0 and 180, or 0 degrees and 180 degrees. This switch does not change the polarity of the wiring. Instead, it flips the electrical signal sent to the subwoofer driver by 180 degrees, which is the same as reversing the polarity of the speaker.
The purpose of the switch is to help match the subwoofer to your main speakers at the crossover point. Even with correct wiring, low-frequency waves from the subwoofer and main speakers can cancel each other depending on the distance between them and your listening position. Flipping the phase switch reverses the subwoofer’s output so its peaks line up with the peaks from the mains.
How to Choose Between 0 and 180
There is no single correct setting. The right choice depends on your room, your seating position, and where the subwoofer sits relative to your main speakers. Here is the method I use every time:
- Play a bass-heavy track you know well. Something with strong, sustained low-end content works best.
- Set the phase switch to 0 and sit in your normal listening position. Listen to how the bass sounds.
- Switch to 180 and listen again. Pay attention to whether the bass feels tighter, louder, or more focused.
- Pick the position that sounds best at the listening seat. The difference is often subtle, but one position will usually feel more solid.
If the difference is hard to hear, try moving the subwoofer a few inches at a time. Phase interactions are highly dependent on distance, and a small placement change can make a big difference.
Common Wiring Mistakes to Avoid
Even experienced installers make these errors. I have made most of them myself over the years. Avoiding them will save you time and frustration.
- Using unmarked wire inconsistently. If your wire has no stripe or color difference, label both ends with tape before running it through walls or ceilings.
- Trusting wire color alone. Some manufacturers use different conventions. Always check the terminal markings on the speaker itself rather than relying on wire color.
- Leaving a single strand of wire crossing the terminals. This creates a short that can damage an amplifier. Twist the strands tightly and trim any stragglers.
- Reversing only one speaker in a multi-speaker setup. This is the classic cause of “everything sounds weird but I cannot tell why.” Check both speakers, even if you are sure one is correct.
- Forgetting to check after moving furniture. Rearranging a room often means disconnecting and reconnecting speakers. Treat every reconnection as a fresh wiring job.
- Assuming the subwoofer is in phase automatically. Even with correct polarity wiring, a subwoofer can be acoustically out of phase with your mains. Use the phase switch and the listening test above.
Frequently Asked Questions
What happens if speaker wire polarity is reversed?
If speaker wire polarity is reversed on one speaker, that speaker’s cone will move in the opposite direction of the others. The result is partial cancellation of bass frequencies, a smeared or hollow center image, and reduced vocal clarity. In short, the music sounds weaker and less defined, even though the speakers themselves are working fine.
How do I know which speaker wire is positive if there are no markings?
If your wire has no stripe, ridge, or color difference, you will need to test it. The easiest method is the 9V battery test: briefly touch the battery to the wire ends while watching the speaker cone. The wire that makes the cone push outward is your positive conductor. Label both ends with tape once you have identified them.
What is the 83% rule for speakers?
The 83% rule states that roughly 83 percent of the audio content in a typical stereo mix is mono at any given moment, with the remaining 17 percent shared between channels. Because most material is mono, reversing the polarity of one speaker destroys the centered elements like vocals and lead instruments. This is why out-of-phase wiring affects imaging and clarity so dramatically.
Is it better to wire speakers in series or parallel?
Neither is universally better. Series wiring doubles the total impedance, which is easier on your amplifier but gives each speaker less power. Parallel wiring halves the impedance, giving each speaker more power but demanding an amplifier that can handle the lower load. From a phase perspective, both topologies keep your speakers in phase as long as you maintain consistent positive-to-positive polarity.
Should I set my subwoofer phase switch to 0 or 180?
There is no universally correct setting. Choose the position that sounds best at your listening seat by playing a bass-heavy track and switching between the two options. Whichever position delivers tighter, louder, more focused bass is the right one for your room and speaker placement. If neither sounds clearly better, try moving the subwoofer a few inches and testing again.
Can a single speaker be wired out of phase by itself?
A single speaker cannot really be out of phase on its own because there is nothing to compare it to. Phase is a relationship between two or more sound sources. However, a single speaker can be wired with reversed polarity, which means its cone moves in the opposite direction of what the amplifier expects. This matters when that speaker is paired with others in a multi-speaker system.
Final Thoughts on Speaker Phase
Learning how to wire speakers in phase is one of those rare free upgrades that costs nothing and improves everything. Whether you are setting up a simple stereo, a home theater, or a car audio system, the rule is the same: positive to positive, negative to negative, every time. Use the 9V battery test or a multimeter to verify your work, and use the subwoofer phase switch if your low end still feels off.
If your system has sounded “almost right” but never quite right, phase is the first thing I would check. In my experience, about half of the systems I have helped troubleshoot were suffering from a single reversed wire. A few minutes with a battery or multimeter, and the missing bass and centered vocals come right back.