
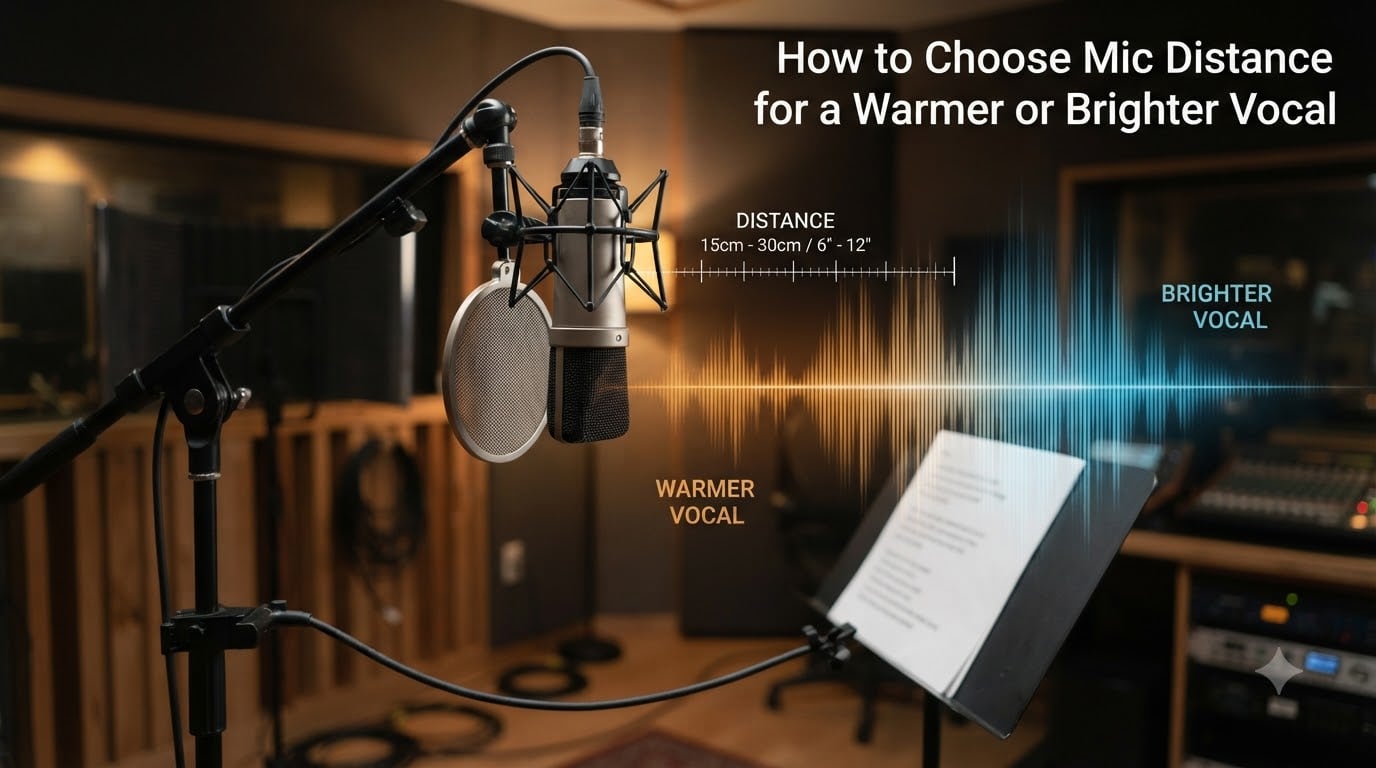
Move your mouth two inches closer to the microphone and your voice gets noticeably warmer and fuller. Pull back a few inches and suddenly everything sounds brighter and more open. That shift in tonal balance, driven entirely by how far you stand from the capsule, is one of the most powerful and underused tools in vocal recording.
Understanding how to choose mic distance for a warmer or brighter vocal lets you shape tone before you ever touch an EQ plugin, a compressor, or any other processing. The distance between the singer and the microphone directly controls how much low-frequency boost you get from the proximity effect, how much room sound leaks into the recording, and how present or distant the vocal feels in the mix.
I have spent years recording vocals in everything from professionally treated studios to bedroom setups with foam on the walls. The single most consistent lesson is that distance matters as much as microphone choice. In this guide, I will break down exactly how different distances affect your tone, give you specific inch-by-inch recommendations for warmer and brighter results, and share genre-specific placement tips that no other guide covers in this level of detail.
Table of Contents
Understanding the Proximity Effect: Why Distance Changes Everything
The proximity effect is a phenomenon where directional microphones, particularly cardioid pattern mics, boost low frequencies as the sound source gets closer to the capsule. The closer you sing, the more bass enhancement you hear. The farther you pull back, the more that low-frequency boost disappears.
Think of it like standing near a bonfire. Right next to the flames, you feel intense, concentrated heat. Step back ten feet and that warmth spreads out and thins. The proximity effect works the same way with sound, concentrating low-frequency energy when you are inches from the diaphragm and letting it dissipate as you move away.
Here is what happens at a physical level. Directional microphones are designed to reject sound from the sides and rear using rear-entry ports. When a sound source is far away, sound reaches the front and rear of the diaphragm at nearly equal pressure, causing some low-frequency cancellation. But when the source is very close, the direct sound from the front overwhelms the rear entry path, and those low frequencies hit the diaphragm with full force.
Audio engineers on forums like r/audioengineering consistently report that the proximity effect is most pronounced within about 4 inches of the mic. Within that range, you get a significant bass boost that can add warmth but can also quickly turn muddy. Users widely agree that 6 to 8 inches is the sweet spot where you retain enough body for a full sound without losing clarity.
It is worth noting that the proximity effect only applies to directional microphones. Omnidirectional mics do not exhibit this behavior at all, so distance changes with an omni will not produce the same warmth shift. Most vocal recordings use cardioid or supercardioid patterns, which is why proximity effect is such a central concept in vocal technique.
Warm vs Bright Vocals: What These Terms Actually Mean
Before dialing in your distance, it helps to understand what warm and bright actually describe in audio terms. These are not vague descriptors. They refer to specific areas of the frequency spectrum and the overall character of the recorded voice.
Warm vocals emphasize the lower midrange and bass frequencies, roughly between 100 Hz and 500 Hz. A warm vocal feels full, rich, rounded, and intimate. It has body and weight that fills out the bottom end of the mix. Think of a crooning jazz singer or a hip-hop artist with a deep, resonant delivery.
Bright vocals emphasize the upper midrange and high frequencies, roughly between 2 kHz and 10 kHz and beyond. A bright vocal feels clear, present, airy, and articulate. It cuts through a dense mix easily and has a sense of sparkle or definition. Pop vocals, rock leads, and broadcast voices often lean brighter for intelligibility.
Here is a quick breakdown of how the two compare:
Warm tone characteristics: Fullness, depth, richness, intimacy, low-mid presence, rounded edges, can risk muddiness if overdone
Bright tone characteristics: Clarity, presence, air, articulation, high-frequency detail, cuts through mixes, can risk harshness if overdone
Balanced tone: A mix of both, retaining body without sacrificing intelligibility, the goal for most modern recordings
Neither warmth nor brightness is inherently better. The right choice depends on the genre, the singer’s natural voice, the microphone you are using, and the overall production style. A thin, reedy voice might benefit from the proximity-induced warmth of close-mic placement. A boomy, heavy voice might sound better with the added clarity that comes from backing off a few inches.
How to Choose Mic Distance for a Warmer or Brighter Vocal: The Complete Guide
This is where we get into the practical, inch-by-inch guidance that most resources leave vague. The recommendations below assume you are using a typical large-diaphragm condenser mic with a cardioid pattern, the most common setup for studio vocal recording. Dynamic and ribbon mics will behave slightly differently, but the general principles still apply.
Mic Distances for Warmer Vocals
If warmth is your goal, you want to exploit the proximity effect. That means getting closer to the capsule. Here are the specific distance ranges and what you can expect from each.
0 to 2 inches (very close): This delivers maximum proximity effect. The low-frequency boost is intense, giving your vocal a thick, heavy, almost radio-DJ quality. This range works well for rap vocals, intimate spoken-word recordings, and aggressive rock vocals where you want a larger-than-life presence. The trade-off is that you lose high-frequency detail, and plosives become a serious problem. A pop filter is mandatory at this distance, and even then you may need to sing slightly off-axis to avoid popping.
2 to 4 inches (close): You still get a strong proximity boost, but it is more controlled. The vocal sounds full and warm with enough clarity to remain intelligible. This is a popular distance for R&B, soul, and intimate pop vocals where you want the listener to feel like the singer is right in front of them. Many engineers consider 3 to 4 inches the sweet spot for achieving professional warmth without crossing into mud territory.
4 to 6 inches (medium-close): The proximity effect is present but noticeably reduced compared to closer positions. You get a warm, rounded tone with a more natural frequency balance. This range is excellent for singer-songwriter recordings, acoustic genres, and any vocal that needs warmth but still has to sit clearly in a mix. If you find 2 to 4 inches too boomy, this is where you back off to.
Mic Distances for Brighter Vocals
If brightness and clarity are your goals, you need to move away from the mic. As the proximity effect diminishes, the natural high-frequency response of the microphone becomes more apparent, and the vocal takes on a more open, present character.
6 to 8 inches (medium): The proximity effect is minimal at this distance. The vocal sounds natural, balanced, and true to the microphone’s inherent frequency response. Most engineers recommend this range as a default starting point for studio vocal recording. You get clarity and presence without the vocal sounding thin or distant. Forum users on Gearslutz and Reddit consistently cite 6 to 8 inches as the sweet spot for balanced recordings.
8 to 12 inches (medium-far): The proximity effect is essentially gone. The vocal takes on a brighter, airier quality with more high-frequency detail and sense of space. This works well for pop vocals that need to cut through dense electronic productions, lead vocals in rock where you want some room sound, and any scenario where you want the vocal to feel open rather than intimate. The trade-off is that you pick up more room reflections, which can be problematic in untreated spaces.
12+ inches (far): At this distance, the room becomes a significant part of the recorded sound. The vocal will sound distant, ambient, and heavily influenced by the acoustic space. This can work as an effect for atmospheric sections or group vocals, but it is rarely used for lead vocal tracking. In an untreated room, this distance will almost always produce a muddy, reflected sound that is difficult to mix.
Genre-Specific Mic Distance Recommendations
One of the biggest gaps I found across competing guides is that nobody gives genre-specific mic distance advice. After analyzing forum discussions and drawing on my own recording experience, here are practical recommendations tailored to specific styles of music.
Pop vocals: Start at 4 to 6 inches for a warm, intimate verse, then back off to 6 to 8 inches for brighter, more energetic choruses. Pop productions often layer multiple takes, so consistency matters more than hitting an exact distance. Use a pop filter and mark the floor with tape so the singer can return to the same spot.
Rap and hip-hop vocals: Rap vocals typically call for a close, punchy, in-your-face sound. Record at 2 to 4 inches for the main vocal, using the proximity effect to add weight and authority. For ad-libs and doubles, you can back off to 6 to 8 inches for contrast. A dynamic mic like an SM7B is popular here, and these mics handle close-mic work well without getting boomy.
Rock and metal vocals: Aggressive styles often benefit from 2 to 4 inches for screamed or belted sections, giving you that thick, powerful sound that cuts through heavy guitars. For cleaner, melodic sections, move to 6 to 8 inches. Angling the mic 15 to 20 degrees off-axis can help tame harshness when recording loud, high-energy performances up close.
Jazz and acoustic vocals: These genres usually call for a natural, uncolored sound. Record at 6 to 10 inches to minimize proximity effect and let the singer’s natural tone and the room acoustic come through. A ribbon mic at this distance can produce a beautifully smooth, vintage warmth without the boominess of close-mic proximity effect.
Podcast and spoken word: For conversational, intimate delivery, 3 to 5 inches with a dynamic mic works well. The proximity effect adds warmth and presence that makes the voice feel close and engaging to the listener. For interview-style formats with two people sharing a mic, 6 to 8 inches per person helps maintain consistent levels.
The 3:1 Rule for Microphone Placement
The 3:1 rule is a fundamental principle of microphone placement that prevents phase cancellation when using multiple microphones. The rule states that the distance between two microphones should be at least three times the distance from the nearest mic to its sound source.
Here is a practical example. If your lead vocal mic is 6 inches from the singer, any second microphone (like a room mic or a mic on a second vocalist) should be at least 18 inches away from the first mic. This 3:1 ratio reduces phase interference to a level that is generally inaudible, keeping your recordings clean and coherent.
The rule matters for solo vocalists too. If you use a room mic alongside your main vocal mic, applying the 3:1 rule prevents the two signals from cancelling each other’s frequencies when summed in the mix. Without it, you can get a hollow, thin, or comb-filtered sound that no amount of EQ will fix.
While the 3:1 rule is a guideline rather than a physical law, it has been validated through decades of studio practice. When in doubt, increase the distance between mics rather than decrease it. Phase issues are far easier to prevent than to repair after the fact.
How Recording Environment Interacts with Mic Distance
Your room plays a bigger role in mic distance decisions than most people realize. The farther you pull back from the microphone, the more room sound you capture alongside the direct vocal. In a well-treated space, that can add pleasing depth and dimension. In an untreated bedroom or office, it introduces reflections that muddy the recording.
In a treated studio with acoustic panels, bass traps, and diffusion, you have the freedom to record at 8 to 12 inches or more without worrying about reflections degrading the signal. The controlled environment lets distance work purely as a tone-shaping tool.
In an untreated room, every inch you back off the mic brings in more reflected sound. Forum users consistently report that room reflections are one of their biggest frustrations when trying close-mic techniques, because even small distances can introduce noticeable comb filtering. If you are working in an untreated space, stay within 4 to 6 inches and consider using a reflection filter behind the mic to reduce back-wall reflections.
Here are practical tips for managing environment and distance together:
Clap loudly in your recording space at the mic position. If you hear a noticeable echo or ring, your room is reflective. Stay closer to the mic (4 to 6 inches) to minimize room pickup.
Hanging a heavy blanket behind the singer and another behind the mic can dramatically reduce reflections, letting you record at greater distances without muddying the signal.
Carpet on the floor helps absorb floor reflections. If you have hard floors, consider a rug under the recording position.
A reflection filter attached to the mic stand is a budget-friendly way to improve results at medium distances in challenging rooms.
The interaction between distance and room means your ideal mic distance is never just about the singer and the mic. It is about the singer, the mic, and the space they are in together.
Troubleshooting: Fixing Harsh or Muddy Vocals with Distance
One of the most common questions I see on audio forums is how to fix vocals that sound wrong. Before reaching for EQ or plugins, try adjusting your mic distance. Many tonal problems can be solved or significantly reduced with a simple position change.
If your vocals sound muddy or boomy: You are likely too close to the mic and getting too much proximity effect. Back off 2 to 3 inches from your current position and listen again. If you are at 2 inches, move to 4. If you are at 4 inches, move to 6. Also try angling the mic 10 to 15 degrees off-axis so the singer is not pointing directly at the capsule, which can reduce plosive and low-frequency buildup. Muddiness in the 200 to 400 Hz range is the classic signature of excessive proximity effect.
If your vocals sound harsh or piercing: Harshness typically lives in the 2 to 5 kHz range. This can come from a bright condenser mic combined with a singer whose voice naturally has a lot of upper-mid energy. Try two things. First, angle the mic slightly off-axis, pointing it toward the singer’s nose or forehead rather than directly at the mouth. This naturally tames high frequencies. Second, check if you are too far from the mic. At distances beyond 8 inches, the loss of proximity warmth can make the remaining highs sound more prominent. Try moving to 5 or 6 inches to reintroduce some low-mid balance.
If your vocals sound thin or weak: You are probably too far from the mic, losing the proximity effect that adds body. Move closer. Going from 10 inches to 5 inches can transform a thin, reedy vocal into something full and present. If you are already close and still sound thin, the issue may be your microphone choice. A bright condenser paired with a thin voice sometimes needs the warmth of a dynamic mic or a darker ribbon mic instead.
If your vocals sound inconsistent: The most common cause is the singer drifting closer and farther during the performance. A distance change of even 2 inches during a take can cause noticeable tonal shifts. Mount a pop filter at your desired distance and have the singer maintain light contact with it, or place a visual marker like a pencil mark on the floor. Consistency is more important than hitting the perfect distance if that distance keeps changing.
Here is a quick troubleshooting reference:
Muddy or boomy: Move 2 to 3 inches farther from the mic, angle slightly off-axis
Harsh or piercing: Angle 10 to 15 degrees off-axis, consider moving slightly closer
Thin or weak: Move 3 to 5 inches closer to restore proximity warmth
Inconsistent: Use a pop filter as a distance guide, maintain physical contact or visual reference
Too much room sound: Move closer, add acoustic treatment, use a reflection filter
FAQs
What is the 3:1 rule for mics?
The 3:1 rule states that the distance between two microphones should be at least three times the distance from the nearest mic to its sound source. For example, if your vocal mic is 6 inches from the singer, any second microphone should be at least 18 inches away from the first. This ratio minimizes phase cancellation and keeps recordings clean when using multiple mics.
How far away should the mic be placed for vocals?
For most studio vocal recordings, start at 6 to 8 inches from the microphone. This distance provides a natural balance of warmth and clarity with minimal proximity effect. Move closer (2 to 4 inches) for warmer, fuller vocals. Move farther (8 to 12 inches) for brighter, airier vocals with more room presence.
How to make vocals feel warmer?
To make vocals warmer, move closer to the microphone. At 2 to 4 inches, the proximity effect boosts low frequencies, adding fullness and richness. Use a cardioid pattern condenser or dynamic mic for maximum proximity boost. Always use a pop filter when recording close, and avoid going closer than 2 inches to prevent excessive muddiness and plosives.
How to get brighter vocals?
To get brighter vocals, increase your distance from the microphone to 6 to 12 inches. As proximity effect diminishes with distance, the natural high-frequency response of the mic becomes more prominent, giving the vocal more clarity, air, and presence. A bright condenser mic at 8 to 10 inches typically produces a detailed, open vocal tone.
What is the best mic placement for harsh vocals?
To reduce harshness, angle the microphone 10 to 15 degrees off-axis so the singer is not pointing directly at the capsule. This naturally tames harsh upper-mid frequencies. Also try moving 2 to 3 inches closer to reintroduce some low-mid warmth that balances out the harsh range. A darker mic like a ribbon can also reduce harshness compared to a bright condenser.
Conclusion
Mic distance is the simplest, most immediate tool you have for shaping vocal tone. By understanding the proximity effect and how it boosts low frequencies at close range, you can dial in exactly the warmth or brightness your recording needs before any processing. Record at 2 to 4 inches for warmth, 6 to 8 inches for a balanced natural tone, and 8 to 12 inches for brightness and air.
The best thing you can do is experiment. Set up your mic, record the same vocal passage at 2 inches, 4 inches, 6 inches, and 10 inches, then listen back on good headphones or monitors. Hearing the difference firsthand will teach you more about mic distance warmer brighter vocal techniques than any guide ever could. Trust your ears, stay consistent, and let distance do the heavy lifting for your vocal tone.