
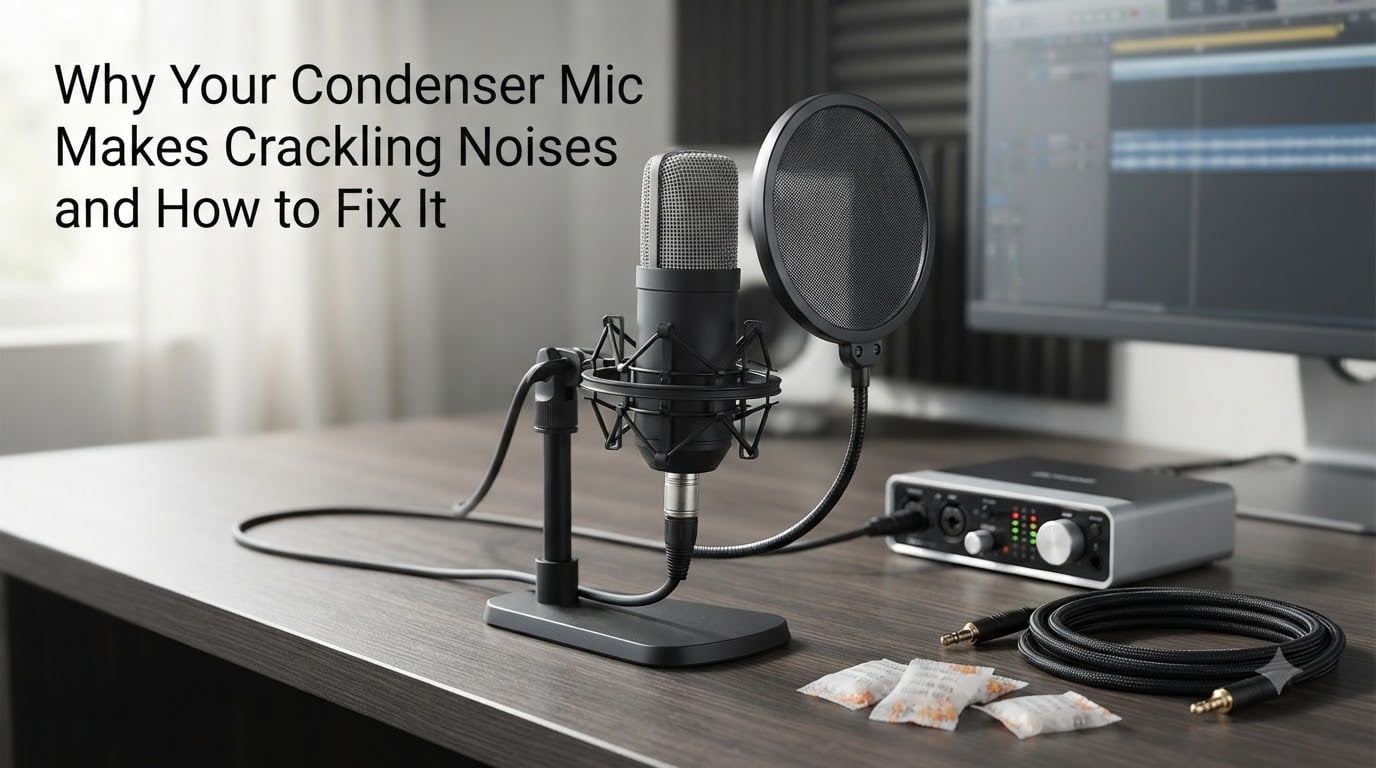
You sit down to record a podcast, a vocal take, or a voiceover session. Everything looks ready. You hit record, speak into your condenser mic, and then you hear it. That sharp, intermittent crackling sound cutting through your audio like a tiny lightning storm inside your signal chain. If you are dealing with condenser mic crackling, you are not alone. This is one of the most common headaches for home studio owners, podcasters, and content creators.
The good news is that most crackling issues are fixable without buying new gear. The bad news is that the cause is not always obvious. Crackling can come from a damaged cable, a moisture-laden diaphragm, a flaky phantom power supply, electrical interference, or even a software buffer setting that is too low. I have spent years troubleshooting these issues in my own home studio, and I have learned that the fix almost always comes down to a systematic process of elimination.
In this guide, I will walk you through every common cause of condenser microphone crackling, give you a step-by-step diagnostic process to isolate the problem, and show you exactly how to fix each one. Whether your mic is popping during recording, buzzing on Discord, or producing random static bursts, you will find the answer here. Let us get your audio clean again.
Table of Contents
What Causes Condenser Mic Crackling in the First Place
Condenser mic crackling happens when something disrupts the clean electrical signal traveling from your microphone capsule to your recording software. The condenser capsule is essentially a charged capacitor. When sound hits the diaphragm, it changes the capacitance, and that change is converted into an audio signal. If anything interferes with that delicate electrical chain, you get noise.
There are five root causes behind almost every crackling complaint. The first is a physical cable problem, where a damaged XLR wire or loose connector creates microphonic noise as the signal flickers on and off. The second is phantom power instability, where your audio interface fails to deliver a steady 48 volts to the capsule. The third is diaphragm contamination, where moisture from your breath or dust particles settle on the charged diaphragm and cause tiny electrical discharges.
The fourth cause is electrical interference, where nearby power cables, fluorescent lights, or RF signals bleed into your audio chain through poor shielding or ground loops. The fifth is a software issue, where buffer underruns or sample rate mismatches in your DAW create digital crackling that sounds almost identical to an analog problem.
Understanding which of these five categories your crackling falls into is the key to fixing it fast. You do not want to replace a perfectly good microphone when the real culprit is a 15-dollar cable.
How to Diagnose Condenser Mic Crackling Step by Step
The biggest mistake people make is guessing. Instead of randomly swapping parts, follow this systematic troubleshooting process to isolate the problem in under 30 minutes. I use this exact sequence every time a crackling issue shows up in my studio.
Step 1: Record a test clip. Open your DAW, hit record, and speak normally for 30 seconds. Listen back carefully on headphones. Note whether the crackling is constant, intermittent, triggered by movement, or tied to your voice volume.
Step 2: Wiggle the cable. While monitoring live, gently move the XLR cable near both connectors. If the crackling responds to movement, you have a cable problem. This is the most common diagnosis.
Step 3: Swap the cable. Replace your XLR cable with a known good one. If the crackling disappears, your old cable is the culprit. If it persists, move on.
Step 4: Test a different input. Plug your mic into a different preamp channel on your audio interface. If the noise moves with the mic, the problem is in the mic or its relationship to phantom power. If it stays on the same channel, your interface may be faulty.
Step 5: Toggle phantom power. Turn phantom power off, wait 10 seconds, and turn it back on. Some interfaces have unreliable phantom power switches that cause intermittent noise. If the crackling changes behavior when you toggle the switch, suspect your power delivery.
Step 6: Change buffer settings. In your DAW, increase the buffer size to 512 or 1024 samples. If the crackling vanishes, you were dealing with CPU-related digital artifacts, not an analog hardware issue at all.
By the end of these six steps, you will know exactly which component is causing your crackling. From there, the targeted fixes below will get you sorted out.
Check Your XLR Cables and Connections First
If there is one thing I tell every home studio owner, it is this: your XLR cable is the most likely cause of condenser mic crackling. Forum users across Reddit and GearSpace consistently confirm that cheap or damaged cables are the number one culprit behind random static and popping sounds. I have seen a single bad cable turn an otherwise clean signal chain into an unlistenable mess.
XLR cables are balanced cables, meaning they use three wires to reject noise. Two carry the audio signal in opposite polarity, and one acts as a ground shield. When the internal wires get damaged or the shielding degrades, that noise rejection breaks down. The result is crackling, buzzing, and microphonic noise that gets worse when the cable is moved or bent.
Cable damage happens in ways you might not notice. Walking on a cable repeatedly can crush the internal conductors. Pinching a cable in a door or under heavy equipment can break a wire internally without any visible damage on the outside. Cheap budget cables use thin conductors and poor solder joints at the connectors, which loosen over time and create intermittent connections.
Here is how to check your cable. First, inspect both connectors for bent or corroded pins. Look inside the female end and make sure all three pinholes are clean and the pins are straight. Next, coil the cable gently and listen through headphones while flexing it along its length. Any crackling that responds to flexing means there is a broken conductor inside.
The fix is simple: replace the cable. Do not waste time trying to repair a cracked solder joint unless you have soldering experience. A quality balanced XLR cable costs a fraction of what your microphone did, and it will immediately eliminate cable-related crackling. If you have been using the cheapest cable you could find, upgrading to a properly shielded mid-range cable is the single best investment you can make for clean audio.
Inspect Phantom Power and Your Audio Interface
Condenser microphones require phantom power to operate. This is a 48-volt DC supply delivered through the XLR cable from your audio interface or standalone preamp. Without it, your condenser mic produces no sound at all. With unstable phantom power, you get crackling, popping, and dropouts. Understanding how phantom power works is essential to diagnosing this category of problems.
The condenser capsule contains a charged diaphragm that needs a stable voltage to function. When phantom power dips, spikes, or cuts out momentarily, the charge on the diaphragm fluctuates. Those fluctuations translate directly into audible crackles and pops in your recording. Some budget audio interfaces deliver noisy or inconsistent phantom power, especially when USB bus-powered rather than running from a dedicated power supply.
Start by checking that phantom power is actually engaged. It sounds obvious, but I have seen cases where the 48V button was partially pressed or the switch was failing intermittently. Make sure the LED indicator on your interface lights up solidly when phantom power is on. If the LED flickers, your interface has a hardware fault.
Next, check your gain staging. If your preamp gain is set too high, the signal clips and produces distortion that sounds like crackling. Record a loud passage and watch the input meter on your interface or DAW. Your peaks should stay below minus 6 decibels. If they are hitting zero, turn the gain down.
USB-powered interfaces are a common source of phantom power problems. When an interface draws power from a USB port, any fluctuation in bus power can affect the 48V supply. Try connecting your interface to a different USB port, ideally a powered hub or a port directly on your motherboard rather than a front panel connector. If your interface has an optional external power supply, use it.
If you have access to a standalone phantom power supply, try routing your mic through that instead of your interface. If the crackling stops, your interface has a faulty phantom power circuit. At that point, the interface needs professional repair or replacement.
Remove Moisture and Dust From the Diaphragm
This is the cause that catches people by surprise. Moisture on the diaphragm is a well-documented and extremely common reason for condenser mic crackling, yet many troubleshooting guides barely mention it. If you record vocals for extended sessions, your breath carries moisture that condenses on the charged diaphragm inside the capsule. That moisture creates tiny electrical arcs that sound exactly like crackling or static.
Forum users on Reddit and GearSpace repeatedly report that moisture is the hidden villain behind intermittent crackling that comes and goes. The pattern is distinctive: the mic sounds fine when you start recording, but after 20 or 30 minutes of vocal work, the crackling creeps in and gets progressively worse. That is moisture building up on the diaphragm as you breathe and sing into the capsule.
Dust particles cause a similar problem. If you store your microphone without a protective cover, dust settles on the diaphragm over time. Because the diaphragm carries a charge, dust particles stick to it and create localized electrical disturbances. The result is the same crackling sound.
To dry out a moisture-damaged condenser mic, remove it from its mount and place it in a dry, warm environment. Many audio engineers recommend putting the mic in an airing cupboard or near a gentle heat source for several hours. You can also place the microphone in a sealed bag with silica gel desiccant packs overnight. The rice trick works too: bury the mic in a container of dry rice for 24 hours, and the rice will draw the moisture out of the capsule.
Never use a hair dryer or heat gun on a microphone. Forced hot air can warp the diaphragm and permanently destroy the capsule. Patience is your friend here. Give the mic a full day in a low-humidity environment and test it again.
To prevent future moisture damage, always use a pop filter when recording vocals. A pop filter does more than stop plosives. It also catches a significant amount of breath moisture before it reaches the capsule. When you finish a session, leave the mic in its mount with a dust cover or plastic bag loosely placed over it. Store silica gel packs near your microphone to keep ambient humidity low.
Address Room Environment and Electrical Interference
Sometimes the problem is not your microphone or your cable at all. It is your room. Electrical interference from nearby devices can bleed into your audio chain and produce buzzing, humming, and crackling that sounds like a hardware fault. This is especially common in home studios where audio cables run alongside power cables or sit near computers, monitors, and lighting fixtures.
Ground loops are a frequent offender. A ground loop occurs when your audio equipment is connected to electrical ground through multiple paths, creating a loop that picks up interference from the AC power in your walls. The symptom is a low hum or buzz that may also include crackling artifacts, especially when other devices in your home turn on or off.
RF interference is another source. Wireless routers, mobile phones, fluorescent lights, and dimmer switches all emit radio frequency energy that can sneak into poorly shielded cables and preamps. If your crackling gets worse when a phone call comes in or when someone dims the lights, you are dealing with RF interference.
Start by rerouting your cables. Keep XLR audio cables away from power cables whenever possible. If they must cross, cross them at a right angle rather than running parallel. Move your microphone and interface away from computer monitors and power supplies. Try turning off fluorescent lights and dimmer switches in your recording space to see if the noise changes.
If you suspect a ground loop, try plugging all your audio equipment into the same power strip or surge protector so they share a single ground point. A ground loop isolator on your audio path can also break the loop and eliminate the noise. For persistent RF issues, upgrading to a cable with better shielding will help reject interference.
Adjust Your DAW and Software Buffer Settings
Not all crackling comes from hardware. Digital crackling caused by software settings is easy to mistake for an analog problem, and it will send you chasing cable and microphone issues that do not exist. If your condenser mic crackling only appears during recording or playback in your DAW, the cause might be your buffer size or sample rate settings.
Buffer size determines how much latency your system allows in exchange for processing headroom. A small buffer gives you low latency but demands more from your CPU. When your CPU cannot keep up with the audio stream, the buffer underruns and you hear clicks, pops, and crackling in your recording. This type of crackling is tied to CPU load, so it gets worse when you add plugins or open other programs.
Open your DAW audio settings and find the buffer size. If it is set to 64 or 128 samples, try increasing it to 256 or 512. Record a test clip and see if the crackling disappears. If it does, you were overloading your processor. Close unnecessary applications while recording, freeze or bypass heavy plugins on your tracking channels, and consider increasing your buffer during recording sessions.
Sample rate mismatches cause a similar problem. If your audio interface is set to 48 kHz but your DAW project is set to 44.1 kHz, the mismatch can produce periodic clicks and crackling. Make sure the sample rate in your interface control panel matches the sample rate in your DAW exactly. Check this every time you start a new project.
Finally, update your audio drivers. Outdated or corrupted drivers for your interface can cause dropout artifacts that sound like crackling. Download the latest driver from your interface manufacturer and install it. On Windows, use the dedicated ASIO driver for your interface rather than the generic Windows audio driver, which has higher latency and less stability.
When to Repair vs Replace Your Condenser Mic
One question that no competitor guide answers is whether your microphone is even worth fixing. If you have worked through every troubleshooting step and the crackling persists, you face a decision: pay for a professional repair or buy a new microphone. Here is how I approach that call.
If the problem is a faulty cable, bad phantom power supply, or software setting, the fix is cheap or free and your mic is fine. But if you have confirmed the crackling originates inside the microphone capsule itself, the situation changes. Capsule damage from prolonged moisture exposure, physical impact, or manufacturing defects can cause permanent crackling that no cleaning or drying will fix.
For microphones under warranty, contact the manufacturer immediately. Most reputable brands offer one to two years of coverage on capsule and electronics faults. Do not attempt to open the microphone body yourself, as this will void your warranty.
If your mic is out of warranty, weigh the repair cost against the microphone’s value. Professional capsule replacement typically costs between 100 and 300 dollars depending on the microphone. For a budget condenser that originally cost 100 to 200 dollars, replacement makes more financial sense than repair. For a premium microphone in the 500 to 3000 dollar range, repair is almost always worth it.
Signs that your mic is beyond repair include crackling that persists after professional cleaning, a capsule that has visible corrosion or physical damage, and internal electronics that have failed due to power surges. In those cases, retire the mic and invest in a replacement with better moisture resistance.
Preventive Maintenance to Stop Crackling Before It Starts
The best fix for condenser mic crackling is preventing it from happening in the first place. A few simple habits will keep your microphone performing cleanly for years. These practices cost nothing and take only a few minutes per session.
Always use a pop filter during vocal recording. Beyond controlling plosives, the filter catches breath moisture before it reaches your diaphragm. This single habit prevents the most common cause of capsule contamination.
Store your microphone in a dry environment when not in use. Put it in a protective pouch or cover it with a plastic bag. Place silica gel desiccant packs in your microphone storage area to absorb ambient humidity. Avoid leaving your mic mounted on a stand in a damp basement or garage.
Handle your XLR cables with care. Never walk on cables, pinch them in stands, or coil them tightly around your hand. Use the over-under coiling method to preserve the internal wire structure. Replace cables at the first sign of crackling rather than waiting for total failure.
Power down phantom power before connecting or disconnecting your microphone. Hot-plugging a condenser mic with phantom power active can send a voltage spike through the capsule that damages the diaphragm over time. Turn off 48V, wait a moment, then make your connections.
Run a quick test recording before every important session. Speak into the mic for 30 seconds, listen back on headphones, and confirm the signal is clean. Catching a crackling issue before a client session or important take saves you from ruined recordings and frustrating rewrites.
Frequently Asked Questions
How do I fix my mic crackling?
Start by swapping your XLR cable for a known good one, as cables are the most common cause. Then check that phantom power is solid, increase your DAW buffer size to 512 samples, and inspect your mic diaphragm for moisture. If the crackling responds to cable movement, replace the cable. If it only appears during DAW recording, raise your buffer size.
Why is my condenser microphone picking up noise?
Condenser microphones are highly sensitive and pick up room noise, electrical interference, and RF signals that dynamic mics would ignore. Common sources include fluorescent lights, dimmer switches, ground loops, nearby power cables, and computer fans. Check your cable routing, use balanced XLR cables with good shielding, and treat your recording space acoustically to reduce background noise pickup.
How do I fix my audio crackling?
Audio crackling has two main sources: hardware and software. For hardware, check your XLR cable, phantom power stability, and audio interface preamp gain. For software, increase your DAW buffer size to 512 or 1024 samples, match your sample rate between your interface and DAW, update your audio drivers, and use the correct ASIO driver on Windows.
How to unclog a condenser mic?
To clear moisture or dust from a condenser mic diaphragm, remove the mic from its mount and place it in a dry, warm environment for several hours. You can use silica gel desiccant packs in a sealed bag or bury the mic in dry rice for 24 hours. Never use forced hot air from a hair dryer, as it can warp the diaphragm permanently. Use a pop filter during future sessions to prevent moisture buildup.
Why does my condenser mic crackle only sometimes?
Intermittent crackling usually points to moisture buildup during long vocal sessions, a cable with a partially broken internal wire that shorts under movement, or unstable phantom power from a USB-powered interface. Track when the crackling appears: if it worsens over a session, suspect moisture. If it responds to movement, suspect the cable. If it is random and unpredictable, check your phantom power and USB connection.
Can a bad XLR cable cause crackling?
Yes, a damaged or low-quality XLR cable is the single most common cause of condenser mic crackling. Broken internal conductors, loose solder joints at the connectors, and degraded shielding all create intermittent connections that produce popping and static sounds. Test by swapping in a quality cable and flexing the old one while monitoring. Any crackling that responds to movement confirms a cable fault.
Final Thoughts
Condenser mic crackling is frustrating, but it is almost always solvable with a methodical approach. Start with your cable, because that is where the problem hides most often. Then work through phantom power, moisture, interference, and software settings in that order. Following the six-step diagnostic process I outlined will save you hours of guessing and prevent unnecessary purchases.
The key takeaway is this: do not blame the microphone first. Condenser mics are remarkably durable when properly maintained, and the vast majority of crackling issues trace back to cables, power delivery, or moisture contamination. Fix those root causes, adopt the preventive habits I described, and your recordings will stay clean and professional for years to come. Now go run that test recording and track down the noise.