
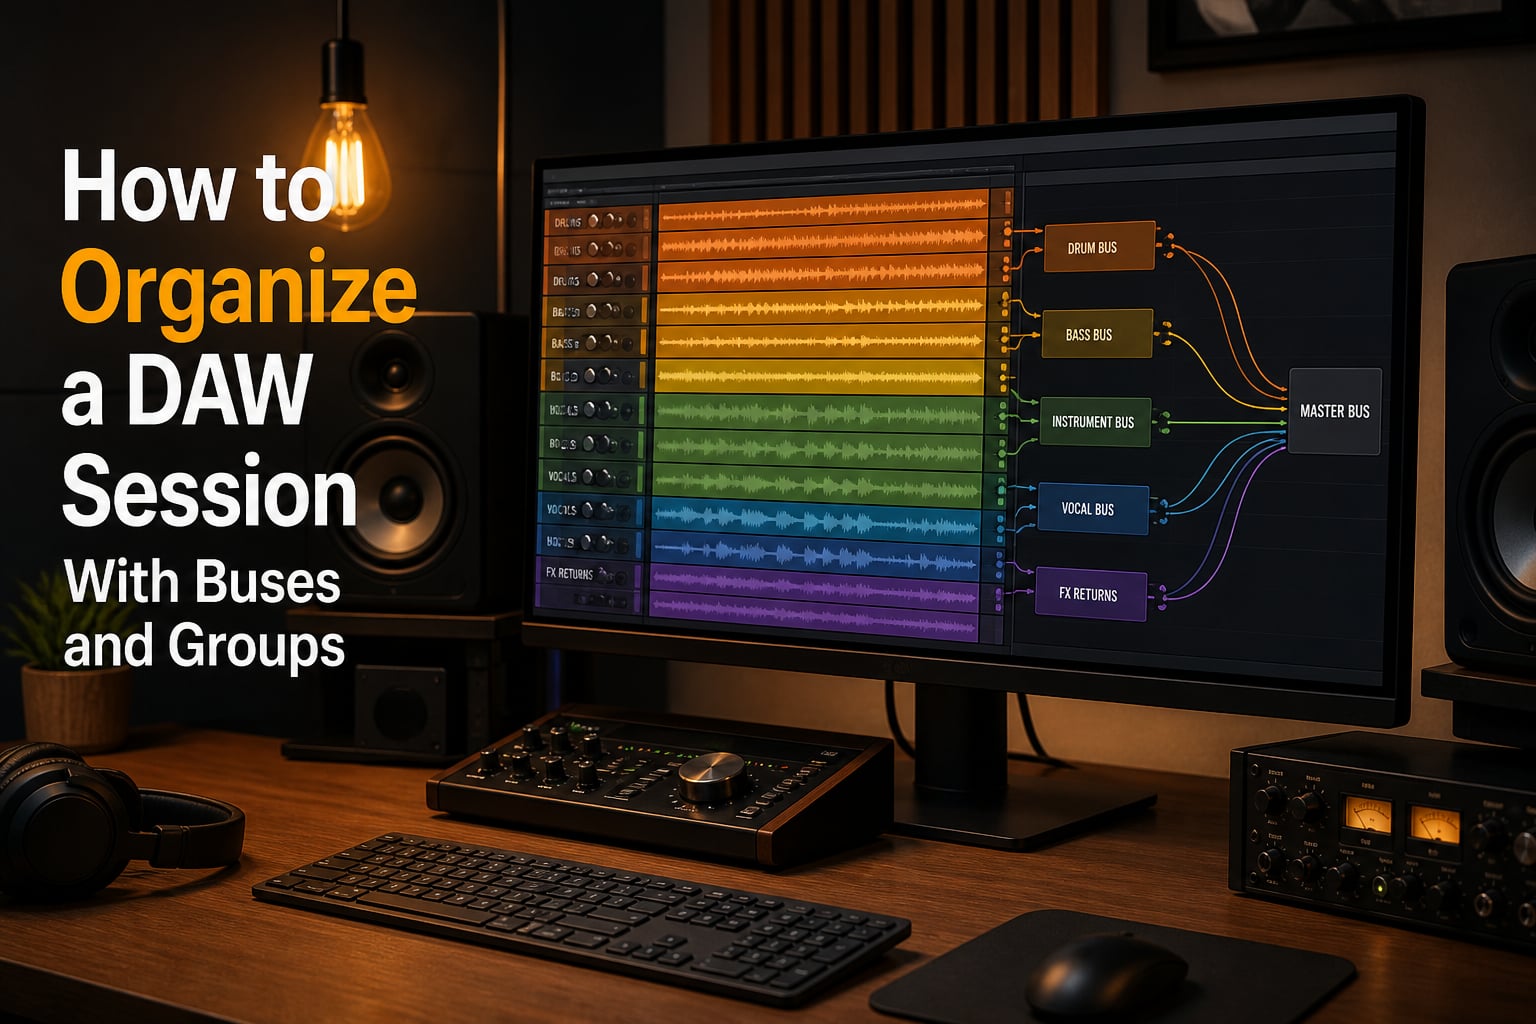
If your DAW session looks like a wall of unmapped tracks, you are not alone. I rebuilt my first 60-track mix from scratch twice because I could not remember what anything was routed to. That pain is exactly why learning how to organize a DAW session with buses and groups matters long before you ever touch a fader.
In this guide, I will walk you through the routing architecture I use on every session. You will learn what a bus actually is, how groups differ from buses, how to set up a mix bus step by step, and how to structure drums, bass, vocals, and instruments into clean subgroups. By the end, you will have a session template that saves hours of mix cleanup on every project.
Table of Contents
What is a Bus in a DAW?
A bus in a DAW is a routing destination that collects the output of multiple audio tracks into a single channel so they can be processed together. Think of it as a virtual pipe that gathers individual tracks and delivers them as one combined signal.
When you route three vocal tracks to a bus, the bus receives the summed audio of all three. You can then apply EQ, compression, or volume changes to that bus and affect every track feeding into it at once. This is the foundation of efficient mixing because it lets you control groups of tracks with a single move instead of dozens.
Definition of a Mix Bus
A mix bus is the specific bus that carries the combined output of your grouped tracks toward the master output. In most sessions, you create one mix bus per instrument family (drum bus, vocal bus, bass bus) and then route all of those into a final mix bus, which feeds into the master.
The master bus, sometimes called the 2-bus, is the final stereo channel before your file bounces. The mix bus is what comes before it. Big-picture processing like limiting, final EQ, and metering usually happens on the master bus, while tonal shaping and group dynamics happen on the mix bus.
Why Buses Matter in Mixing
Buses turn dozens of individual decisions into one. If you have 12 drum tracks and need to bring the whole kit down 2 dB, you would normally adjust 12 faders. With a drum bus, you move one fader and the relative balance inside the kit stays intact.
Beyond level control, buses enable collective processing. A classic move is to place a glue compressor on the drum bus so the kit feels like a single instrument rather than 12 isolated hits. The same applies to vocal buses, where you can shape the entire vocal chain in one place.
What is a Group? Bus vs Group Explained
A group in a DAW is a collection of tracks that share a common name, color, and often a shared fader or folder, but it does not have to involve routing. A bus is a routing destination that combines audio signals. In practice, the two terms often overlap, which is why beginners get confused.
Many DAWs let you group tracks simply by selecting them and pressing a hotkey to make them a folder or linked group. This keeps your session visually organized and lets you adjust multiple faders at once. A bus is a separate channel that those tracks actually send audio into.
Key Differences Between Bus and Group
The biggest difference is signal flow. A group is a logical container for editing and visual organization. A bus is a real audio path that receives summed audio and can have plugins inserted on it.
You can use a group without ever touching routing. You can use a bus without naming or coloring anything. The most powerful workflows combine both: you group tracks for clarity, and you route them to a bus for processing.
Think of a group as a folder on your desktop and a bus as an actual cable carrying audio. Folders organize. Cables route. You need both for a clean session.
When to Use Each
Use a group when you want to edit, mute, or solo a section of tracks together. Use a bus when you want to apply collective processing or send audio to a shared destination. In modern sessions, both usually exist side by side for the same set of tracks, like drum tracks grouped into a Drum folder and routed to a Drum Bus.
How to Create a Mix Bus (Step-by-Step)
Creating a mix bus in any DAW follows the same general workflow. The exact menu names differ between Ableton, Pro Tools, Logic, FL Studio, and Cubase, but the routing concept is identical. Here is the universal sequence.
Step 1: Create a New Track or Bus Channel
Open your DAW and create a new audio track. In most DAWs, you can change its output type to “Bus” or “Aux” instead of the master output. Naming matters here. If you are about to route all your drums into it, call it “Drum Bus” or “Drum Sub.” Future-you will thank present-you during mix revisions.
Step 2: Route Other Tracks to That Bus
Select every drum track in your session. In the output routing menu, change each track’s output from “Master” to the new “Drum Bus” channel. Some DAWs also let you drag cables directly between track outputs and inputs using the routing graph.
Make sure you do not accidentally break any solo or mute logic. The routing should be silent until you verify levels.
Step 3: Apply Collective Processing
Insert whatever plugins you want the entire group to share. Common choices include a glue compressor, a shared EQ for tonal balance, and a subtle saturation. These shape the entire group as one instrument.
I usually start with just a compressor and an EQ on the bus. Add more only when the mix calls for it. Overprocessing a bus is a common mistake that can smother individual track detail.
Step 4: Route the Mix Bus to the Master
Set the bus’s output to the master channel. Now the signal flows: individual tracks to bus, bus to master, master to file. You should be able to adjust the drum bus fader and hear the entire drum kit respond together.
If you hear nothing, check that the individual tracks are not muted or set to a wrong output. The most common beginner issue is routing to a bus that itself has no output assigned.
Instrument Group Buses Setup (Drums, Bass, Vocals, Instruments)
Once you understand the basic flow, instrument buses become muscle memory. Here is the standard architecture I set up in every session before I start mixing.
Drum Bus Setup
Route every drum track (kick, snare, toms, hi-hat, overheads, room mics) to a single Drum Bus. This lets you ride the entire kit’s level with one fader and apply shared compression to glue the hits together.
Inside the drum group, you can also create a parallel drum bus by sending a duplicate pre-fader signal to a separate channel with heavy compression. Blend that parallel channel in subtly to add weight without crushing the original hits.
Bass Bus Setup
Group all bass-related tracks (DI bass, reamped bass, sub synth, bass octave) into a Bass Bus. This is where you make the single biggest tonal decision for your low end. A gentle EQ dip around 200-400 Hz and a touch of compression here tightens the entire foundation.
If your song uses multiple bass layers, you can also create a Sub Bus for the lowest frequencies and a Top Bass Bus for the midrange bite. Then combine both into the main Bass Bus.
Vocal Bus Setup
Send all lead and harmony vocals to a Vocal Bus. This is where live mixing engineers often do their level riding because vocal balance drives the entire song’s energy.
A common arrangement is to have a Lead Vocal Bus, a Background Vocal Bus, and a master Vocal Bus. Process each separately and then route them into the master vocal bus for the final polish before sending to the main mix bus.
Instrument and Key Bus Setup
Group all keyboards, guitars, and other harmonic instruments into an Instrument Bus or Key Bus. This separation lets you automate the entire instrumental bed down during vocal sections without riding individual faders.
Within that bus, you can create sub-buses for guitars, keys, and pads if they need different tonal treatments. The general rule is to keep it as simple as possible while still giving you the control you need.
FX Bus and Effects Routing
An FX bus is a dedicated channel that receives audio from other tracks via a send, applies effects like reverb or delay, and returns the wet signal back into your mix. This is how you get a single reverb to sound cohesive across every vocal and instrument without loading a plugin on every track.
What is an FX Bus?
An FX bus is technically an aux channel or return channel. It exists to hold effects shared by multiple tracks. Instead of putting a reverb plugin on every vocal track, you send each vocal to the FX bus, where the reverb is inserted once.
This saves CPU, makes the reverb sound like one shared space, and lets you automate one reverb return fader for the entire mix. It is the difference between a professional and an amateur mix.
Setting Up Sends and Returns
Create a new aux track and label it “Reverb Send” or “Vocal Reverb.” Insert your reverb plugin on this channel. Then, on each vocal track, turn up the send knob toward this reverb bus. The signal goes to the reverb bus while the dry vocal continues to your vocal bus.
Pre-fader sends send the signal regardless of the track’s volume, which is ideal for shared effects. Post-fader sends send the signal after the fader, so the reverb tails duck when you lower the dry track. Most engineers use pre-fader for reverbs and delays.
Common FX Bus Types (Reverb, Delay, Parallel Compression)
Standard FX buses include short room reverb, long plate reverb, slap delay, tempo-synced delay, and parallel compression. A typical setup includes three to five FX buses with neutral names so you can change the plugin without renaming the channel.
Parallel compression deserves special mention. To set it up, send a copy of your drum, vocal, or mix bus to a parallel channel, compress it heavily, then blend it back in at a low level. This adds punch and weight without sacrificing the natural dynamics of the original signal.
Best Practices for Session Organization
Routing is only half the battle. The other half is keeping your session easy to navigate. Here are the practices I have refined across hundreds of mixes and what our team considers non-negotiable before delivery.
Use Color Coding and Naming
Color your groups consistently. Drums red, bass orange, vocals blue, guitars green, keys yellow. This makes the session scannable at a glance. Pair that with clear names like “Kick In,” “Snare Top,” “Bass DI,” and “Lead Vocal.”
A consistent naming convention is more valuable than any single plugin choice. Clients and collaborators can find what they need without paging you for an explanation.
Build a Template Project
Save your bus and group structure as a template. Every new session starts from this template, so your drum bus, vocal bus, FX buses, and master chain are already in place. This alone can save 30 to 60 minutes per mix.
Update your template after every project. When you notice a new routing improvement, add it to the template so it carries forward.
Organize Track Order
Arrange tracks in a logical order: drums first, then bass, then percussion, then instruments, then vocals, then FX returns. This mirrors how a live mixing console is laid out and makes automation easier.
Group folders should follow the same order. When you fold groups, the session becomes a clean stack of sections rather than a chaotic list.
CPU Efficiency Tips
Running effects on a shared bus instead of on every individual track saves significant CPU. Instead of putting a reverb on 12 vocal tracks, one reverb on the FX bus handles the same job. Freeze or bounce tracks you are not actively editing to free up processing power.
Disable plugins on buses when you are not actively working on them. Most DAWs let you bypass with a single click, and this alone can stabilize sessions on older computers.
Common Mistakes to Avoid
The biggest mistake is routing tracks to a bus but accidentally also sending them to the master. You end up with double audio. Always check the routing matrix after creating new buses.
Another mistake is overprocessing. If you stack five compressors on a vocal bus, you will lose the natural energy. Apply one or two processors per bus and let the individual tracks do the heavy lifting.
Finally, do not skip the folder structure. Many producers route everything correctly but never group it, leaving a messy track list. A clean visual session is just as important as clean routing.
Frequently Asked Questions
How does a bus work in a DAW?
A bus works by acting as a routing destination that receives audio from multiple tracks. You send the output of several individual tracks to a single bus channel, and the bus combines and processes that audio before sending it to the master output.
What is the difference between a group and a mix bus?
A group is a logical container for organizing, editing, and controlling multiple tracks together. A mix bus is an actual routing channel that receives the combined audio of multiple tracks and can have plugins like EQ or compression inserted on it.
Should a bus be mono or stereo?
Most mix buses should be stereo because they receive stereo audio from modern productions. Use a mono bus only for specific mono sources like a single kick or bass DI, or when you are intentionally collapsing a stereo signal to mono for parallel processing.
How do I organize my DAW session efficiently?
Start by creating bus channels for drums, bass, vocals, instruments, and FX. Route the relevant tracks to each bus, color and name them clearly, build a template, and place tracks in a logical order that mirrors a live mixing console.
Is a group track the same as a bus?
Not necessarily. A group track is a folder or linked set of tracks used for editing and visual organization. A bus is a separate channel that receives and processes audio. The two often coexist on the same set of tracks.
Do I really need to use buses in my DAW?
Buses are not strictly required, but they save time, reduce CPU load, and make collective processing possible. If you want clean levels, cohesive effects, and efficient mixing, buses are essentially non-negotiable.
Final Thoughts
Learning how to organize a DAW session with buses and groups is one of the highest-return skills you can build as a producer. Once your routing is clean, every mix decision becomes faster and every revision becomes painless.
Start small: create one drum bus and one vocal bus on your next session. Route everything accordingly. Notice how much faster level rides become and how cohesive your reverbs sound when shared across sends. From there, expand into subgroups and FX buses until your template mirrors your creative workflow.
The sessions that mix themselves are the ones built on a foundation of clean routing. Take an hour this week to set up your template, and you will save hours on every project for the rest of 2026 and beyond.