
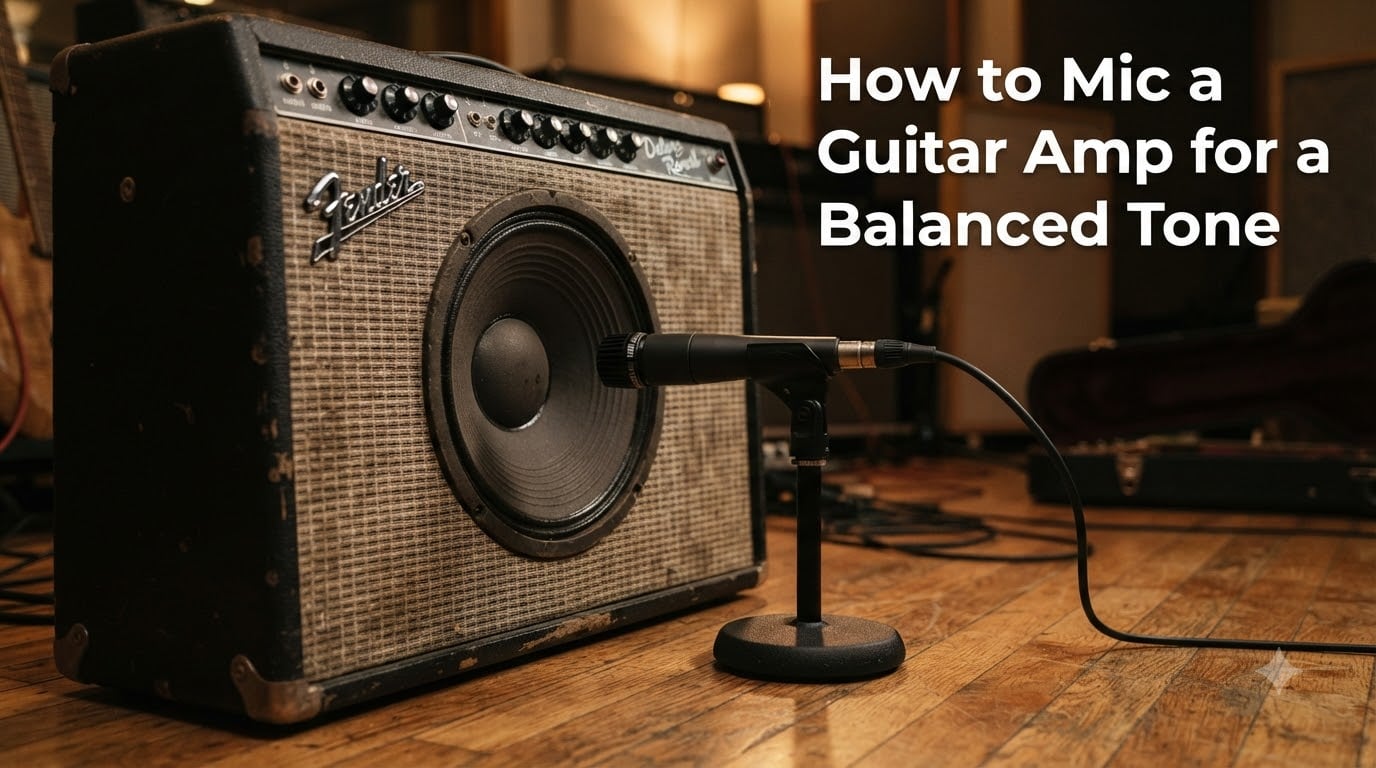
If you have ever wondered how to mic a guitar amp for a balanced tone, the short answer is this: place a dynamic microphone like an SM57 about one inch from the grille cloth, aimed at the boundary between the dust cap and the speaker cone, then move it in small increments until the tone sits right. That spot between center and edge gives you a blend of brightness and warmth that no EQ plugin can fully recreate.
The reason mic placement matters so much is that the speaker of a guitar cabinet does not produce the same sound across its entire surface. The center of the cone pushes out aggressive highs and bite. The outer edge delivers mellow, rounded low-mid warmth. Where you point the mic determines which of those two characters dominates your recording.
I have spent hundreds of hours moving microphones one inch at a time, and I can tell you that even a half-inch shift changes the tone more than most equalizer moves. In this guide, our team breaks down everything from single-mic basics to double-mic blending, phase correction, the 3-to-1 rule, and the common mistakes that leave recordings sounding muffled and lifeless. By the end, you will know exactly how to capture the tone you actually hear in the room.
Table of Contents
How to Mic a Guitar Amp for a Balanced Tone: The Fundamentals
Before you touch a microphone stand, you need to understand what is happening inside the speaker cabinet. A guitar amp pushes signal through a driver, and that driver moves air in ways that change depending on where you listen from. Knowing the anatomy of the speaker is the foundation of every mic placement decision you will make.
The Speaker Cone and the Dust Cap
The speaker cone is the large circular surface that pushes air and produces most of your sound. At the very center sits the dust cap, a smaller dome that covers the voice coil. The boundary where the dust cap meets the cone is the sweet spot for most recordings because it captures both the attack from the center and the body from the outer cone.
Pointing your mic dead-center on the dust cap gives you a bright, aggressive, sometimes harsh tone with lots of presence and bite. That works for cutting lead guitar parts in dense mixes. Pointing the mic near the outer edge of the cone, close to the surround, produces a darker, rounder, mellower sound that sits beautifully under rhythm parts.
Why Placement Matters More Than Gear
Forum users on r/audioengineering routinely report spending 40 or more hours trying to get a guitar amp recording that matches what they hear live. The problem is almost never the microphone or the interface. It is the placement. Moving the mic even five inches across the face of the speaker can take you from harsh and piercing to thick and muddy.
This is why experienced engineers say to listen first and mic second. Walk around the room while the amp is playing. Get your ear near the speaker at different angles and distances. When you find the spot where the tone sounds balanced to your ear, that is where the mic goes.
Choosing the Right Microphone Type
The microphone you choose sets the ceiling for what your recording can sound like. Three types dominate guitar amp recording: dynamic, condenser, and ribbon. Each one interacts with high sound pressure levels differently, and each one flatters a different style of playing.
Dynamic microphones are the workhorses. They handle high SPL without distortion, they are affordable, and they sound great on loud, distorted guitar amps. The Shure SM57 is the industry standard that nearly every engineer recommends as a starting point. It has a presence boost in the upper mids that helps guitars cut through a mix.
Condenser microphones are more sensitive and capture a wider frequency range, including airy highs that dynamics miss. They are excellent for clean tones and acoustic-style passages but can sound harsh on heavy distortion unless you back them off the grille cloth. Most condensers need phantom power and have a lower SPL tolerance.
Ribbon microphones are the warmest and smoothest of the three. They tame harsh highs and add a vintage character that flatters overdriven tube amps beautifully. Ribbons are figure-8 pattern by default, meaning they pick up sound from the front and back equally. They are also fragile, so keep them away from phantom power unless the manufacturer specifies otherwise.
Single Mic Placement: Step by Step
If you want to know how to properly mic an amp with just one microphone, follow these steps. The single-mic approach is where every engineer starts, and many professional recordings use nothing else.
Step 1: Set up your amp at the volume you plan to record at. Do not record quietly and boost later, because the speaker responds differently at different volumes.
Step 2: Position a mic stand so the microphone capsule sits about one inch from the grille cloth. Aim the mic at the junction where the dust cap meets the outer cone.
Step 3: Put on headphones and listen to the recorded signal while someone slowly moves the mic across the face of the speaker. You will hear the tone shift from bright to mellow as the mic travels from center to edge.
Step 4: Lock the stand in place once you find the spot that sounds balanced. That junction between dust cap and cone is your default starting position for a balanced tone.
Step 5: Fine-tune the angle. Pointing the mic straight on gives maximum brightness. Angling it 45 degrees off-axis rolls off harsh highs and produces a smoother, more natural sound.
Step 6: Record a short test passage and compare it against the sound in the room. If the recording is too bright, move toward the edge or increase the off-axis angle. If it is too dark, move toward the center.
Double Mic Technique for a Richer, Balanced Tone
Using two microphones lets you capture the brightness of the cone center and the warmth of the edge at the same time. You then blend the two signals to taste, effectively using the mics as a pseudo-EQ that sounds far more natural than plugin equalization.
The classic approach pairs a dynamic mic like the SM57 on the grille cloth aimed at the dust cap boundary with a ribbon or condenser placed a few inches away, aimed slightly off-axis toward the edge of the cone. The dynamic captures the punch and attack. The ribbon or condenser captures the air, body, and room character.
Phase Cancellation and the 3-to-1 Rule
Whenever you use two microphones on the same source, you risk phase cancellation. Because the two mics sit at different distances from the speaker, the sound arrives at each capsule at a slightly different time. When those signals combine, certain frequencies cancel each other out, leaving a thin, hollow sound.
The 3-to-1 rule is the standard guideline for avoiding this. If your first microphone is one inch from the speaker, your second microphone should be at least three inches away from the first. This distance ratio keeps phase interference below audible levels in most cases.
Even when you follow the 3-to-1 rule, always check phase by hitting the polarity reverse switch on one channel. If the low end gets thicker when you flip polarity, your mics were partially out of phase. Leave the switch in whichever position gives you the fullest sound.
Distance, Angle, and Proximity Effect
How close the microphone sits to the grille cloth dramatically changes the tone. A mic pressed right against the cloth captures maximum detail, punch, and isolation from the room. Pulling the mic back even two or three inches adds ambience and reduces the proximity effect, which is the bass boost that occurs when a directional mic is placed very close to a source.
Proximity effect can be useful or destructive. Close placement adds warmth and fullness to a thin-sounding amp, but it can also make a already-boomy cabinet sound muddy. If your recordings have too much low-end flab, try pulling the mic back an inch or two before reaching for an EQ cut.
Off-axis angling is the other powerful tool. A mic pointed straight at the speaker captures the full frequency range, including potentially harsh treble peaks. Tilting the mic 30 to 45 degrees off-axis softens those highs naturally, giving you a smoother recording without any processing.
Common Mistakes and How to Fix Muffled Recordings
The number one complaint on guitar recording forums is that the captured tone sounds muffled and lifeless compared to what the player hears live in the room. Understanding why this happens is the fastest way to fix it.
Mistake 1: Mic too close to the center. The dust cap area produces harsh highs, and many players overcompensate by pointing dead center and then boosting lows. The result is a bright but thin recording. Fix it by moving the mic toward the edge of the cone where the tone is naturally fuller.
Mistake 2: Mic too far from the speaker. Pulling the mic back captures more room reflections, which can blur the direct sound. If your recording sounds washed out and indistinct, bring the mic within two inches of the grille cloth.
Mistake 3: Ignoring the room. A bad room makes even a great amp sound boxy and lifeless. Hard parallel walls create standing waves that color the tone. Try recording in a room with soft furnishings, or place the amp on a carpet and dampen nearby reflections.
Mistake 4: Not checking phase with multiple mics. Two mics that look fine visually can still be cancelling low frequencies. Always hit the polarity reverse button on each channel and listen for which position gives you the thickest, fullest sound.
Mistake 5: Recording at the wrong volume. Tube amps sound best when pushed. Recording at bedroom volume and then adding distortion plugins never captures the same harmonic richness as recording a slightly cooking power section.
Back of Cabinet Miking and Room Considerations
One technique most guides skip entirely is miking the back of an open-back cabinet. Sound pours out of the rear of the cabinet just as it does from the front, and that rear sound is often warmer and rounder. Placing a ribbon mic a few inches behind the open back gives you a thick, dark tone that blends beautifully with a front-facing dynamic mic.
When you combine front and rear mics, polarity reverse becomes essential. The front and back of the speaker move in opposite directions, so the two signals are naturally out of phase. Flipping polarity on the rear mic aligns them and delivers a huge, full-bodied tone that neither mic can produce alone.
Room acoustics play a bigger role than most home recordists expect. A carpeted bedroom with a closed door sounds completely different from a hard-floored garage. There is no universally correct room, but you should know that the room is always part of the recording. Treat harsh reflections with rugs, curtains, or foam panels if your recordings sound echoey.
Conclusion
Learning how to mic a guitar amp for a balanced tone comes down to understanding your speaker, choosing the right microphone, and moving it in small increments until the sound matches what you hear in the room. Start with an SM57 aimed at the dust cap boundary, one inch from the grille cloth. Experiment from there.
The biggest takeaway from every forum, every engineer interview, and every session our team has run is that there is no single magic position. Your ears are the final judge. Trust them, move the mic slowly, and you will capture a balanced tone every time.
FAQs
How to properly mic an amp?
Place a dynamic microphone like an SM57 about one inch from the grille cloth, aimed at the boundary between the dust cap and the speaker cone. Move the mic in small increments toward the center for brightness or toward the edge for warmth until the tone sounds balanced through your headphones.
What is the 3 to 1 rule in micing?
The 3-to-1 rule states that when using two microphones on the same source, the second mic should be at least three times as far from the first mic as the first mic is from the source. This distance ratio keeps phase cancellation below audible levels when blending multiple mic signals.
Can a guitar amp be used for a microphone?
A guitar amp cannot be used as a microphone. However, you can run a microphone into a guitar amp for a lo-fi effect, though this is not recommended for recording because guitar speakers color the sound heavily and lack the flat frequency response needed for accurate capture.
Why do guitarists mic their amps?
Guitarists mic their amps to capture the tone of the speaker for recording or for live sound reinforcement through a PA system. The amp speaker shapes the guitar sound in ways that direct signals cannot, and miking preserves that characteristic tone for the audience or the recording.
Why does my recorded guitar sound muffled and lifeless?
Muffled recordings usually come from the mic being placed too far toward the edge of the cone, too far from the grille cloth, or in a room with bad acoustics. Try moving the mic closer to the dust cap boundary, within two inches of the cloth, and check that phase is correct if using multiple microphones.
1 thought on “How to Mic a Guitar Amp for a Balanced Tone (September 2026)”