
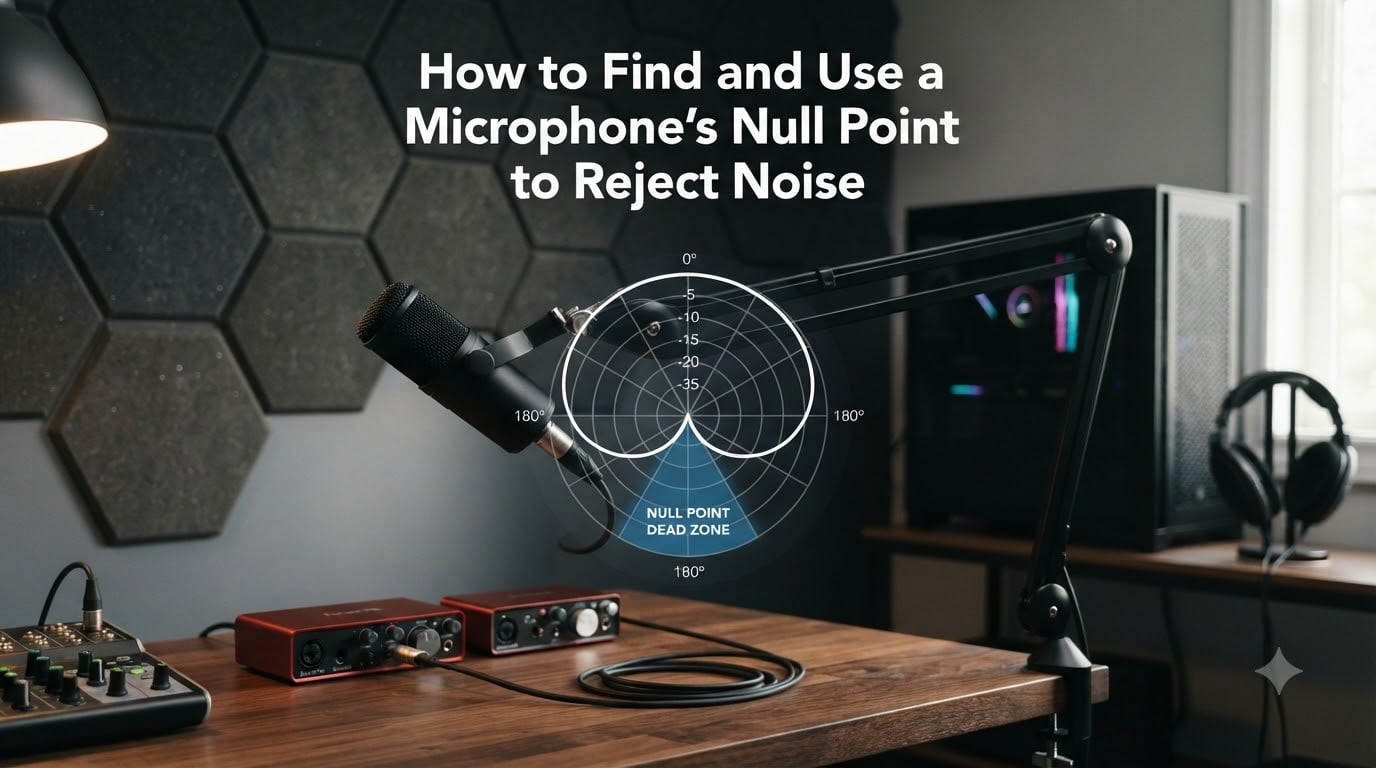
Recording at home taught me something that no gear purchase ever could: the cheapest noise fix is already sitting on your mic stand. The microphone null point is the quietest spot on your mic, the angle where it barely hears anything. Point that dead zone toward your computer fan, AC unit, or noisy neighbor, and you’ll hear the difference instantly.
Most people reach for software denoisers or acoustic panels first. I’ve been there too. But understanding how to find and use a microphone null point saves you money and gives you cleaner recordings before the audio even hits your interface.
In this guide, I’ll walk you through what null points are, how to find yours, and the exact positions I use for home studio vocals, podcasts, and live sound. No test equipment required.
Table of Contents
What Is a Microphone Null Point?
A microphone null point is the specific angle on a microphone’s polar pattern where sound is rejected the most, producing the lowest possible output from that direction. It is the dead zone, the area of least sensitivity, created by the acoustic design of the mic capsule.
Think of it as a shadow that your mic casts. Whatever sits in that shadow stays quiet. That could be a computer fan, a window with traffic outside, or a drum kit three feet away during a live session. Every directional microphone has at least one null point, and learning where it lives changes how you record.
The reason null points exist comes down to physics. Sound arrives at the front and rear of the diaphragm at slightly different times. When those sound waves meet out of phase, they cancel each other out. That cancellation is what creates the dead zone. The sharper the cancellation, the deeper the null.
Not all mics have the same null depth. A figure-8 ribbon mic can reject side noise by 30 to 40 dB, which is massive. A cardioid dynamic mic might give you 15 to 20 dB of rejection at the rear. Even a modest 10 dB reduction makes a real-world difference in how clean your recordings sound before you touch a single plugin.
How Polar Patterns Create Null Points
The polar pattern of a microphone describes its sensitivity to sound arriving from every angle. That pattern also tells you exactly where the null points live. If you want to use the microphone null point effectively, you need to know the shape of your mic’s pickup zone.
Cardioid Pattern: Rear Null
A cardioid mic picks up sound from the front and rejects sound from directly behind. The null point sits at 180 degrees, straight off the back of the capsule. This is the most common pattern on studio and stage mics, from the Shure SM57 to the Audio-Technica AT2020.
The rear null on a cardioid mic is useful for pointing the back of the mic at a noise source. If your computer tower hums behind you, angle the mic so the rear faces the tower. You’ll still sing into the front, but the fan noise drops significantly.
Supercardioid and Hypercardioid: Off-Axis Nulls
These tighter patterns shift the null point slightly off the rear axis. A supercardioid mic has nulls at about 126 degrees, and a hypercardioid places them around 110 degrees. This means sound coming from directly behind the mic is actually picked up a bit.
Live sound engineers love hypercardioid mics because those off-axis nulls can be aimed at stage monitors. The monitor sits at the null angle rather than directly behind the mic, giving you maximum gain-before-feedback. This technique alone can add 15 to 20 dB of separation between the mic and the wedge.
Figure-8 Pattern: Side Nulls
A figure-8 (also called bi-directional) pattern picks up sound from the front and back equally but rejects sound from the sides. The null points sit at 90 and 270 degrees, both sides of the capsule. Ribbon microphones naturally produce this pattern, which is why ribbons are famous for their deep side rejection.
That side null is incredibly sharp. I’ve used a figure-8 ribbon mic to record a vocalist while a guitarist played five feet away, with the guitar positioned in the side null. The bleed was minimal. No cardioid mic I own can match that level of isolation.
Omnidirectional Pattern: No Null
An omnidirectional mic picks up sound equally from every direction. There is no null point. If you’re trying to reject noise with an omni pattern, the null point technique will not help you. You’ll need acoustic treatment, closer mic placement, or a different mic.
How to Find Your Microphone’s Null Point Step by Step
You don’t need an anechoic chamber or measurement software to find your null point. Here is the exact method I use, based on a technique that audio engineers on forums like r/audioengineering have confirmed works reliably with nothing but your ears.
Step 1: Identify Your Mic’s Polar Pattern
Check your microphone’s manual or spec sheet for its polar pattern. Most large-diaphragm condensers default to cardioid. Dynamic vocal mics like the SM58 are cardioid. Ribbon mics are typically figure-8. If your mic has a switchable pattern, set it to the one you plan to record with.
Knowing the pattern tells you where to expect the null. Cardioid means rear null. Figure-8 means side nulls. Supercardioid or hypercardioid means off-axis rear nulls.
Step 2: Set Up a Steady Noise Source
Position the noise you want to reject in a fixed location. This could be your computer fan, an open window, or a speaker playing music at a constant volume. Keep the noise steady so you can hear changes clearly.
Step 3: Rotate the Mic Slowly While Listening
With headphones on and your mic connected, slowly rotate the microphone 360 degrees while the noise source plays. Do this in small increments. At some angles the noise will be loud, and at one or two angles it will drop noticeably.
The angle where the noise is quietest is your null point. With a cardioid mic, you’ll hear the dip when the rear of the mic faces the noise. With a figure-8 mic, you’ll hear two dips, one on each side.
Step 4: Lock In That Position
Once you’ve found the quietest angle, mark it. Take a mental note or use a piece of tape on your mic stand to remember the orientation. From now on, position the null toward whatever noise you want to reject.
Step 5: Test With Your Actual Source
Record yourself singing, speaking, or playing while the mic stays in its null-aimed position. Compare that recording to one where the mic is randomly positioned. The difference is often dramatic, sometimes 15 dB or more of noise reduction before any processing.
Practical Ways to Use the Null Point for Noise Rejection
Knowing where the null lives is only half the battle. The real value comes from putting that knowledge to work in actual recording situations. Here are the setups I use most often.
Home Studio Vocal Recording
In a typical bedroom or home studio, the main noise sources are the computer, an AC unit, and room reflections. If you use a cardioid condenser, face the rear of the mic toward your computer. Position your acoustic reflections from the side, where even cardioid mics have reduced sensitivity.
I keep my tower behind and slightly to the side of my vocal mic. The rear null absorbs most of the fan noise. Moving the mic just 20 degrees can shift the noise floor by several decibels.
Podcast and Voiceover Recording
For podcasters, keyboard clicks and mouse movement are the usual enemies. If you use a dynamic cardioid mic like a Shure SM7B or Rode PodMic, aim the rear null at your keyboard. The mic still picks up your voice from the front, but the typing sound drops significantly.
This works especially well with boom arms. You can angle the mic so the rear faces the keyboard while the front captures your mouth. No software noise gate needed.
Live Sound and Stage Monitor Placement
Onstage, feedback is the enemy, and the null point is your best weapon. If you sing into a hypercardioid mic, place your floor monitor at the null angle, which is about 110 degrees off the rear axis. The wedge fires sound into the dead zone rather than into the sensitive front of the capsule.
This technique can buy you 15 to 20 dB of gain-before-feedback. That means you can push the monitor louder before the system starts ringing, which is the difference between a clean show and a squealing mess.
Recording Multiple Instruments in One Room
If you record a full band live, use figure-8 mics and aim the side nulls at other instruments. A vocalist using a ribbon mic can have the guitar cabinet in the side null, reducing bleed without gobos or isolation screens. The 3:1 rule also helps here: space microphones at least three times the distance from each other as they are from their sources to minimize phase overlap.
Null Point Characteristics by Microphone Type
Different microphone designs produce null points with different depths and widths. Here’s how the three main types compare when it comes to off-axis rejection.
Dynamic Microphones
Dynamic mics like the SM57 and SM58 use a moving coil that is naturally less sensitive to off-axis sound. Their cardioid null sits at the rear and offers solid rejection, typically 15 to 20 dB. They are forgiving, durable, and excellent for loud stage environments where bleed control matters.
Because dynamics have heavier diaphragms, their nulls tend to be broader and less surgical than ribbons. They still work well for noise rejection, just with a slightly wider dead zone.
Condenser Microphones
Condensers are more sensitive overall, which means they pick up more detail but also more noise. Large-diaphragm condensers in cardioid mode have rear nulls that provide 10 to 15 dB of rejection. Smaller-diaphragm condensers sometimes have tighter patterns, especially in hypercardioid configurations.
The trade-off is that condensers reveal more room sound. Their null points are effective but less dramatic than ribbons. They shine in treated rooms where the null handles residual noise rather than major bleed.
Ribbon Microphones
Ribbons produce figure-8 patterns with the sharpest nulls of any mic type. The side rejection can reach 30 to 40 dB, which is extraordinary. Even budget ribbons like the Cascade Fat Head or affordable active ribbons deliver side nulls that crush bleed.
The catch is that ribbons are figure-8 only (in most cases), so they pick up sound from the rear too. You need to manage both the front and rear pickup zones. But for isolation, nothing beats a ribbon’s side null.
Common Mistakes to Avoid When Using a Null Point
Even with good technique, a few pitfalls can undermine your results. Here are the mistakes I see most often.
Assuming your mic actively rejects noise. Microphones don’t reject sound. They simply have areas of lower sensitivity. You have to aim the null at the noise source manually. A cardioid mic pointed the wrong way will pick up just as much noise as any other mic.
Forgetting that nulls vary by frequency. A polar pattern is an average. At some frequencies the null is deeper than at others. Low-frequency rumble may still leak through even when the null is aimed correctly. Combine null placement with a high-pass filter for best results.
Ignoring proximity effect. Moving a directional mic closer to the source boosts bass response, which can change the character of the null. Test your null position at your actual working distance, not farther away.
Pointing the front at the noise instead of the null. It sounds obvious, but I’ve seen people angle the front of the mic toward a noise source thinking it will somehow block it. The front is the most sensitive part. Always aim the null, not the capsule, at the noise.
Frequently Asked Questions About Microphone Null Points
What is the null point of a microphone?
The null point of a microphone is the angle on its polar pattern where the mic has the lowest sensitivity to sound. It is the dead zone where noise is rejected the most. Cardioid mics have a rear null, figure-8 mics have side nulls, and hypercardioid mics have nulls slightly off the rear axis.
What is the 3:1 rule for mics?
The 3:1 rule states that when using two microphones on separate sources, the distance between the mics should be at least three times the distance from each mic to its source. This spacing reduces phase cancellation and bleed between the microphones by keeping the overlap below audible levels.
How do you use a microphone null point to reject noise?
Find your mic’s null point by rotating it while a noise source plays, then aim that dead zone toward the noise. For cardioid mics, face the rear at the noise. For figure-8 mics, face the sides at the noise. This can reduce unwanted sound by 15 to 40 dB depending on the mic type.
What is it called when your mic doesn’t pick up background noise?
This is called off-axis rejection. Directional microphones are less sensitive to sound arriving from angles outside their main pickup zone. The area of maximum rejection is the null point. A well-placed null can dramatically reduce background noise without any software processing.
Which microphone type has the best null point for noise rejection?
Ribbon microphones with figure-8 patterns have the sharpest null points, offering 30 to 40 dB of side rejection. Hypercardioid mics also have excellent off-axis nulls for live sound. Cardioid dynamics offer solid 15 to 20 dB rear rejection for stage and podcast use.
How do I remove static noise from my mic?
First, aim your mic’s null point at the noise source to reduce it acoustically. Then check your cable connections and use a balanced XLR cable to prevent interference. Engage a high-pass filter to cut low-frequency hum. If static persists, move away from power sources and fluorescent lights that can cause electromagnetic interference.
Final Thoughts on Mastering Your Microphone Null Point
Learning to find and use your microphone null point is the single most effective free technique for cleaner recordings. You don’t need new gear, plugins, or acoustic treatment to get started. You just need to know where your mic’s dead zone lives and aim it at the noise.
I recommend testing this today. Set up your mic, play a steady noise from a fixed position, and rotate the mic slowly while listening on headphones. When you hear the noise drop, you’ve found your null. Mark that position and use it for every session going forward.
The microphone null point works for home studio vocals, podcast setups, live stage monitoring, and multi-instrument recording sessions. It is not a trick or a hack. It is basic acoustic physics applied with intention. Master it, and your recordings will sound cleaner before you ever touch an EQ.
1 thought on “How to Find and Use a Microphone Null Point to Reject Noise (2026)”