
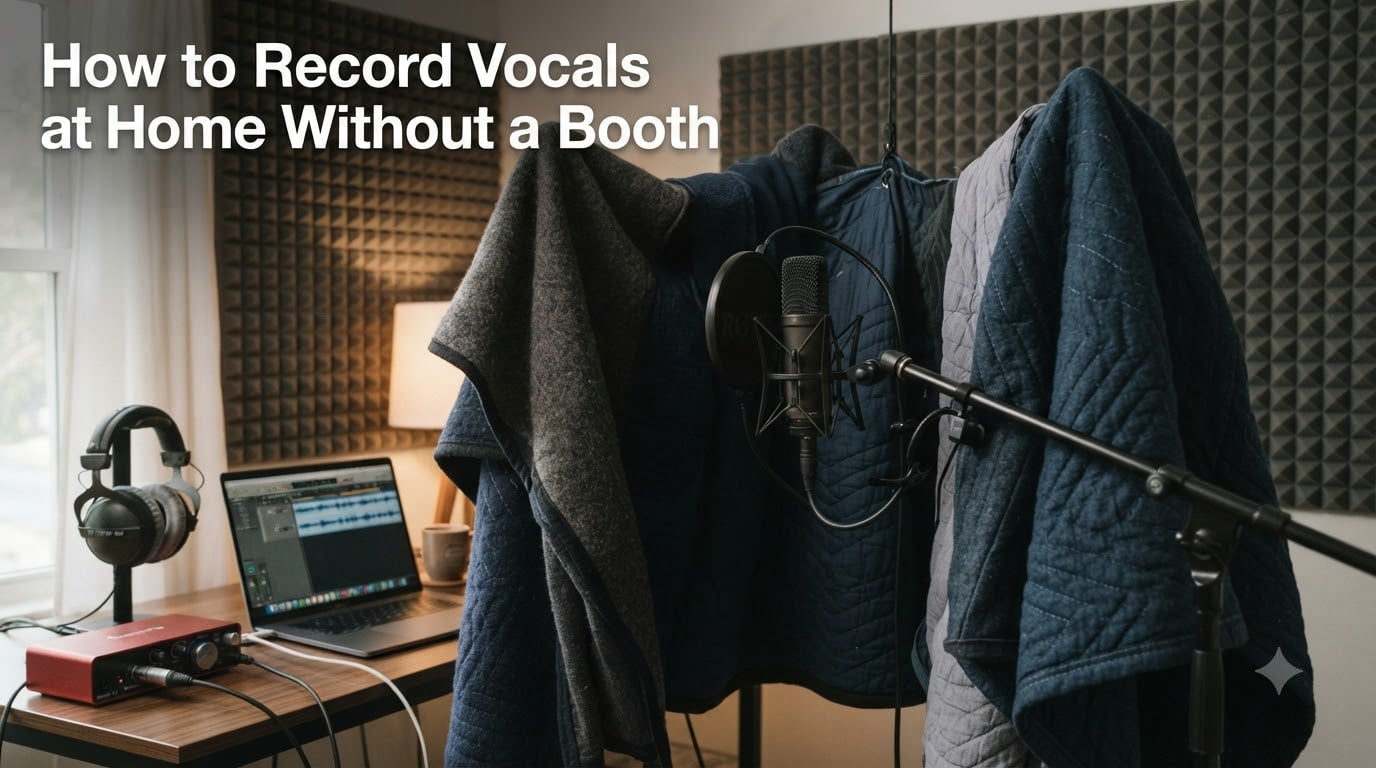
If you’ve ever tried recording vocals in your bedroom and ended up with something that sounds more like you’re singing inside a bathtub, I get it. I’ve been there. After months of muddy takes, reflections bouncing off bare walls, and noise from neighbors that ruined every chorus, I figured out a system that actually works. Recording vocals at home without a booth is completely possible. You just need the right combination of room choice, microphone placement, and DIY acoustic treatment.
This guide covers everything I’ve learned from recording vocals in closets, under blankets, behind reflection shields, and even on my phone. Whether you’re a singer-songwriter, podcaster, voice actor, or just someone who wants clean audio without renting studio time, I’ll show you the exact techniques that produce professional-sounding results on a budget.
Table of Contents
Understanding the Recording Booth Problem at Home
A professional vocal booth is essentially a small, isolated room with hard, reflective walls covered in dense acoustic absorption. It exists to stop room reflections from contaminating your recording. When you sing without acoustic treatment, sound waves bounce off your walls, ceiling, and floor, then return to the microphone milliseconds later. That creates the hollow, “roomy” sound that ruins otherwise good vocals.
The good news is that you don’t actually need a dedicated booth. What you need is a controlled recording environment, and that’s something you can build with materials you already have at home. Soft, dense materials absorb reflections. Hard, flat surfaces create them. Every DIY solution in this guide works because it adds absorption where there was none before.
Your goal is simple: capture your voice with as few room reflections as possible. Everything else – mic choice, interface, processing – matters far less than getting this acoustic foundation right. Once you nail the environment, even budget gear will produce clean vocals.
How to Make a Makeshift Vocal Booth at Home
You have three solid DIY options for building a vocal booth at home, and each one works in different situations. I’ve tested all three extensively, and the best choice depends on your room, your neighbors, and how portable you need your setup to be.
The Blanket Booth
This is the cheapest and most popular DIY vocal booth. Here’s how to build one in under 10 minutes:
Get two heavy moving blankets or thick comforters. The denser, the better.
Hang one blanket behind your microphone position using a stand, curtain rod, or two command hooks.
Drape the second blanket over a microphone stand or boom arm in front of you, leaving space to sing through.
Add a third blanket on the floor under your feet to kill floor reflections.
Position your mic about 6 inches in front of the back blanket, with the front blanket creating a partial enclosure around your mouth.
The result is a partial vocal booth that absorbs reflections from three sides. I’ve gotten some of my cleanest vocal takes this way. Reddit users in r/musicproduction report similar results, with many saying heavy moving blankets beat expensive foam for actual absorption.
The Closet Recording Setup
A walk-in closet is nature’s vocal booth if you set it up correctly. Clothes hanging around you act as broadband absorption. Here’s my step-by-step process:
Clear out everything except hanging clothes – leave them on the rod for absorption.
Set up your microphone on a stand facing into the closet interior.
Position yourself so your mouth is roughly 8 inches from the mic, with clothes surrounding you on three sides.
Close the closet door if it’s not too echoey – sometimes leaving it open works better.
Lay a thick rug on the closet floor if it’s hard surface.
The big risk with closets is a “boxy” sound from small parallel walls. If your takes sound like you’re singing in a cardboard box, add more blankets on the walls behind the clothes. Most closet recordings need this small fix to sound professional.
Reflection Shield for Portable Use
A reflection filter (also called a vocal shield or porta-booth) is a curved panel of acoustic foam you mount behind your microphone. It’s a one-piece solution that works anywhere, including hotel rooms and apartments. Setup takes about a minute.
Place the shield on its included stand behind your mic at roughly head height. Position yourself so the curve wraps around the back half of the mic. The shield absorbs reflections from the wall directly behind you. It’s not as effective as a full blanket booth, but it’s the most portable option and a huge upgrade over recording in an empty room.
| Solution | Cost | Effectiveness | Portability | Best For |
|---|---|---|---|---|
| Blanket Booth | Lowest | High | Medium | Home studio, maximum absorption |
| Closet | Free | High (if treated) | None | Permanent home setup |
| Reflection Shield | Mid | Medium-High | Highest | Renters, mobile recording |
Choosing the Right Room for Home Vocal Recording
The room you record in matters more than any piece of gear. A great microphone in a bad room will always sound worse than a budget microphone in a good room. Here’s how to find and prepare the best space in your home.
Run the Clapping Test
Before setting up anything, stand in the middle of the room and clap your hands once, sharply. Listen carefully to what happens after the clap. Three possible outcomes tell you everything:
Quick decay with a slight “thud” = good room, low reflections, ideal for vocals.
Long ringing or “slap” echo = bad room, lots of hard parallel surfaces to fix.
Flutter echo (rapid metallic ringing) = terrible room, avoid it entirely.
This test takes five seconds and saves hours of frustration. If your chosen room fails, try another one. Most homes have at least one room that passes.
Best Room Characteristics for Vocal Recording
Smaller is generally better for vocals. Bathrooms are too reflective, but a small bedroom with carpet and a bed full of clothes absorbs beautifully. Look for these features when choosing your recording space:
Carpet or rug on the floor (not hard surface)
Curtains or blinds on windows
Bookshelves filled with books (excellent broadband absorption)
A bed with thick blankets and pillows nearby
No direct line of sight to bare walls from your mic position
Avoid rooms with hardwood floors, large windows without curtains, and bare drywall walls. These create exactly the reflections that ruin recordings.
Apartment-Specific Solutions
If you live in an apartment with thin walls and noise-sensitive neighbors, you need extra focus on isolation. Recording during daytime hours when neighbors are out is the simplest fix. Beyond that, recording near interior walls (not shared walls) reduces how much of your voice bleeds into their space.
A common trick from r/WeAreTheMusicMakers is recording inside a closet that shares no walls with neighbors. Interior closets give you two layers of drywall plus clothes between your voice and the outside world. It’s not perfect isolation, but it dramatically reduces neighbor complaints during loud vocal sessions.
Microphone Placement Techniques That Actually Work
Even with the best room, bad mic placement will destroy your recording. The three variables you control are distance, angle, and height. Get these right and you’ll hear the difference immediately.
Optimal Distance From the Microphone
Stand 6 to 8 inches from your condenser microphone, measuring from your mouth to the mic grille. This distance gives you a full, present vocal sound while keeping the proximity effect under control. The proximity effect is the bass boost you get when singing very close to a directional mic – useable for effect, but muddy if exaggerated.
If you have a dynamic microphone like an SM58, work closer, around 4 to 6 inches. Dynamics need more distance from the room to sound their best because they’re less sensitive. Beginners often sing too far away and pick up way more room sound than they realize.
The Angle Trick Most Singers Miss
Don’t sing directly into the microphone on-axis. Slightly off-axis placement (about 15 to 30 degrees off-center) reduces plosives and sibilance without losing vocal clarity. Sing slightly past the mic rather than directly into it.
This is also why a pop filter helps so much – it spreads the air from plosives before they hit the diaphragm. Combined with a slight angle, you’ll eliminate the harsh “P” and “B” sounds that ruin takes.
Height and Stand Setup
Position the microphone at mouth level, slightly above or below depending on your voice. For most singers, mic at lip level pointing slightly downward works best. This keeps the diaphragm aimed at your mouth while reducing breath noise from your nose.
Use a boom arm or sturdy stand to keep the mic locked in place. Holding a mic or letting it dangle on a loose stand adds handling noise and inconsistent takes. Boom arms also let you angle the mic precisely and keep your cable management clean.
Pop Filters and Plosive Prevention on a Budget
Plosives are bursts of air from letters like P, B, and T that hit your microphone’s diaphragm and create low-frequency thumps. They’re one of the top reasons home recordings sound amateur. A pop filter solves the problem for under $20, or you can DIY one.
The classic solution is a dual-layer mesh pop filter mounted on a gooseneck clamp. Position it 2 to 3 inches in front of the microphone, between your mouth and the mic. Air from plosives hits the mesh and disperses before reaching the diaphragm, while your voice passes through cleanly.
If you don’t have a pop filter, you can make one with embroidery hoop and pantyhose. Stretch a single layer of pantyhose across the hoop and clamp it to your mic stand. It won’t look pretty, but it works nearly as well as commercial filters. Reddit users have tested this exact method and reported clean takes even with hard consonant-heavy vocals.
High-pass filtering on your audio interface or in post-production also helps. Set it to around 80 to 100 Hz to roll off the low-end rumble that plosives create. Don’t go higher than 120 Hz or you’ll thin out your vocal tone.
Choosing Between Condenser and Dynamic Microphones
Microphone type matters more than brand when recording without a booth. Condensers and dynamics behave very differently in untreated rooms, and picking the right one for your situation saves a lot of frustration.
Condenser Microphones for Quiet Spaces
Condenser mics are detailed, sensitive, and pick up everything – including room noise. They’re the right choice when you’ve built a good DIY booth or have a quiet treated space. Large-diaphragm condensers give you that classic warm vocal sound, but they need phantom power from your audio interface to work.
Popular budget condensers like the Audio-Technica AT2020 or BM-800 deliver excellent results in a properly set up DIY booth. The detail they capture is incredible when reflections are controlled.
Dynamic Microphones for Noisy Spaces
Dynamic mics reject more room sound than condensers. They have lower sensitivity, so they capture less of the reflections and ambient noise around them. If you’re recording in a less-than-ideal room, with computer fans running, or in an apartment with background noise, a dynamic microphone is the safer choice.
The Shure SM58 is the industry standard for live vocals and works beautifully for home recording without a booth. It’s affordable, nearly indestructible, and rejects a surprising amount of room sound thanks to its cardioid pattern.
| Microphone Type | Best For | Room Requirement | Sensitivity |
|---|---|---|---|
| Large-Diaphragm Condenser | Detail and warmth in quiet rooms | Well-treated DIY booth | High |
| Small-Diaphragm Condenser | Accuracy, acoustic instruments | Treated space | High |
| Dynamic (SM58 style) | Noisy rooms, untreated spaces | Minimal treatment | Low-Medium |
| USB Condenser | Beginners, plug-and-play | Treated space | High |
Headphone Monitoring Setup for Clean Recordings
Always monitor your vocals through closed-back headphones while recording. Open-back headphones leak sound into your microphone and create phase issues in your take. Closed-back headphones isolate your playback so you only hear the mix, not your live voice competing with the recording.
Use the direct monitoring feature on your audio interface if it has one. Direct monitoring sends the mic signal to your headphones with zero latency, meaning you hear yourself in real-time without any delay. Software monitoring introduces latency that makes singing on pitch almost impossible.
Keep one ear slightly off the headphone cup if you want to hear your own voice naturally while tracking. This trick, used by many professional vocalists, helps you stay in tune while still catching any issues in real-time through the monitored signal.
Common Mistakes to Avoid When Recording Without a Booth
After recording vocals at home for years, I’ve made every mistake possible. Here are the issues that come up most often and exactly how to fix them.
Recording too loud into the mic. Distortion from clipping ruins more home recordings than bad acoustics. Set your gain so your loudest vocal peaks hit around -12 dB to -6 dB on your meter. Leave headroom for processing.
Ignoring computer fan noise. Your microphone can easily pick up your computer’s cooling fans. Move your tower away from the mic, use a dynamic mic, or record in short bursts while your computer is cool. Laptop users should record away from the machine or use a fanless setup.
Forgetting to mute notifications. Phone buzzes, message alerts, and email pings during recording ruin takes. Put your phone in airplane mode and close any apps that send notifications before pressing record.
Singing too far from the mic. Doubling the distance from your mic quadruples the room sound you capture. Stay close, even if it feels awkward at first. The intimacy gives you a better vocal sound and rejects more reflections.
Not doing the clap test first. Five seconds of clapping saves hours of editing. Always test your room before committing to a recording session.
Phone Recording Techniques When No Mic Is Available
Sometimes you need to capture a vocal idea right now, and you don’t have a microphone handy. Modern phones can record surprisingly good audio if you use them correctly. I’ve tracked demo vocals on my phone that were release-ready after some basic processing.
iPhone Recording Tips
Use the Voice Memos app or a free DAW app like GarageBand or BandLab. Hold the phone 4 to 6 inches from your mouth, slightly below chin level pointing upward. This angle mimics how a proper condenser microphone would be positioned.
Record in your closet or car for surprisingly usable results. Cars are mobile vocal booths – the soft interior, small space, and isolation from outside noise make them excellent emergency recording environments.
Android Recording Tips
Most Android phones include a voice recorder app, but third-party options like RecForge II give you better control over format and gain. Position your Android the same way as an iPhone: close to mouth, slightly below, pointing up.
Use airplane mode on either platform to prevent call interruptions during recording. A single incoming call will end your take immediately on most phones.
Getting the Most From Phone Recordings
Record in a quiet, soft space – closets and cars win again. Speak or sing at a consistent volume and avoid shouting, which causes phone mics to distort. Use a windscreen or your hand cupped around the phone to reduce wind noise if you’re recording outside.
Phone recordings won’t match a proper studio, but they can capture a song idea, podcast episode, or vocal reference that you can re-record professionally later. Treat them as scratch tracks, and you’ll be impressed by how useful they are.
FAQs
Do you need a booth to record vocals?
No, you do not need a booth to record vocals. A booth helps reduce room reflections, but you can achieve similar results using DIY solutions like blanket booths, closets full of clothes, or reflection shields. The goal is minimizing reflections and ambient noise, not having a dedicated room. Many professional-sounding home recordings use these alternatives successfully.
What is the best way to record vocals at home?
The best way to record vocals at home is to use the quietest, smallest, most absorptive space available, treat it with blankets or clothing around the microphone position, place a cardioid condenser or dynamic mic 6 to 8 inches from your mouth at a slight angle, use a pop filter, and monitor through closed-back headphones with direct monitoring enabled. This combination produces clean, professional vocals without needing a booth.
What equipment do I need to record singing at home?
You need a microphone (condenser or dynamic), an audio interface or USB mic, closed-back headphones, a pop filter, a microphone stand or boom arm, and a computer with recording software (DAW). For acoustic treatment, use blankets, pillows, or a closet full of clothes. Total beginner setups can start under $150 and still produce professional-sounding results.
How to make a makeshift vocal booth?
To make a makeshift vocal booth, hang heavy blankets behind and beside your microphone position, drape another blanket in front as a partial enclosure, lay a thick rug under the recording area, and position your mic 6 to 8 inches from your mouth. Alternatively, record inside a closet full of clothes, which acts as a natural vocal booth using garments as broadband absorption.
Why do my vocals sound roomy?
Your vocals sound roomy because sound is bouncing off hard surfaces like walls, ceilings, and floors before reaching your microphone. These reflections combine with your direct vocal sound and create that hollow, distant quality. Adding soft, dense materials around your mic position – blankets, clothes, pillows, foam – absorbs these reflections and produces a much drier, more professional vocal sound.
Final Thoughts on Recording Vocals Without a Booth
Recording vocals at home without a booth comes down to controlling reflections. Pick the quietest, smallest, most absorptive space you have. Surround your microphone with soft, dense materials. Stay close to the mic, angle slightly off-axis, and use a pop filter. These fundamentals give you clean, professional vocals on any budget.
Don’t let the lack of a professional studio stop you from recording. I’ve produced release-ready vocals from a closet with blankets. Start with what you have, apply the techniques in this guide, and your recordings will transform. The booth matters far less than your technique.
1 thought on “How to Record Vocals at Home Without a Booth (2026) Complete Guide”