
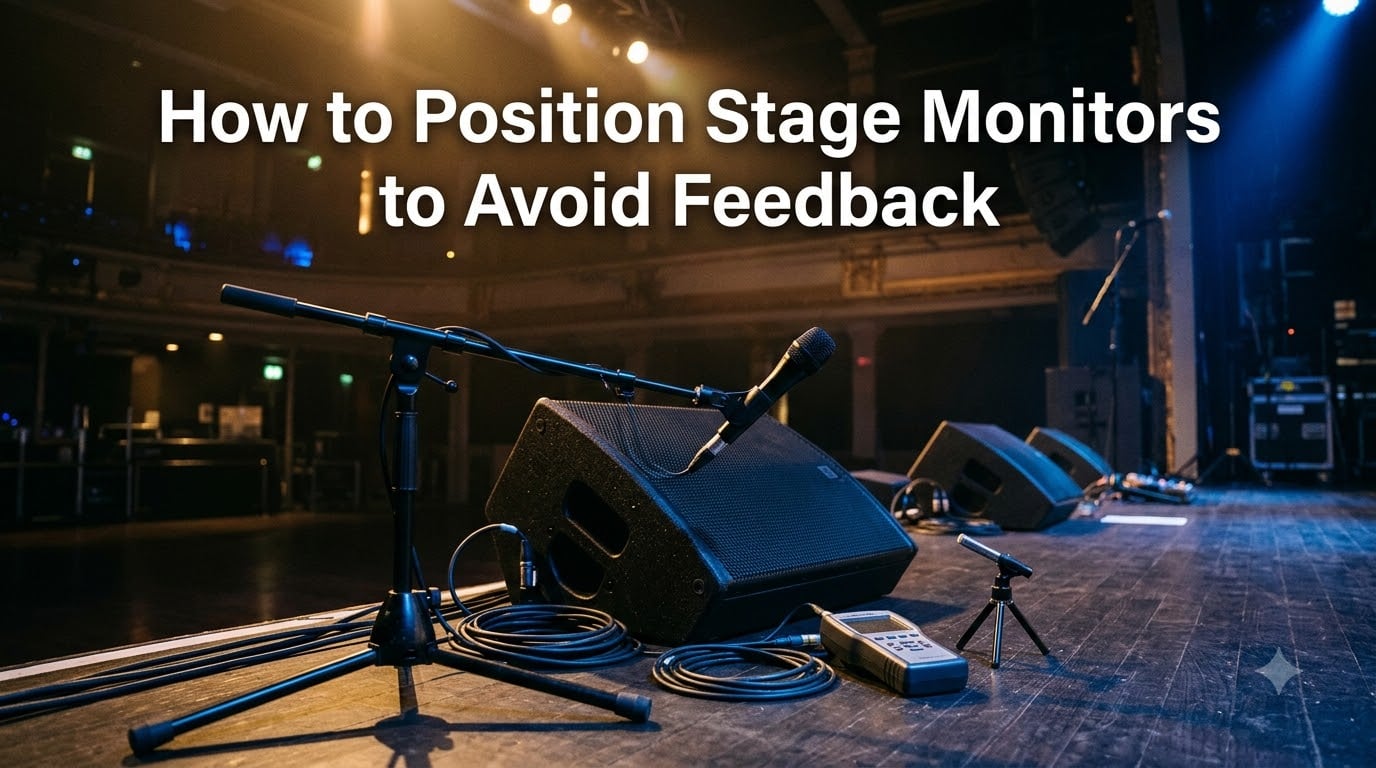
Stage monitor feedback is the single most frustrating problem in live sound. That ear-piercing screech kills performances, destroys audience confidence, and makes every engineer look like an amateur. I have spent years mixing in venues ranging from 40-seat coffeehouses to 800-capacity clubs, and I can tell you that proper stage monitor placement feedback prevention solves the problem before it starts.
The core technique is simple: position floor wedges so they fire into the microphone’s least sensitive area (the null point), angle them up toward the performer’s ears rather than the mic capsule, and keep monitor volume as low as the performer will accept. When you combine smart physical placement with proper gain staging and EQ, you can push monitors surprisingly loud without a hint of feedback.
In this guide, I will walk you through exactly how to position stage monitors to avoid feedback. We will cover the physics of the feedback loop, microphone polar patterns, wedge angle geometry, gain staging, and the process of ringing out monitors with EQ. I will also share the mistakes I see engineers make over and over, so you can sidestep them entirely.
Whether you are a church volunteer running sound on Sundays, a theatre tech dealing with a live pit band, or a gigging musician setting your own monitors for the first time, these techniques translate across every environment.
Table of Contents
Quick Checklist: Stage Monitor Placement at a Glance
If you only have 30 seconds before soundcheck, here is your rapid-fire checklist for avoiding feedback:
Place the wedge on the floor in front of the performer, angled up toward their ears, not toward the microphone.
Aim the monitor into the mic’s null point. For cardioid mics, that is directly behind the capsule (180 degrees). For supercardioid mics, it is roughly 125 to 135 degrees off-axis.
Keep the wedge as close to the performer as practical so you need less volume.
Start with monitor gain low and bring it up slowly during soundcheck, stopping before feedback starts.
Ring out problem frequencies with a parametric EQ or graphic EQ before the band arrives.
Use close miking to improve the signal-to-noise ratio and reduce the monitor level needed.
Print this list. Tape it to your FOH desk. It works.
What Is Stage Monitor Feedback? (The Larsen Effect Explained)
Audio feedback, also called the Larsen effect, happens when a microphone picks up sound from a speaker, sends that signal to an amplifier, which plays it back louder through the same speaker, which the microphone picks up again. This creates an endless loop at whatever frequency the system resonates most easily. The result is that telltale howl or screech.
Think of it as a sound chain with no end. The microphone acts as the input, the monitor speaker acts as the amplifier, and the air between them is the connection. Break any link in that chain, physically or electronically, and the feedback stops.
Every microphone and speaker combination has a frequency where the loop gain exceeds 1.0. Below that threshold, the loop dies out naturally. Above it, the signal builds on itself until you hear that runaway screech. The frequency of the feedback tells you a lot about the problem. Low howls usually point to room modes or speaker boundary interference. Mid-range whistles often come from monitor wedge positioning. High-pitched squeals typically indicate a specific resonant frequency in the mic or monitor chain.
Why Stage Monitors Cause More Feedback Than Front-of-House
Front-of-house speakers face the audience, away from the microphones. Stage monitors face the performers, who are standing right next to open microphones. This is the fundamental difference. FOH speakers can run at high volume because their sound hits the crowd, not the mics. Monitors sit inches from the very capsules they could trigger.
Floor wedges compound the problem because they bounce sound off the stage floor and nearby hard surfaces, creating reflections that reach the mic from multiple angles. A monitor pointed at a singer’s face is also pointed, more or less, at the microphone in front of that singer’s mouth.
This is why stage monitor placement feedback prevention is an entire discipline within live sound engineering. You cannot rely on distance alone, the way FOH can. You have to use geometry, polar patterns, and careful gain management.
How to Position Stage Monitors to Avoid Feedback
This is where the real work happens. Getting monitor placement right before you touch a single EQ knob gives you more headroom than any piece of gear ever will. I always tell engineers: fix it physically first, then fix it electronically. Here is the step-by-step process I use on every stage.
Step 1: Understand Your Microphone’s Polar Pattern
Every directional microphone has a polar pattern, a three-dimensional map of its sensitivity to sound coming from different angles. The pattern tells you where the mic hears best and, just as importantly, where it hears worst.
Cardioid microphones are most sensitive at 0 degrees (directly in front) and least sensitive at 180 degrees (directly behind). The rear of a cardioid mic is called the null point, and it offers up to 20 to 25 dB of rejection. That is enormous. If you aim your monitor directly into the back of a cardioid vocal mic, the mic barely hears it.
Supercardioid microphones have a narrower front pickup but their null point shifts to roughly 125 to 135 degrees off-axis. There is also a small rear lobe of sensitivity directly behind the capsule, which means you should never aim a monitor straight behind a supercardioid mic. Instead, place the wedge at an angle that hits that 125-degree null.
Hypercardioid microphones behave similarly to supercardioid but with an even narrower pickup and a slightly more pronounced rear lobe. The null sits around 110 to 120 degrees.
Omnidirectional microphones pick up sound equally from all directions. They have no null point. If you are using omni mics with floor wedges, you will fight feedback all night. Switch to directional mics for stage monitor work whenever possible.
Step 2: Aim the Monitor at the Null Point
This is the single most important technique in this entire guide. Once you know where your mic’s null point is, position the wedge so its sound fires into that dead zone rather than into the mic’s live pickup area.
For a standard cardioid vocal mic like a Shure SM58, the null is directly behind the capsule. That means the wedge should be in front of the singer, aimed up at their face, but offset slightly so the speaker’s axis passes behind the mic rather than into the grille. Visualize a line from the monitor’s tweeter through the back of the microphone capsule. If that line clears the mic, you are in good shape.
For supercardioid mics, angle the wedge so the speaker axis meets the mic at about 125 degrees off the front of the capsule. This typically means the monitor sits slightly to one side rather than directly behind the singer, angled in toward their ear.
I once worked with a singer who insisted on pointing directly at her wedge from two feet away. She used a cardioid mic and the monitor was aimed straight into the front of the capsule. Feedback every single song. I rotated the wedge 30 degrees so it fired into the null point. She got another 6 dB of clean monitor level instantly, with zero changes to EQ.
Step 3: Choose the Right Wedge Angle
Floor wedges are designed with a built-in upward angle, usually between 30 and 45 degrees. This angle serves two purposes: it aims sound at the performer’s ears rather than their legs, and it reduces the amount of sound bouncing directly off the stage floor into the microphone.
A 45-degree wedge works well for most standing vocalists because it puts the high frequencies right at head height from a few feet away. A shallower 30-degree wedge can work for seated performers or drummers behind a kit. Some wedges have adjustable angles, which I strongly prefer for multi-use venues.
If your wedge is too flat, the sound skims the stage floor and bounces unpredictably. If it is too steep, the high frequencies pass over the performer’s head and hit the back wall or the FOH area. Find the angle that puts the performer’s ears in the direct path of the speaker’s output.
Step 4: Manage Distance Between Monitor and Microphone
Closer is generally better, up to a point. A wedge placed 3 feet from a singer needs less overall volume to be heard than one placed 8 feet away. Less volume means less energy bouncing around the stage, which means less risk of triggering a feedback loop.
The tradeoff is proximity. If the monitor is too close, the performer may feel overwhelmed by sound or have trouble hearing the full mix. For vocalists, 3 to 5 feet is the sweet spot. For drummers using a drum fill, 2 to 3 feet works because the stage noise is already high.
The inverse square law applies here. Every time you halve the distance between the speaker and the listener, you gain about 6 dB of perceived volume without touching the volume knob. That free headroom directly translates to more gain before feedback.
Step 5: Plan Your Stage Layout Before Setup
Walk the stage before you place a single wedge. Identify where each performer will stand, where open mics will live, and where hard reflective surfaces exist. Then map out monitor positions that keep speaker axes aimed at null points.
Watch for these stage layout traps:
Backline bleed: Guitar amps pointed across the stage will pour into vocal mics and side-fill monitors. Angle amps back toward the player.
Drum overhead spill: Drum fills on the floor can reflect off the drum riser into vocal mics. Decouple the drum fill with a small isolation pad.
Multiple wedges facing each other: Two wedges aimed at each other across the stage create a feedback loop even without a microphone in the path. Stagger their positions.
Reflective back walls: Sound bouncing off a hard wall behind the singer re-enters the mic from the front. Hang a heavy drape or aim the wedge slightly off-axis.
A good stage layout makes mixing easy. A bad one makes feedback inevitable regardless of your EQ skills.
Monitor Type Considerations
Not all stage monitors are floor wedges, and the type you use affects your placement strategy:
Floor wedges are the most common and the most prone to feedback because they sit close to mics and bounce sound off the stage. They reward careful null-point aiming.
Side fills are larger speakers placed at the edges of the stage. They cover broader areas but run lower in volume to avoid feeding into vocal mics. Use them for ambient stage sound rather than primary vocal monitoring.
In-ear monitors (IEMs) bypass the feedback problem entirely because there is no speaker-to-mic acoustic path. If feedback is a persistent issue at your venue, switching performers to IEMs is the most effective solution. The tradeoff is cost, performer adaptation, and the need for wireless systems.
Microphone Placement That Maximizes Gain Before Feedback
Monitor placement is only half the equation. How you position the microphone itself is equally critical for preventing stage monitor feedback. The goal is to get the strongest possible direct signal from the source while rejecting everything else on stage.
Close Miking for Better Signal-to-Noise Ratio
Close miking means placing the microphone as near to the sound source as practical. When a singer cups the mic or sings from two inches away, the direct vocal signal is strong relative to the monitor bleed entering the capsule. This high signal-to-noise ratio means you need less gain at the preamp, which directly increases your gain before feedback.
The physics are straightforward. A mic 1 inch from a mouth picks up a much louder vocal signal than one 6 inches away. To match the output level, the preamp must add more gain to the distant mic. That extra gain amplifies the monitor sound leaking into the capsule just as much as it amplifies the vocal. More preamp gain means more feedback risk.
Train singers to stay on the mic. The moment they drift back, your feedback margin shrinks. I have seen engineers add 12 dB of monitor EQ correction for a singer who simply refused to maintain consistent mic distance. The real fix was not EQ, it was technique.
Choose the Right Microphone for Monitor Work
Not all microphones handle stage monitoring equally. For high-volume situations, look for mics with tight pickup patterns and excellent off-axis rejection. The Shure SM58, Beta 58A, and Sennheiser e835 are industry standards because their cardioid and supercardioid patterns reject monitor bleed effectively.
Condenser microphones, while more sensitive and natural sounding, are generally riskier on stage because they pick up more ambient sound. If you must use a condenser for live vocals, choose one with a tight supercardioid pattern and engage any available low-cut filter to reduce handling of low-frequency stage wash.
Managing Singers Who Move
Singers who roam the stage are a feedback nightmare because they constantly change the angle between the microphone and the monitor. A cardioid mic rotated 45 degrees loses much of its null rejection, and suddenly the wedge is firing into a live part of the pickup pattern.
Solutions include using side fills for broader coverage at lower individual volume, placing wedges at multiple angles so the singer always has a null-point reference, and training performers to be aware of monitor positions. For extreme cases, a headset mic with a fixed position relative to the mouth eliminates the movement problem entirely.
Gain Staging and EQ Strategies to Ring Out Monitors
Physical placement gets you most of the way. Electronic techniques buy you the final few decibels of headroom. The key is to use these tools after you have optimized placement, not as a substitute for it.
Gain Staging Fundamentals
Gain staging means setting the input gain at each stage of the signal chain so that no single stage is working harder than necessary. For monitors, this starts at the microphone preamp. Set the preamp gain so that the channel’s loudest moments hit around 0 dB on the meter without clipping. Too little gain and you will need to push the monitor send too hard. Too much gain and you amplify everything, including monitor bleed.
The monitor send level matters too. If your monitor send is maxed out at +10 dB while the master is barely moving, you are asking for feedback. Aim for monitor sends in the middle of their range, with room to go up or down during the show. This gives you a safety buffer when a performer asks for more partway through a set.
Gain before feedback is the practical limit of how loud you can push a monitor before it starts to ring. Every adjustment you make, physical or electronic, either raises or lowers that ceiling. Your job is to raise it as high as possible before the band arrives.
How to Ring Out Monitors
Ringing out is the process of identifying and reducing the specific frequencies where a monitor system wants to feed back. It is the most powerful electronic technique for increasing gain before feedback. Here is the method I use, step by step:
Step 1: Set up all monitors and microphones in their performance positions. Do not ring out a system that is not properly placed first.
Step 2: With the performer absent, slowly raise the monitor send for a single vocal mic while listening carefully. Use a pink noise source or have someone speak into the mic at performance volume.
Step 3: When you hear the system start to ring at a specific frequency, stop raising the level. Note the pitch. Experienced engineers can identify frequencies by ear, but using a real-time analyzer (RTA) makes this faster and more accurate.
Step 4: Apply a narrow notch filter at that frequency using a parametric EQ. Start with a 3 to 5 dB cut and a narrow bandwidth (high Q). The goal is to reduce just the problem frequency without damaging the overall tone.
Step 5: Raise the monitor level again until the next frequency starts to ring. Repeat the process. Most monitor systems have two to five dominant feedback frequencies that need attention.
Step 6: Stop when the monitor is loud enough for the performance or when cuts start to noticeably degrade the sound quality. Cutting more than 6 to 9 dB on any single frequency usually means the physical placement needs improvement.
A well-rung monitor can run 6 to 10 dB louder than an uncorrected one. That is the difference between a singer who is happy and one who keeps turning around and pointing at the wedge.
Graphic EQ vs Parametric EQ vs Feedback Suppressors
A graphic EQ (typically 31-band, 1/3 octave) is the traditional tool for monitor ringing. It is simple and visual, with fixed frequency bands. Sweep each slider down slightly at the ringing frequency until the feedback stops. The downside is lower precision compared to parametric options.
A parametric EQ lets you choose any frequency and adjust the bandwidth of your cut. This surgical precision means you can remove feedback frequencies without affecting nearby content as much. For monitor work, a parametric EQ on each channel or on monitor bus inserts is ideal.
A feedback suppressor is an automatic device that detects feedback and inserts notch filters in real time. These are useful as a safety net in unpredictable situations like panel discussions with multiple open mics. However, they can react to musical content and create audible artifacts. I treat them as insurance, not as a primary tool. Get your placement and manual EQ right first.
Common Stage Monitor Placement Mistakes (And How to Fix Them)
After years of mixing and consulting, the same mistakes come up again and again. Here are the most common ones and how to correct them.
Mistake 1: Cranking the Monitor to Fix a Placement Problem
The instinct when a performer says they cannot hear is to turn up the wedge. But if the wedge is aimed into the mic’s live pickup zone, more volume just brings feedback closer. The fix is to reposition the monitor into the null point first, then raise the level. You will almost always find that proper placement gives you more usable volume than the old position ever could.
Mistake 2: Ignoring Stage Bleed from Backline
Guitar amps, bass rigs, and drum kits all contribute energy to the stage. If a guitar amp is louder than the vocal wedge, the singer will ask for more monitor, which pushes the system toward feedback. The solution is to manage backline levels first. Angle guitar amps toward the player’s ears, use amp isolation cabinets in tight venues, and encourage reasonable stage volumes. Every 3 dB you take off the stage wash gives you 3 dB more monitor headroom.
Mistake 3: Too Many Open Microphones
Every open mic on stage adds gain to the system and increases the chance that one of them will find a feedback path. A stage with 8 open vocal mics has far less gain before feedback than one with 3. Close unused channels with mute groups. Use automatic mic mixers for panel discussions and theatre ensembles where many mics share the space. Train performers to approach the mic when speaking rather than expecting the gain to come to them.
Mistake 4: Singers Who Cup the Mic Capsule
Cupping the grille of a cardioid microphone with a hand changes its polar pattern, making it more omnidirectional and destroying the rear null rejection. This is one of the most common causes of sudden monitor feedback. The fix is education, show performers how to hold the mic by the handle without wrapping around the capsule. If a performer insists on cupping, switch to a mic that handles it better (some supercardioid designs are more forgiving) and be prepared to ring out more aggressively.
Mistake 5: Skipping the Ring-Out Process
Ringing out takes 10 to 15 minutes and can add significant clean headroom to any monitor system. Skipping it because the band has arrived or because the room sounds okay is a false economy. Ring out before every show if possible. Your future self during the performance will thank you.
FAQs
How do stage monitors not cause feedback?
Stage monitors avoid feedback when positioned so their sound enters the microphone’s least sensitive area, called the null point. For cardioid microphones, aim the wedge toward the rear of the capsule (180 degrees). For supercardioid mics, aim it at roughly 125 degrees off-axis. Combined with proper gain staging and EQ ringing out, this lets monitors run at usable volumes without triggering the feedback loop.
What is the 83% rule for speaker placement?
The 83% rule is a studio monitoring guideline suggesting that listening position should be 83% of the distance from the front wall to the back wall in a room. While it applies to control room acoustics rather than stage monitors, the principle of using room proportions to minimize reflections is relevant to live sound stage layout and monitor positioning.
How to position monitors on stage?
Position each floor wedge on the stage floor in front of the performer, angled upward toward their ears at roughly 30 to 45 degrees. Place it 3 to 5 feet from a standing vocalist, closer for louder stage environments. Aim the speaker axis into the microphone’s null point rather than its live pickup area. Keep wedges away from reflective back walls and avoid aiming two wedges directly at each other.
What is the 38 rule for studio monitors?
The 38% rule states that the optimal listening position in a rectangular room is 38% of the room’s length from the front wall. This is a studio design principle for speaker placement in control rooms and does not directly apply to stage monitor positioning. However, understanding how distance from boundaries affects sound is useful when placing floor wedges near stage edges and walls.
How to fix monitor feedback?
To fix monitor feedback, first reduce the monitor level to stop the ringing. Next, check that the wedge is aimed at the microphone’s null point rather than into its pickup pattern. Move the monitor closer to the performer to reduce the volume needed. Then ring out the problem frequency with a narrow parametric EQ cut of 3 to 5 dB. Finally, address stage bleed from amps and close any unused microphone channels.
Conclusion
Learning how to position stage monitors to avoid feedback comes down to three principles: understand your microphone’s polar pattern, aim the monitor into the null point, and manage gain before you reach for EQ. Physical placement always beats electronic correction. Fix it with geometry first, then ring out the remaining problem frequencies with narrow notch filters.
The best engineers I know spend more time on stage layout and monitor positioning than they do at the FOH desk. They ring out monitors before the band arrives, train performers on mic technique, and treat every dB of stage wash as stolen headroom. Do the same and you will walk away from every gig with clean, feedback-free monitors and happy performers.
Start with the quick checklist, work through each step methodically, and practice ringing out on every system you touch. It becomes second nature faster than you think.