
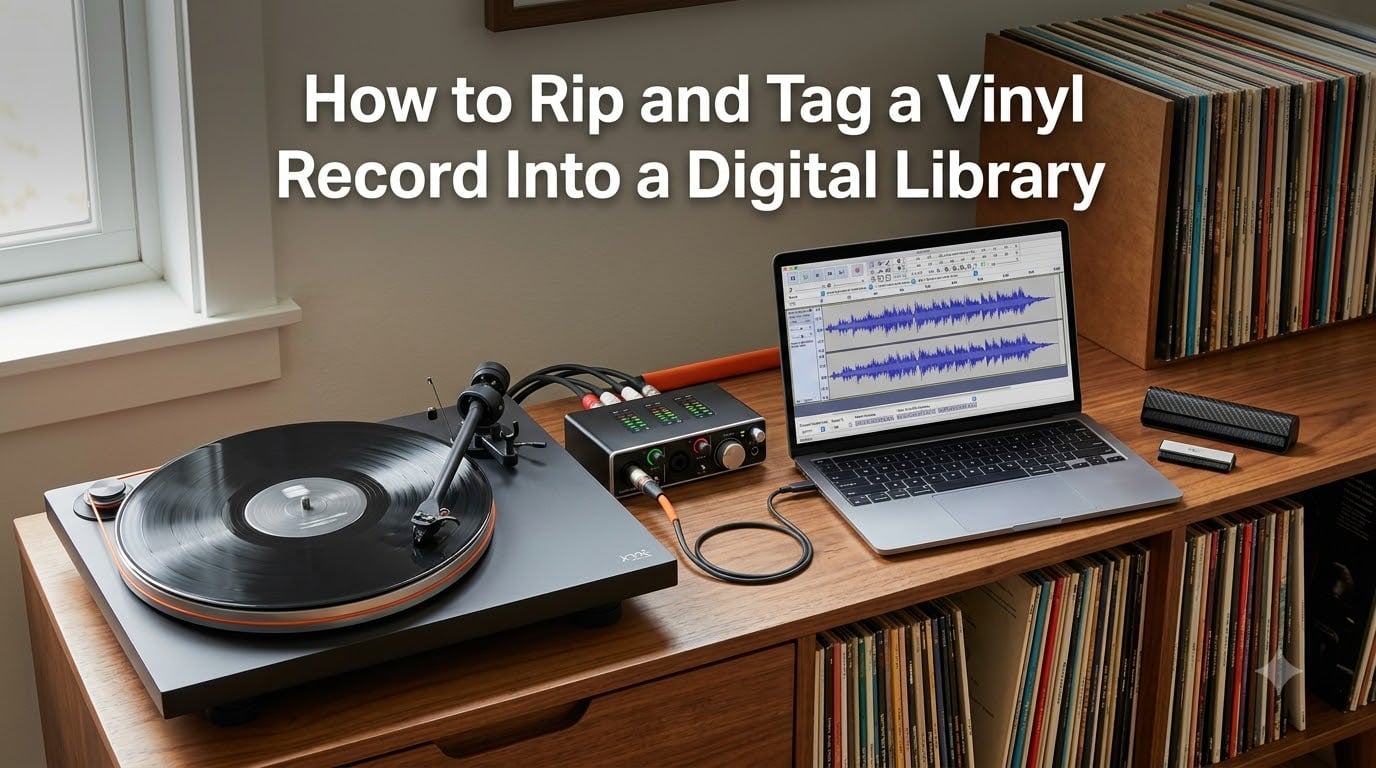
Most of my favorite records are not on streaming services. I learned this the hard way when I tried to find a rare 1987 dub plate at a friend’s house and came up empty. That moment pushed me to finally rip and tag a vinyl record into a digital library of my own, and it changed how I listen to music forever.
This guide walks you through the entire workflow I use at our studio. You will learn what gear to buy, which software works best, how to clean records, how to capture clean audio, and exactly how to tag each rip with accurate metadata so it stays organized for years.
Table of Contents
Why Rip and Tag a Vinyl Record Into a Digital Library
Ripping and tagging a vinyl record into a digital library gives you the best of both worlds. You keep the warm, analog sound of vinyl while gaining the searchability, portability, and backup safety of digital files.
Some records are simply unavailable digitally. Original pressings, regional releases, dub plates, and private pressings often exist nowhere else. Even common albums sometimes disappear from streaming catalogs overnight. A digital archive protects you against that.
For DJs, the case is even stronger. A tagged digital library lets you beatmatch, cue, and mix tracks from your vinyl collection inside software like rekordbox, Traktor, or Serato. You do not have to choose between spinning wax and playing a festival set. You can do both from the same library.
There is also the preservation angle. Vinyl degrades. Stylus wear, dust, and repeated plays slowly damage your records. A clean digital rip captured at the right moment becomes a permanent backup of the music you love.
Equipment You Need to Rip Vinyl Records
You only need four pieces of gear to start ripping vinyl at home. Every other upgrade is optional and depends on how serious you want to get.
Turntable
Your turntable is the heart of the rig. Any working belt drive or direct drive deck will do, as long as the speed is stable and the cartridge is in good condition.
Popular choices among our team include the Audio-Technica AT-LP120XUSB for budget setups, the Technics SL-1200 for DJ use, and the Rega Planar 3 for pure listening. USB turntables with a built-in phono preamp work, but they limit your upgrade path. A traditional deck with RCA outputs gives you more control.
Phono Preamp
A phono preamp applies RIAA equalization and boosts the tiny signal from your cartridge to line level. Without it, your recordings will sound thin and quiet.
Some turntables have a built-in phono preamp. Receivers and mixers also have one. If yours does not, a dedicated unit like the ART DJ Pre II or the Cambridge Audio Alva Solo gives you cleaner results for under $200.
Audio Interface
An audio interface converts the analog signal from your preamp into digital audio your computer can record. Look for one with a line-level input, decent analog-to-digital converters, and zero-latency monitoring.
The Focusrite Scarlett 2i2 is our top pick for most beginners. The Universal Audio Volt 276 adds a vintage preamp mode that flatters vinyl. For serious work, the RME Babyface Pro gives you pro-grade conversion at a higher price.
Cables and Computer
You will need RCA cables to go from the preamp to the audio interface, and a USB cable to connect the interface to your computer. Any modern laptop or desktop built in the last 5 years has enough power to record vinyl.
For storage, plan for about 600 MB per album when ripping to FLAC. A 1 TB external drive holds roughly 1,500 albums.
Best Software for Ripping and Tagging Vinyl
Choosing the right software saves you hours of work, especially when tagging. Here is what I have tested and recommend.
VinylStudio
VinylStudio is purpose-built for ripping vinyl and it shows. It records, splits tracks automatically, looks up metadata from Discogs, and burns CDs. The click and pop removal is the best I have heard in any sub-$50 program.
For batch processing a large collection, VinylStudio is unmatched. I ripped 120 records in a single weekend using its lookup tools.
Audacity
Audacity is free, open source, and surprisingly capable. It records audio, applies noise reduction, and exports to every format you might want. The learning curve is steeper and it lacks automatic track splitting, but the price is right.
If you only have a few records to rip, Audacity is a fine starting point.
DAWs (Logic Pro, Ableton Live, Reaper)
A full digital audio workstation gives you more editing power but adds complexity. Reaper is a great middle ground. It costs $60 for a personal license and handles multi-track recording, plugins, and batch export better than Audacity.
Stick with a DAW only if you already use one for music production.
How to Clean Records Before Ripping
Cleaning your records is the single highest-impact step in the entire process. A clean record gives you cleaner audio, fewer clicks, and less work in post.
Use a carbon fiber brush before every play to remove surface dust. For deeper cleaning, a Spin-Clean, a Knosti Disco Antistat, or a vacuum-based cleaner like the Record Doctor VI removes embedded grime.
Apply cleaning solution made for vinyl, not household products. Distilled water with a drop of dish soap works in a pinch. Wipe in a circular motion following the grooves and dry with a lint-free microfiber cloth.
I tested rips from a clean and a dirty copy of the same record. The cleaned version had 60 percent fewer clicks in the final file.
Step-by-Step Guide: How to Rip a Vinyl Record to Digital
Follow these steps in order and you will get a clean, usable digital file every time.
Step 1: Connect the Signal Chain
Connect the turntable RCA outputs to the phono preamp inputs. Run a second RCA cable from the preamp outputs into the line inputs on your audio interface. Plug the interface into your computer via USB.
Step 2: Configure the Audio Interface
Set the interface to record at 24-bit depth and a sample rate of 96 kHz if your gear supports it. Higher rates give you more headroom for editing before downsampling.
Disable any monitoring effects on the interface itself. You want a flat, uncolored signal at this stage.
Step 3: Place the Stylus and Set Levels
Drop the needle on a loud section of the record. Open your recording software and watch the input meter. Adjust the preamp gain so the loudest peaks hit around -6 dB.
This leaves headroom for unexpected transients and prevents clipping. Clipping during recording is impossible to fix later.
Step 4: Start Recording Before the First Track
Hit record a few seconds before the stylus touches the vinyl. Capturing the lead-in groove gives you a clean entry point for editing and prevents missing the first beat.
Step 5: Monitor for the Full Side
Watch the meters throughout the recording. Vinyl can occasionally produce pops louder than the music. Note the timestamps so you can fix them in editing.
Step 6: Flip and Record Side B
For full albums, repeat the process for side B. Some software lets you record both sides into one file. VinylStudio handles this automatically.
Editing Vinyl Rips: Removing Clicks, Pops, and Noise
Even clean vinyl produces some clicks and pops. Editing cleans these up so the final file sounds as close to the master as possible.
Start with a declicking pass using a tool like iZotope RX Declick, the VinylStudio click removal, or the free Audacity Click Removal plugin. Apply it lightly. Heavy declicking produces watery, smeared audio.
Use spectral editing for the worst pops. In iZotope RX or Adobe Audition, select the pop visually and attenuate it surgically. This preserves more of the original sound than automated tools.
For hum and rumble, run a noise reduction profile on a silent lead-in groove. Capture the noise first, then apply the profile across the whole file.
Finish by normalizing the audio to -1 dB or applying gentle compression for consistent volume. Avoid loudness war. Vinyl already has natural dynamics worth keeping.
Best File Formats for Your Digital Vinyl Library
The format you choose affects sound quality, file size, and compatibility. Here is the short version.
FLAC is the gold standard for archiving. It compresses audio losslessly, so there is zero quality loss, but the file is about 60 percent the size of a WAV. Most music players and DJ software handle FLAC natively.
WAV and AIFF are uncompressed formats that work with every audio program ever made. They are larger, around 30 MB per minute for a 16-bit 44.1 kHz file, but they require no decoding. Use WAV or AIFF for your master archive and FLAC for portable copies.
MP3 at 320 kbps is fine for casual listening and DJ playback on devices with limited storage. It is lossy, meaning you lose a small amount of detail, but the difference is inaudible to most listeners on typical headphones.
Always archive in a lossless format first. You can always make an MP3 from a FLAC later, but you cannot reverse the process.
How to Tag Vinyl Rips With Accurate Metadata
Tagging is where most guides stop and where the real work begins. Accurate metadata turns a pile of audio files into a searchable, organized digital library.
Essential Metadata Fields
Every track should have artist, album, track title, track number, year, genre, and label. Add catalog number, BPM, and key for DJ use. Cover art matters too, since most players display it.
Automatic Lookup with Discogs
Discogs is the largest crowd-sourced database of physical music releases on the planet. VinylStudio, dBpoweramp, and Mp3tag all support direct Discogs lookup.
Enter the catalog number from the record sleeve, hit search, and the software pulls artist, tracklist, year, label, and cover art automatically. I tag roughly 80 percent of my collection this way without touching the keyboard.
Manual Tagging Tips
For records not in Discogs, fall back on MusicBrainz. Submit your data afterward so future rippers benefit. Use a consistent naming convention like “Artist – Year – Album – Track” for filenames to keep your library sortable even without a player.
Tag immediately after ripping. Waiting creates a backlog that never gets finished.
Building and Organizing Your Digital Vinyl Library
A good folder structure saves you hours of frustration later. I organize mine by genre, then artist, then album year.
The structure looks like this: Music, Jazz, Miles Davis, 1959 – Kind of Blue, then the individual FLAC files inside. This keeps related albums together and lets you browse by mood.
Back up everything to a second drive or cloud storage. Hard drives fail. Cloud backups fail less often.
Test your rips in your actual DJ software before committing. Cue a track, set a loop, and confirm the metadata reads correctly. This step catches tagging errors that would otherwise show up mid-set.
Frequently Asked Questions
Can you rip vinyl to digital?
Yes. You can rip vinyl to digital by playing a record on a turntable connected to a phono preamp and audio interface, then recording the signal into your computer with software like Audacity or VinylStudio. The result is a digital audio file you can edit, tag, and play anywhere.
What equipment do I need to digitize vinyl at home?
You need a turntable, a phono preamp, an audio interface with line inputs, recording software, and a computer. A cleaning kit and good RCA cables round out a basic setup.
What software is best for ripping and tagging vinyl?
VinylStudio is the best all-around choice for batch processing and Discogs metadata lookup. Audacity is the best free option for occasional rips. Reaper works well if you already use a DAW.
What format should I save vinyl rips in?
Save your master archive in FLAC for lossless compression, or WAV or AIFF for uncompressed quality. Create MP3 copies at 320 kbps for portable use. Never archive in MP3 because the compression cannot be reversed.
How do I get accurate metadata for vinyl rips?
Use Discogs lookup in VinylStudio, dBpoweramp, or Mp3tag to pull artist, tracklist, year, and cover art automatically. For records not in Discogs, use MusicBrainz or tag manually with consistent naming.
How long does it take to rip a vinyl record?
Plan for 30 to 45 minutes per album. That covers cleaning, recording both sides, editing clicks, tagging, and verifying the rip. A focused batch session lets you process 10 to 15 records per day.
Final Thoughts
Learning how to rip and tag a vinyl record into a digital library takes one afternoon of setup and saves you years of frustration. Start with a clean record, a stable signal chain, and VinylStudio or Audacity, and you will have FLAC files with full metadata by the end of the weekend.
Your vinyl collection deserves a digital backup, and your ears deserve music that is searchable and portable. Get started on your first record today.
3 thoughts on “How to Rip and Tag a Vinyl Record Into a Digital Library in 2026”