
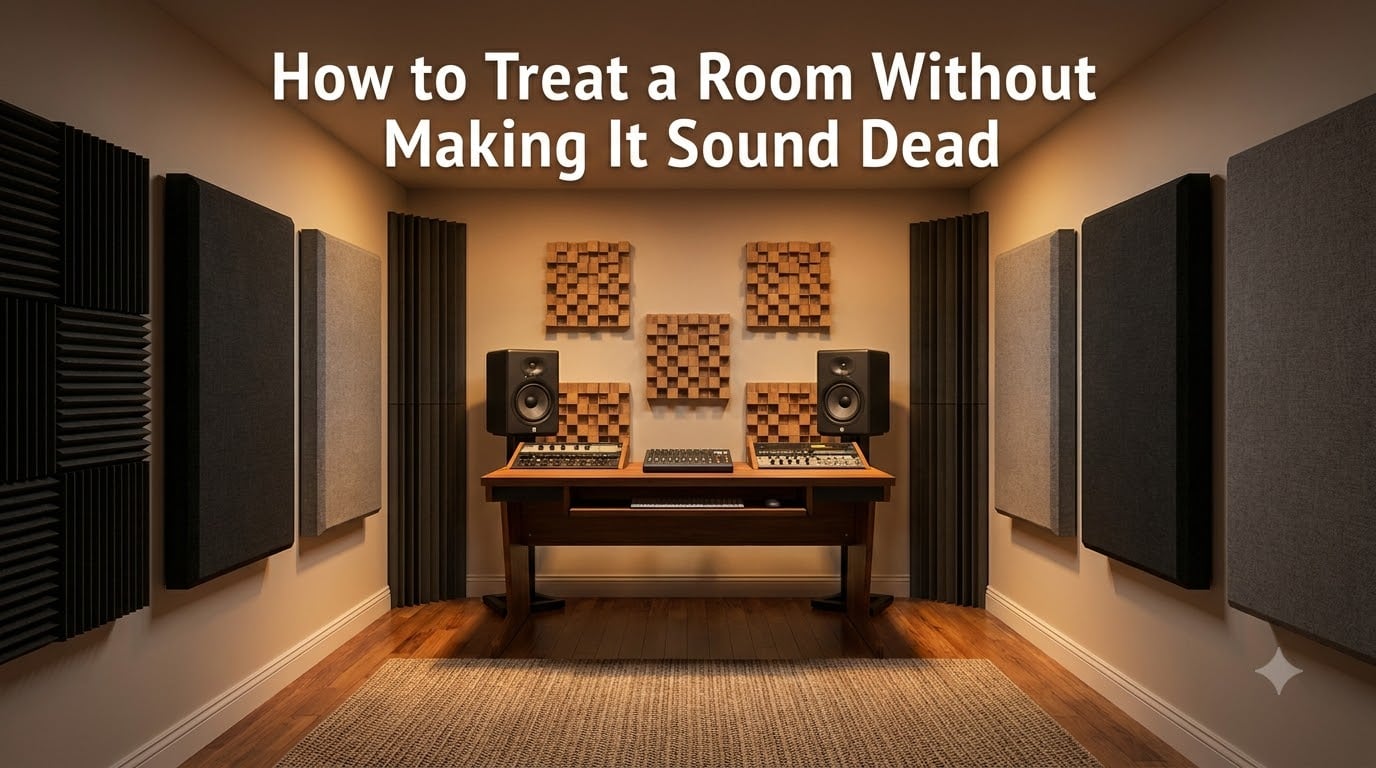
I have been in enough home studios to know the feeling. You spend a weekend lining every wall with acoustic foam, step back, clap your hands, and the room just feels wrong. The sound is flat, lifeless, almost oppressive. You wanted controlled acoustics, but what you got was a padded cell.
If that sounds familiar, you are not alone. Learning how to treat a room without making it sound dead is one of the most common challenges home studio owners, podcasters, and musicians face. The good news is that the fix is not about removing all your treatment. It is about understanding balance.
In this guide, I will walk you through the difference between absorption and diffusion, the signs of an over-damped room, and a proven framework called LEDE that keeps your space controlled without sucking the life out of it. Whether you are building a mixing room, a recording booth, or a listening space, these principles apply universally.
Here is the core idea before we get started: effective acoustic treatment controls problematic reflections while preserving enough room sound to keep the space feeling natural. Too much absorption kills the character. Too little leaves you with a boomy, muddy mess. The sweet spot is in between, and finding it is easier than you might think.
Table of Contents
Understanding Acoustic Treatment: Absorption vs Diffusion
Every acoustic treatment strategy comes down to two fundamental tools: absorption and diffusion. Understanding how they differ is the foundation for treating a room without killing its character.
Absorption is exactly what it sounds like. Materials like mineral wool, acoustic foam, and heavy fabric absorb sound energy and convert it into heat through friction. This reduces the strength of reflections bouncing off your walls. Absorbers are great for taming flutter echoes, controlling early reflections at your mixing position, and reducing overall reverb.
The catch is that absorbers are frequency-selective. A thin panel of 1-inch acoustic foam might absorb high frequencies efficiently but do almost nothing for bass. This is why so many home studios end up with dead-sounding highs and boomy lows. The treatment is only working on part of the frequency spectrum.
Diffusion, on the other hand, does not remove sound energy. It scatters it. A diffuser takes a sound wave and spreads it across many directions, breaking up harsh reflections without deadening the room. The result is a space that still has acoustic life but without the slap-back echoes and standing waves that make mixing impossible.
This distinction matters because the dead room problem almost always comes from over-using absorbers while ignoring diffusers entirely. Foam on every wall absorbs mids and highs but leaves bass frequencies bouncing around unchecked. The room sounds muffled yet still boomy, which is the worst of both worlds.
The fix is to combine both approaches strategically. Use absorption where reflections cause problems, and use diffusion where you want to preserve a sense of acoustic space. This balance is what separates a well-treated room from a dead one.
The Dead Room Problem: What Happens When You Over-Treat
A dead room is an over-damped space where too much absorption has stripped away the natural acoustic character. The sound feels suffocated, like someone threw a heavy blanket over your speakers. It is uncomfortable to work in, and paradoxically, it can make mixing harder rather than easier.
Here is why over-treatment backfires. When you absorb too much of the mid and high frequencies, your ears lose the spatial cues they rely on to perceive depth and dimension. Mix decisions become unreliable because the room is no longer giving you accurate feedback. You might turn up the treble on your mix to compensate, only to discover later that the track sounds harsh on every other system.
The most common version of this problem is what audio engineers call the mid-high deadening trap. You cover your walls with inexpensive foam panels. They absorb everything above roughly 500 Hz. But the bass frequencies, which have much longer wavelengths, pass right through the thin foam and continue bouncing around the room. You end up with a room that sounds dead in the highs but muddy and uncontrolled in the lows.
Forum discussions on Gearspace and Reddit repeatedly highlight this issue. One common observation is that dead rooms earned their bad reputation specifically because of this uneven absorption pattern. It is not that absorption itself is bad. It is that partial absorption creates an unbalanced acoustic environment.
Another problem with an over-treated room is listener fatigue. Working in a dead space for hours is mentally draining. Your brain works overtime to process sound in an unnatural environment. Many engineers report that removing some absorption panels immediately improved their ability to work longer sessions without feeling exhausted.
Signs Your Room Is Too Dead
Recognizing an over-damped room is the first step toward fixing it. Here are the most reliable warning signs I have learned to spot, both from my own experience and from countless home studio visits.
First, do the clap test. Stand at your listening position and clap sharply once. In a well-treated room, you should hear a clean, short sound with no ringing or echo. In a dead room, the clap sounds muffled and lifeless, almost like you clapped inside a closet full of clothes. If the clap feels uncomfortably suppressed, you have too much absorption.
Second, listen for the uncomfortable silence effect. When you stop playing music in a dead room, the silence feels unnatural and oppressive. There is no gentle decay, no sense of the room breathing. The sound just stops, as if the air itself has been swallowed.
Third, pay attention to how your own voice sounds. Speak normally in the room. If your voice sounds unnaturally dry, boxy, or like you are talking into a pillow, the room is over-absorbed in the speech frequency range.
Fourth, check for the boomy-but-dead contradiction. This is the most telling sign of uneven treatment. The room sounds muffled in the highs but the bass still feels uncontrolled and muddy when you play music. This means your panels are absorbing the wrong frequencies.
Fifth, consider RT60 measurements if you have access to measurement software. RT60 is the time it takes for sound to decay by 60 decibels after the source stops. For a small home studio or mixing room, an RT60 between 0.2 and 0.4 seconds is generally ideal. Below 0.2 seconds, the room starts to feel dead. Users on audio forums consistently report that RT60 values below 0.25 seconds sound noticeably lifeless.
If you are checking off multiple items on this list, do not panic. The solution is usually not to rip everything out and start over. Often it means repositioning panels, adding diffusion to the rear of the room, and focusing your absorption on specific problem areas rather than blanketing every surface.
The Live End Dead End (LEDE) Concept: Your Blueprint for Balance
The Live End Dead End concept, usually abbreviated as LEDE, is the single most useful framework for treating a room without making it sound dead. Originally developed for professional recording studio control rooms, it translates perfectly to home studios and listening spaces.
The idea is elegantly simple. You divide your room into two zones. The front of the room, where your monitors and listening position are, becomes the dead end. The rear of the room, behind the listening position, becomes the live end.
In the dead end, you use absorption to control early reflections. These are the first sound waves that bounce off the side walls, ceiling, and front wall before reaching your ears. They arrive within about 20 milliseconds of the direct sound from your speakers and they seriously color what you hear. By absorbing these reflections at the first reflection points, you ensure that the direct sound from your monitors reaches your ears cleanly and uncolored.
In the live end, you use diffusion instead of absorption. Diffusers on the rear wall scatter the sound that gets past your listening position, sending it back into the room in many directions. This preserves a sense of acoustic space and ambient warmth without creating the discrete echoes that cause problems.
The beauty of LEDE is that it gives you the best of both worlds. Your mixing position gets the accuracy of a controlled, reflection-free zone. But the room itself still feels alive because the rear is reflecting sound, just in a scattered, pleasing way. You avoid the padded-cell feeling entirely.
Here is a practical way to implement LEDE in a typical rectangular room. Place broadband absorbers at your first reflection points on the left and right walls, identified using the mirror trick. Add absorption to the ceiling above your mixing position. Then place diffusers on the rear wall behind your chair. If budget allows, add a second set of diffusers to the upper portion of the rear wall for even scattering.
One important note: LEDE is a concept, not a rigid formula. You do not need to achieve a perfectly clinical dead end. Even partial absorption at reflection points makes a massive difference. The key principle is that one end of your room absorbs and the other end diffuses, creating an asymmetry that keeps the room controlled but never dead.
How Much Treatment Do You Actually Need? The 38% Rule
One of the most common questions on audio forums is simply, how much acoustic treatment is enough? There is no single magic number, but there are practical benchmarks that can guide you.
The 38% rule in room acoustics refers to a guideline for listening position placement within a room. It suggests that your ears should be positioned about 38 percent of the room length from the front wall. This position typically offers the smoothest bass response and most balanced low-frequency behavior. It is not about how much treatment to add, but about where to sit within the room you have.
For treatment coverage, a widely accepted guideline is that covering 20 to 30 percent of your wall surfaces with absorption is sufficient for most small to medium rooms. This is enough to control early reflections and tame flutter echoes without pushing the room into dead territory.
The key is prioritizing placement over quantity. Ten well-placed panels at first reflection points and corners will dramatically outperform thirty panels scattered randomly across every wall. Strategic placement at problem areas always beats blanket coverage.
For RT60 targets, aim for 0.2 to 0.4 seconds in a mixing room, 0.3 to 0.5 seconds in a recording room where you want some natural ambience, and 0.4 to 0.6 seconds in a listening room where a bit more liveliness is desirable. Measure before and after adding treatment so you can stop when you hit your target rather than overshooting into dead territory.
Remember that bass frequencies are the hardest to control and require the thickest, densest absorbers. A room that has good mid and high frequency absorption but no bass trapping will always feel like it has one foot in dead territory and one foot in boom territory. Budget for broadband bass traps first, because they address the foundation of your room’s acoustic response.
Where to Place Absorption: The Priority Order
If you are working with a limited budget or limited wall space, you need to know what to treat first. The community consensus from audio engineering forums is remarkably consistent on this point. Here is the priority order I recommend.
Step 1: Start with bass traps in the corners. Low frequencies build up in room corners, creating standing waves and room modes that muddy your bass response. Floor-to-ceiling corner traps packed with mineral wool or dense acoustic cotton are the highest-impact treatment you can add. This single step often transforms a room more than any other change.
Step 2: Treat the first reflection points on your side walls. Use the mirror trick to find them. Have a friend slide a small mirror along each side wall while you sit at your listening position. Wherever you can see your monitor speakers in the mirror, that is a first reflection point. Place a broadband absorber there.
Step 3: Treat the first reflection point on the ceiling above your mixing position. Ceiling clouds are often overlooked but they make a significant difference, especially in rooms with low ceilings where ceiling reflections arrive quickly and strongly.
Step 4: Address the front wall between your monitors. Reflections from the wall behind your speakers can interfere with the direct sound, particularly in the midrange. A layer of absorption here cleans up the stereo image noticeably.
Step 5: Consider the rear wall. This is where LEDE principles come into play. If you want a more controlled, analytical environment, add absorption here. If you want to preserve liveliness and follow the LEDE approach, use diffusion instead. For most home studios, diffusion on the rear wall is the better choice for avoiding the dead room problem.
Step 6: Address any remaining flutter echoes. After the primary treatment is in place, do the clap test again. If you still hear ringing or metallic echoes, they are likely caused by parallel untreated surfaces. Small absorbers or diffusers on those surfaces will eliminate the problem.
This priority order gives you the biggest acoustic improvement for every dollar spent. Follow it sequentially and you will never waste money treating the wrong area first.
How to Use Diffusion to Keep Your Room Lively
Diffusion is the secret weapon against the dead room problem. While absorption removes sound energy, diffusion preserves it and redirects it. This is what keeps a treated room feeling natural and comfortable.
Diffusers work by scattering sound waves across many angles rather than reflecting them back in a single direction like a flat wall does. This breaks up standing waves, eliminates flutter echoes, and creates a sense of spaciousness that pure absorption can never provide.
There are two main types of diffusers you will encounter. Quadratic residue diffusers, often called QRD diffusers, use a series of wells of varying depths calculated using a mathematical formula. They scatter sound evenly across a wide frequency range. Skyline diffusers are a 3D variation that scatters sound in both horizontal and vertical planes.
Polycylindrical diffusers, or poly diffusers, use curved surfaces to redirect sound. They are simpler in design but effective, and they have the added benefit of being visually appealing in a room that doubles as a living space.
For placement, the rear wall behind your listening position is the primary target for diffusion in an LEDE setup. Diffusers should be positioned at ear level or slightly above, facing the listening position. This ensures that sound reaching the back of the room is scattered back toward you in a pleasing, diffuse pattern rather than reflecting as a discrete echo.
A practical alternative for budget-conscious setups is to use bookshelves as natural diffusers. A bookshelf filled with books of varying sizes and depths creates a surprisingly effective diffusion surface. This is a trick recommended repeatedly in home studio communities, and it costs nothing if you already have books.
One common mistake is placing diffusers too close to the listening position. Diffusion needs distance to develop properly. Sound waves need space to bounce off the diffuser, scatter into many paths, and recombine before reaching your ears. If a diffuser is less than about 3 feet from your head, it will not function as intended. Place diffusers on the far wall, not right behind your chair.
DIY Acoustic Treatment on a Budget
You do not need to spend thousands of dollars to treat a room effectively. Some of the best acoustic treatment can be built at home for a fraction of the cost of commercial panels.
The most popular DIY absorption panel uses Rockwool or mineral wool as the core material. Rockwool is dense, fire-resistant, and highly effective at absorbing a broad range of frequencies, including low-mids. A typical DIY panel consists of a 2×4 foot wooden frame filled with 2 to 4 inches of Rockwool, wrapped in acoustic fabric. These panels outperform most commercial foam products at a fraction of the cost.
Melamine foam is another budget option worth knowing about. It is the same base material used in many commercial acoustic panels. While thinner melamine foam sheets are less effective at absorbing low frequencies, they work well for controlling high-frequency reflections when budget is tight. They are also extremely lightweight and easy to mount.
For bass traps, the DIY approach is especially cost-effective. Stack Rockwool batts floor-to-ceiling in your room corners and cover them with fabric. These corner traps address the most problematic low-frequency buildup in your room for a remarkably low investment. Many home studio owners report that DIY corner traps made the single biggest improvement to their room sound.
Heavy curtains and rugs are not a replacement for proper acoustic treatment, but they do help. Thick curtains over windows reduce glass reflections. A large area rug on a hard floor absorbs floor reflections and reduces flutter echo between the floor and ceiling.
For diffusion, the bookshelf method I mentioned earlier is free. If you want something more deliberate, you can build a simple QRD diffuser using a wooden board and a series of wooden dowels or blocks cut to calculated depths. Plans for DIY diffusers are widely available in acoustic treatment communities.
The most important budget principle is to prioritize correctly. A few well-built broadband absorbers at key positions will always outperform a large quantity of cheap foam covering every surface. Spend your money on the corners and reflection points first, then add diffusion to the rear wall.
Common Acoustic Treatment Mistakes to Avoid
After years of helping people fix their room acoustics, the same mistakes come up over and over. Here are the ones that most frequently lead to a dead or unbalanced sounding room.
The number one mistake is using only thin foam panels. Cheap egg-crate foam or thin acoustic foam absorbs highs and upper mids but does almost nothing for bass. This creates the classic dead-but-boomy room. If you are going to use foam, pair it with proper bass traps in the corners.
Another frequent error is treating every wall equally. Symmetrical treatment on all four walls feels thorough, but it ignores the LEDE principle. You end up with a room that is uniformly dead rather than strategically controlled. Treat the front and sides for reflections, and leave the rear for diffusion.
Ignoring the ceiling is surprisingly common. Ceiling reflections are some of the strongest and earliest reflections in a typical room, yet many people only treat their walls. A ceiling cloud above the mixing position is one of the most impactful additions you can make.
Placing absorbers flat against the wall with no air gap reduces their low-frequency effectiveness. An air gap behind an absorber, even just 1 to 2 inches, extends its effective absorption range down to lower frequencies. This means a 2-inch panel with a 2-inch air gap can perform similarly to a 4-inch panel mounted flush.
Finally, the biggest mistake of all is treating before measuring. Before you install anything, measure your room’s current acoustic response using free software like REW, or Room EQ Wizard. This tells you exactly where your problems are so you can treat them precisely rather than guessing. Treating blindly is how rooms end up over-damped.
Avoid these mistakes and you will be well ahead of most home studio owners. The goal is always targeted, measured treatment, not blanket coverage.
FAQs
How to make a room sound dead?
To make a room sound dead, cover all wall and ceiling surfaces with thick absorption material such as mineral wool panels at least 4 inches thick, add bass traps in every corner, and eliminate all reflective surfaces. This maximizes absorption across all frequencies. However, a fully dead room is rarely desirable for mixing or listening, as it removes natural spatial cues and causes listener fatigue. Most engineers recommend partial absorption with diffusion instead.
What is the 38% rule room acoustics?
The 38% rule states that your listening position should be placed approximately 38 percent of the room length measured from the front wall. This position typically provides the smoothest low-frequency response and most balanced bass behavior in a rectangular room. It is a starting guideline for speaker and seating placement, not a treatment coverage rule.
How to acoustically treat a room cheaply?
The most cost-effective acoustic treatment starts with DIY bass traps made from Rockwool or mineral wool stacked in room corners. Build broadband absorber panels using a simple wooden frame, 2 to 4 inches of Rockwool, and acoustic fabric for first reflection points. Use heavy curtains, rugs, and bookshelves as natural diffusers. Prioritize corners and reflection points over covering every wall surface.
What can you put in your room to make it soundproof?
Acoustic treatment and soundproofing are different goals. Treatment controls internal reflections while soundproofing blocks outside noise. For soundproofing, you need mass-loaded vinyl, double drywall walls with air gaps, solid-core doors, and sealed gaps around windows and doors. Acoustic foam and panels will not block outside noise. They only improve how the room sounds from inside.
Conclusion
Treating a room without making it sound dead comes down to one core principle: balance. Use absorption strategically at first reflection points and corners, then use diffusion to preserve the natural life of the room. Follow the LEDE framework, measure before you treat, and stop adding panels when the room sounds right. If you apply the priority order and avoid the common mistakes covered here, your room will be controlled, accurate, and still a pleasure to work in. Start with bass traps and reflection points, add diffusion to the rear, and let your ears tell you when enough is enough.