
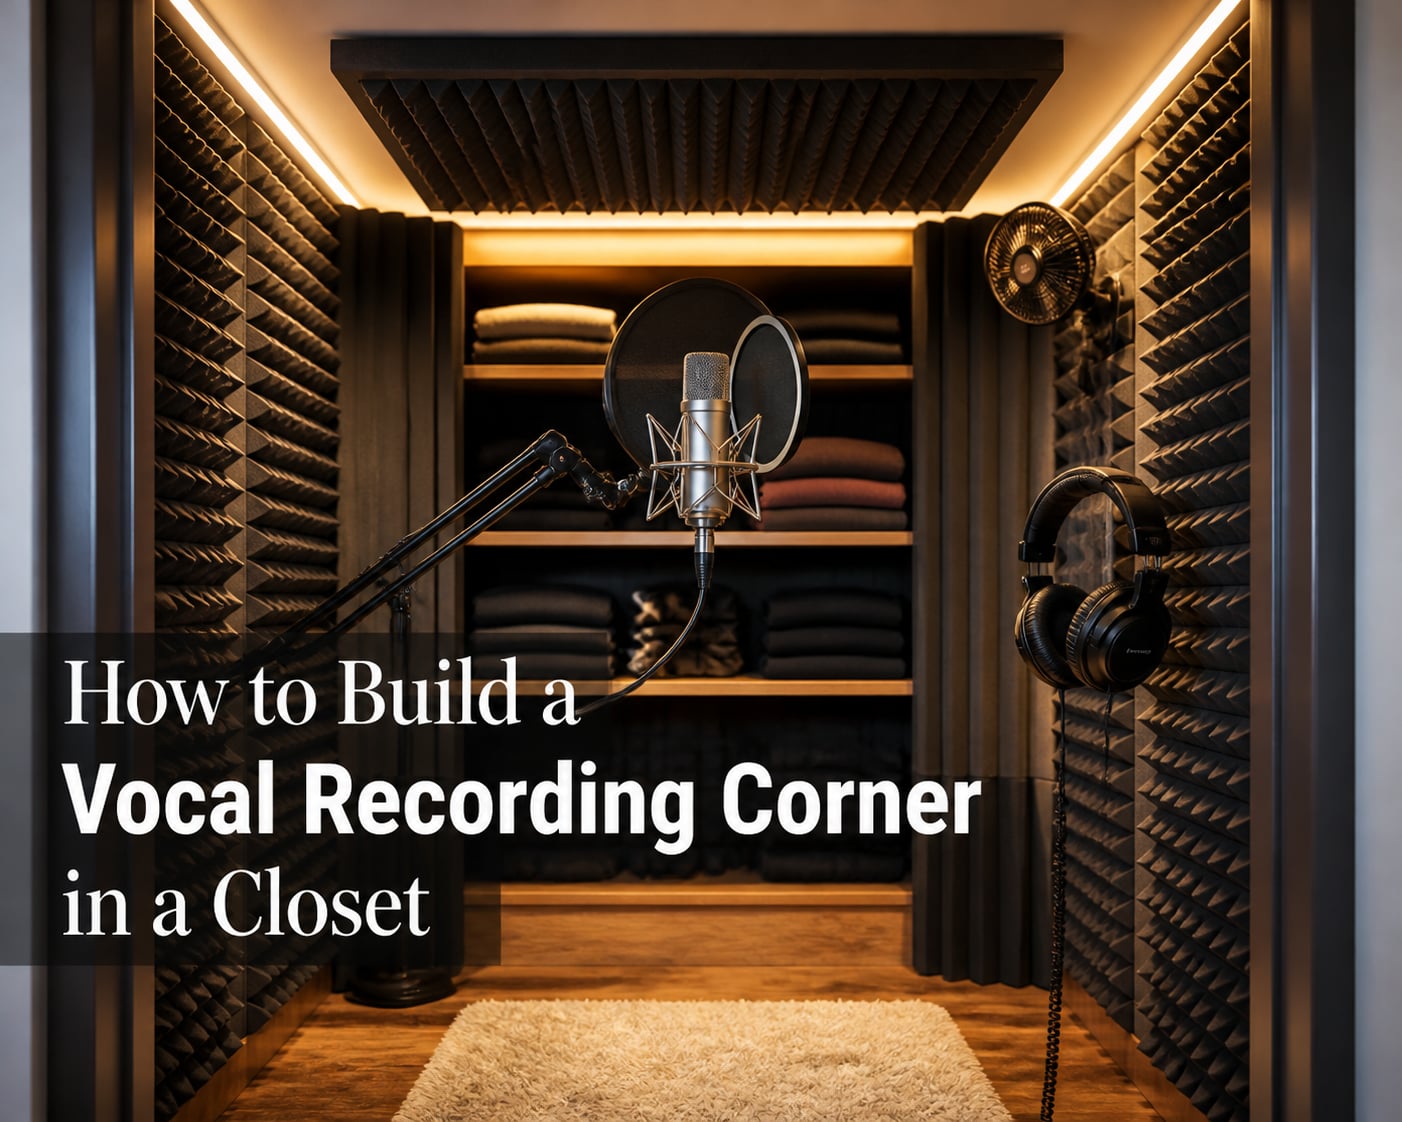
If you have ever wanted studio-quality vocals but do not have a spare room to dedicate, the answer might already be sitting in your hallway. Building a vocal recording corner in a closet is one of the most popular DIY projects in home recording, and for good reason. Closets are small, enclosed, and full of soft materials that already absorb sound. With the right treatment, they can outperform many expensive stand-alone booths.
I have set up three different closet booths over the past decade, and each one taught me something new. This guide pulls together everything I have learned, plus techniques borrowed from professional studio builders, so you can skip the trial and error.
Table of Contents
Why a Closet Works for Vocal Recording
A small enclosed space is actually a vocal booth by accident. Clothes hanging in a closet act as broadband absorbers, softening reflections before they even bounce. Walls are close together, which cuts down the reverb time. When you add a few targeted acoustic panels, you can turn that space into a remarkably dry, controlled recording environment.
Singers, podcasters, and voice-over artists all use closet booths because they offer three things studios charge thousands for: isolation, absorption, and consistency. Outside noise struggles to reach a properly treated closet, reflections are tamed by the surrounding fabric, and the room itself never changes between sessions. That last point matters more than people realize.
Choosing the Right Closet for Your Recording Space
Not every closet is worth converting. Before you start hanging foam, measure the space, listen to the noise floor, and check the structure. A walk-in closet is ideal, but a reach-in with the door removed can also work for spoken word projects.
Minimum Closet Size Requirements
You need enough room to stand, breathe, and hold a microphone without bumping into the walls. I recommend a minimum interior dimension of 3 feet wide by 3 feet deep by 7 feet tall. Smaller than that and you will feel cramped and create unwanted handling noise.
The closet should also sit in a quiet part of your home. Avoid closets that share walls with bathrooms, kitchens, or HVAC equipment. A closet on an exterior wall can introduce street noise unless you seal it carefully.
Understanding Acoustic Treatment Basics
Acoustic treatment and soundproofing are two different jobs, and many beginners confuse them. Soundproofing blocks sound from entering or leaving a space. Acoustic treatment controls how sound behaves inside the room. For a vocal recording corner, treatment matters most.
There are three treatment principles to understand. Absorption soaks up sound energy using soft, porous materials. Diffusion scatters sound so reflections arrive at different times instead of all at once. Bass trapping absorbs low frequencies that pile up in corners and along walls.
What Are Reflection Points
Reflection points are the spots on your walls where sound from your mouth bounces directly toward the microphone. To find them, sit in the booth with a mirror and have a friend tap along the walls, or clap while moving your hand along the surface. Wherever the loudest, clearest echo comes back is a reflection point.
Cover every reflection point behind and to the sides of the microphone with 2-inch acoustic foam or mineral wool panels. The ceiling reflection point directly above you also needs treatment. Skip the wall behind the mic if you can. A slightly live rear wall sounds more natural than a completely dead room.
Bass Traps and Low-Frequency Control
Small rooms have a problem called low-frequency buildup. Bass wavelengths are large, and in a tight space they pile up in corners, creating a boomy, muddy sound. Bass traps fix this.
The best bass traps for a closet are thick, dense panels placed floor-to-ceiling in each corner. Foam alone is too thin to trap bass. Look for 4-inch to 6-inch mineral wool panels wrapped in fabric. Two traps in the rear corners and two in the front corners handle most low-frequency issues in a closet-sized space.
How to Build a Vocal Recording Corner in a Closet Step by Step
This is the hands-on part. I will walk you through the build in clear, numbered steps so you can follow along and finish in a weekend.
Step 1: Clear and Prep the Space
Empty the closet completely. Remove shelves, rods, and anything that rattles. Keep clothing inside if you want extra absorption, but consider hanging it on the back wall only so it does not interfere with mic positioning.
Wipe down the walls and let them dry. If your closet has a carpeted floor, vacuum it thoroughly. A hard floor reflects sound, so plan to add a small rug later.
Step 2: Seal Gaps and Reduce Sound Leakage
Closet doors rarely seal tightly. Even a 1/8-inch gap lets in surprisingly much outside noise. Apply weatherstripping around the door frame and install an automatic door bottom or a simple draft stopper at the base.
Seal any electrical outlets with putty pads. Cover air vents with magnetic covers you can remove when you are not recording. Every gap you close improves your isolation.
Step 3: Install Acoustic Panels on Walls
Mount your acoustic panels at reflection points using construction adhesive, 3M Command strips, or impaler clips. Impalers let you remove panels later without damaging drywall.
Stagger your panels so the foam is not perfectly aligned edge-to-edge. This breaks up reflections more effectively than a perfectly flush grid. Cover at least 30 percent of the side walls and the entire wall directly behind the microphone.
Step 4: Treat the Ceiling and Floor
The ceiling reflects your voice straight back into the microphone. Hang a cloud of 2-inch foam or rigid fiberglass above your recording position. You can suspend it from the ceiling joists or from a simple PVC frame.
For the floor, place a dense wool rug or closed-cell foam mat under your feet. Hard surfaces reflect bass and add comb filtering to your recordings, so absorb as much as possible at floor level.
Ventilation and Lighting Considerations
Closet booths get hot fast. Without airflow, you will sweat within minutes, ruining sensitive recordings. The trick is ventilating without letting in noise.
Install a small quiet computer fan in a vent and connect it to a variable-speed controller. Position the intake and exhaust so air moves across your face from the side, not directly into the microphone. Some builders use PVC ducts with 90-degree bends to muffle incoming sound.
For lighting, add a soft LED strip or a small clip-on reading light. Bright, even lighting reduces eye strain during long sessions and helps if you record video along with audio.
Mic Placement Guide for Closet Recording
Even a perfectly treated closet sounds bad if the microphone is poorly placed. Position your mic 6 to 8 inches from your mouth, slightly off-axis to reduce plosives. A pop filter adds another layer of protection for hard consonant sounds.
Keep the microphone away from walls. Aim for at least 12 inches of clearance on every side. Face the back of the microphone toward the most treated wall so it picks up the driest signal possible. Use a shock mount or a hanging boom to isolate the mic from floor vibrations transmitted through your mic stand.
If your recordings still sound boxy after treatment, try tilting the microphone slightly or moving closer to one corner that has bass traps. Small position changes produce surprisingly large improvements.
Equipment Essentials for Your Closet Vocal Booth
You do not need much to record pro vocals in a closet. A quality condenser microphone captures the detail your treated room now provides. Pair it with an audio interface that has clean preamps and at least 48V phantom power.
Closed-back headphones are mandatory for tracking. They prevent headphone bleed from leaking into the microphone. An XLR cable of at least 10 feet gives you room to position the mic without strain. A sturdy mic stand or boom arm finishes the core setup.
Keep a few extras on hand: a pop filter, a shock mount, a reflection filter for travel sessions, and a small foam wedge for the desk if you record at a workstation.
Budget Breakdown DIY vs Pro Solutions
One of the most common questions I get is how much this actually costs. Here is a realistic range based on the builds I have done.
A budget DIY build using moving blankets, egg crate foam, weatherstripping, and a used microphone can cost under 150 dollars total. You sacrifice some acoustic precision, but for spoken word and casual podcasting the result is solid.
A mid-range build with 2-inch acoustic foam panels, four bass traps, a proper condenser microphone, an interface, and ventilation runs between 400 and 800 dollars. This is the sweet spot for serious musicians and freelance voice-over artists.
A professional build with rigid fiberglass panels, isolated clips, a high-end microphone and preamp, acoustic curtains, and engineered ventilation starts around 1500 dollars and climbs quickly. Few home users need this level, but it is achievable in a closet.
Common Mistakes to Avoid When Building a Closet Vocal Booth
Skipping the door seal is the number one mistake. People spend hours on foam and forget that noise leaking through a 1/4-inch gap destroys every minute of that work.
Over-treating the room is the second. A completely dead booth sounds unnatural and puts a strain on your voice during long takes. Leave one surface slightly reflective for a natural tone.
Using egg crate foam as the primary treatment is the third. Egg crate foam is thin, and it absorbs almost nothing in the low-mid range where vocals live. It looks impressive but does very little acoustically. Spend the same money on proper 2-inch panels.
Finally, never record without sealing the closet door. Even a small breeze moves the mic, and your voice projects outside the booth where the mic will pick it up. Train yourself to close and seal the door every single session.
Frequently Asked Questions
What do I need to turn a closet into a recording booth?
You need acoustic panels or foam for the walls, bass traps for the corners, a quiet ventilation method, a condenser microphone, an audio interface, closed-back headphones, and weatherstripping to seal the door. A rug or foam mat on the floor helps reduce reflections from below.
How do you treat a small closet for vocal recording?
Treat reflection points first by placing 2-inch acoustic foam or mineral wool panels on the walls beside and behind the microphone. Add bass traps in all four corners to control low-frequency buildup. Cover the ceiling directly above the mic with a hanging cloud and seal the door with weatherstripping.
Do you need bass traps in a vocal booth?
Yes. Small rooms create low-frequency buildup in corners that makes vocals sound muddy and boomy. Bass traps absorb this buildup and balance the sound. Four corner traps covering floor to ceiling handle most issues in a closet-sized booth.
What thickness of acoustic foam should I use for a vocal booth?
Use 2-inch acoustic foam for wall panels at reflection points and 4-inch to 6-inch material for bass traps in corners. Foam thinner than 2 inches absorbs very little and is not worth the money for serious vocal work.
How do you soundproof a closet for recording?
Seal the door with weatherstripping and a door sweep, cover any vents, seal electrical outlets with putty pads, and add mass to the walls using dense absorbing materials. Adding a second layer of drywall with Green Glue can dramatically improve isolation if your budget allows.
Final Thoughts on Your Closet Recording Build
Learning how to build a vocal recording corner in a closet is one of the highest-value projects a home recordist can tackle. A few hundred dollars and a weekend of work can replace a recording studio rental that costs more every month. The key is treating reflection points, controlling bass with thick corner traps, sealing the door, and handling ventilation properly.
Start with what your budget allows, then upgrade panels and bass traps as you go. Every improvement you make shows up immediately in cleaner, more professional recordings. Once you hear the difference, you will wonder why you waited so long to build your own vocal recording corner in a closet.
1 thought on “Build a Vocal Recording Corner in a Closet (September 2026)”