
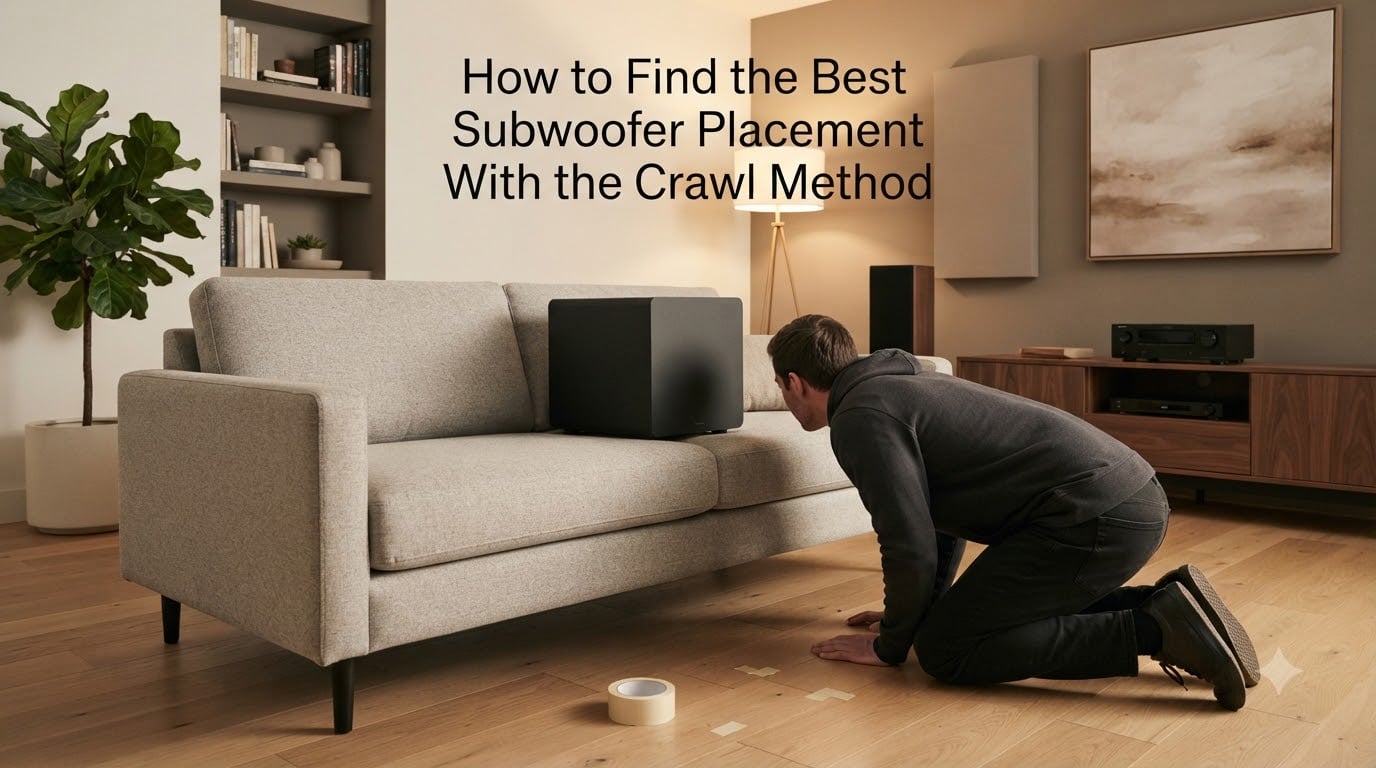
Your new subwoofer sounds great at the store, but at home the bass is either missing or overwhelming. The room is the problem, not the sub. The subwoofer placement crawl method is the simplest free way to find the spot where your room stops fighting your bass. I have used it in three different rooms and it has never failed to improve the result over my first guess.
This guide walks you through exactly what the crawl method is, why it works, how to do it step by step, and what to listen for so you can tell a good spot from a great one. No measurement microphones or software required.
Table of Contents
What Is the Subwoofer Crawl Method
The subwoofer crawl method is a placement technique where you put your subwoofer at your main listening position (often your couch or chair), then physically crawl around the room at floor level to find where the bass sounds smoothest. When you find the sweet spot, you move the subwoofer there.
The logic is simple. Speakers and listeners are interchangeable in a room. If a seat sounds bad, moving the sub to that seat and listening where the sub used to be will tell you how that position would sound as a subwoofer location. The trick is to crawl rather than walk, because low frequencies build up strongest near the floor, where standing wave effects are most pronounced.
It was popularized by audio forums in the early 2000s and is now recommended by Audioholics, SVS, and Bose as the fastest way to optimize subwoofer placement without any equipment.
Why Subwoofer Placement Matters for Bass Response
Low frequencies behave differently from the rest of your audio. A 40 Hz bass note has a wavelength of about 28 feet, which is roughly the length of most living rooms. When that wavelength is similar to your room dimensions, the sound waves bounce off the walls and interfere with each other, creating two problems.
Room modes are the resonant frequencies your room naturally amplifies. They are caused by the distance between parallel walls matching a wavelength or a simple fraction of one. These create bass peaks, where one note suddenly booms louder than the rest.
Standing waves and nulls happen where the reflected wave cancels out the direct wave. You feel these as “dead spots” where certain bass notes seem to disappear. The same room can have a +12 dB peak at one seat and a -12 dB null at another, all from the same speaker.
Subwoofer placement is the single biggest lever you have to control these effects. A sub placed in a corner excites every room mode at once and usually sounds boomy. A sub placed mid-wall is calmer. A sub placed inside a cabinet or under a table can choke the bass. The crawl method helps you find the spot where your specific room’s modes interfere least with the music.
What to Listen for During the Subwoofer Crawl
This is the part most guides skip, and it is the part people get stuck on. You are on the floor, the music is playing, and you have no idea what to listen for. Here are the three bass qualities to compare as you move between spots.
Tightness means each bass note has a clear start and stop. A kick drum should feel like a tap, not a smear. If notes bleed into each other, the spot is probably activating too many room modes.
Evenness means no single note jumps out louder than the others. Play a song with a walking bass line and listen for the moment one note suddenly leaps forward. That spot has a room mode peak. Walk a few feet in any direction and the uneven note should settle.
Depth versus bloat is the trickiest call. Deep bass extends down to 20 Hz and feels powerful but controlled. Bloated bass feels loose and cushiony, like the sub is breathing through a pillow. You want depth, not bloat. If your floor is rattling but you cannot pick out the bass line, you are probably in a spot with serious peaks.
A good test track makes this much easier. Use a song you have heard hundreds of times on headphones, with clear bass guitar or kick drum work. Some community favorites include Steely Dan’s “Aja,” Daft Punk’s “Get Lucky,” and any track from Massive Attack’s Mezzanine. Avoid tracks with heavy mastering compression, which masks the issues you are trying to hear.
Step-by-Step Subwoofer Crawl Procedure
This is the part to bookmark. Follow these steps in order and you will have a real candidate placement by the end.
Step 1: Set up your system normally. Place your subwoofer at your main listening position, ideally on the couch or chair where you actually sit. If the sub is large, place it on a small stool or box so the driver faces sideways at roughly ear height when you are on the floor.
Step 2: Connect and configure. Run a long subwoofer cable (or temporarily move the sub close to your receiver) so the sub is powered and connected. Set the crossover point on your AVR or sub to about 80 Hz, set the gain to roughly 50%, and turn off any room EQ or “bass boost” feature temporarily. You want a clean, unprocessed signal for the crawl.
Step 3: Cue up your test track. Pick a song with steady, even bass. Loop it so you do not have to walk back to the player every time. Set the volume to a comfortable but not loud level. Loud bass tricks your ears and reveals fewer issues.
Step 4: Get down on the floor. Literally. Kneel or lie with your head at floor level, where the subwoofer driver is. Your ears need to be at the same height as the sub during the crawl.
Step 5: Crawl around the perimeter and key spots. Start at the spot directly behind where the sub will eventually live. Move in a slow grid, pausing for 10 to 15 seconds at each spot. Listen. Make a mental note: tight, even, deep, or bloated. Move on.
Step 6: Mark your top three candidates. Use painter’s tape to mark the floor at the three spots where the bass sounds best. Crawl back to each one and compare them directly. Pick the winner.
Step 7: Move the sub to the winning spot. Power down, swap the sub and your temporary chair, and bring everything back. The crawl is done. Now you can listen from your actual seat and let your room EQ or Audyssey do the final smoothing.
Tips for Getting the Best Results From Your Crawl
Do the crawl on a quiet evening with no one else home. The softer ambient noise lets you hear subtle differences between candidate spots that you would otherwise miss.
Try the crawl with the subwoofer driver facing your listening position first, then again with it facing the side wall. Bass is omnidirectional below about 80 Hz, but the cabinet shape and port orientation can affect higher bass. A few minutes of testing both orientations can save you weeks of “something is off” frustration.
If you have two or more subwoofers, run the crawl with each one individually, then again with both playing. Two subs placed in the right spots smooth out room modes far better than one sub placed in a single great spot. The “right spots” for two subs are usually opposite or adjacent walls, not stacked next to each other.
After the crawl, run your AVR’s built-in calibration (Audyssey, YPAO, MCACC, or DCAC). Place the included microphone at your main listening position and let the system measure and correct what the crawl could not. The crawl gets you 80% of the way. Calibration handles the last 20%.
Common Subwoofer Placement Mistakes to Avoid
Pushing the sub into a corner and assuming louder is better. Corners excite every room mode at once and often sound impressive for a few minutes, then fatiguing for the rest of the evening.
Placing the sub inside a cabinet, behind curtains, or inside a TV stand. The cabinet absorbs and refracts the bass in ways that destroy the clean response you paid for.
Doing the crawl with EQ or room correction enabled. Built-in EQ will mask the very differences you are trying to hear. Turn it off for the crawl, then turn it back on afterward.
Crawling at standing height instead of floor level. Mid-room standing wave nulls happen at chest height, not floor level. Your crawl will lead you to the wrong spot.
Choosing a spot based on looks instead of sound. The best spot is often behind the couch, beside a plant, or in the middle of a walkway. If the winning spot is impractical, consider a wireless sub or a second sub in a more convenient location rather than settling for a worse-sounding compromise.
Skipping the rerun. Once you move the sub to the crawl winner, repeat the crawl one more time with the sub in its new spot. Small shifts of a few inches can sometimes reveal an even better position that the first crawl missed.
When the Subwoofer Crawl Method May Not Work
The crawl method assumes your room has a few “good” spots and a few “bad” ones. Some rooms have none. Cubic rooms with identical dimensions on all sides (say, 12 by 12 by 12 feet) create overlapping room modes that are nearly impossible to fix with placement alone. In those rooms, you need acoustic treatment: bass traps in the corners and thick absorption on the rear wall.
Open-concept rooms that flow into kitchens or hallways also confuse the crawl, because the bass waves have no boundary to reflect from. Multiple subwoofers help here, as does placing the sub closer to a hard wall or floor-to-ceiling column.
Severely asymmetric rooms, with one wall of glass and three of drywall, are also tough. The glass wall reflects almost nothing, so the room mode equation is lopsided. You can still crawl, but expect to use bass traps and a parametric EQ to finish the job.
If the crawl gives you a clear winner in any of these rooms, use it. The method is not perfect, but it is the best free starting point you have.
Frequently Asked Questions
How to find the best subwoofer placement?
Place your subwoofer at your main listening position, then crawl around the floor with your ears at the sub’s height. Listen for tight, even, and deep bass at each spot. Move the sub to the spot where the bass sounds best.
How can I use the subwoofer crawl to optimize my subwoofer placement?
Put the sub at your seat, play a bass-heavy song on repeat, and get down on the floor. Crawl around the room’s perimeter and key locations, pausing 10 to 15 seconds at each spot. Mark the three best-sounding spots with painter’s tape, compare them, and move the sub to the winner.
What are common subwoofer placement mistakes?
Pushing the sub into a corner, hiding it inside a cabinet, doing the crawl with EQ turned on, and crawling at standing height instead of floor level. Each one masks the very issues the crawl method is designed to expose.
How to calculate subwoofer placement?
For a single sub, place it a third of the way along the front wall (or the wall opposite your listening position) for smoother bass response. For two subs, try the midpoints of opposing walls. The crawl method is a faster free alternative to mathematical room mode calculators.
Does the subwoofer crawl method actually work?
Yes. It works by swapping the position of the sub and the listener, which is acoustically identical. Most home theater enthusiasts report a clear improvement after the crawl, even in rooms that sounded fine before. Multiple subs and acoustic treatment can improve results further.
Conclusion
The subwoofer placement crawl method is one of the few free tools in audio that actually delivers. It takes about 30 minutes, requires no special equipment, and gives you a real, measurable improvement in bass response. Set aside an evening, grab a long sub cable, and run the crawl. I promise you will end up with a placement that sounds noticeably better than your first guess.