
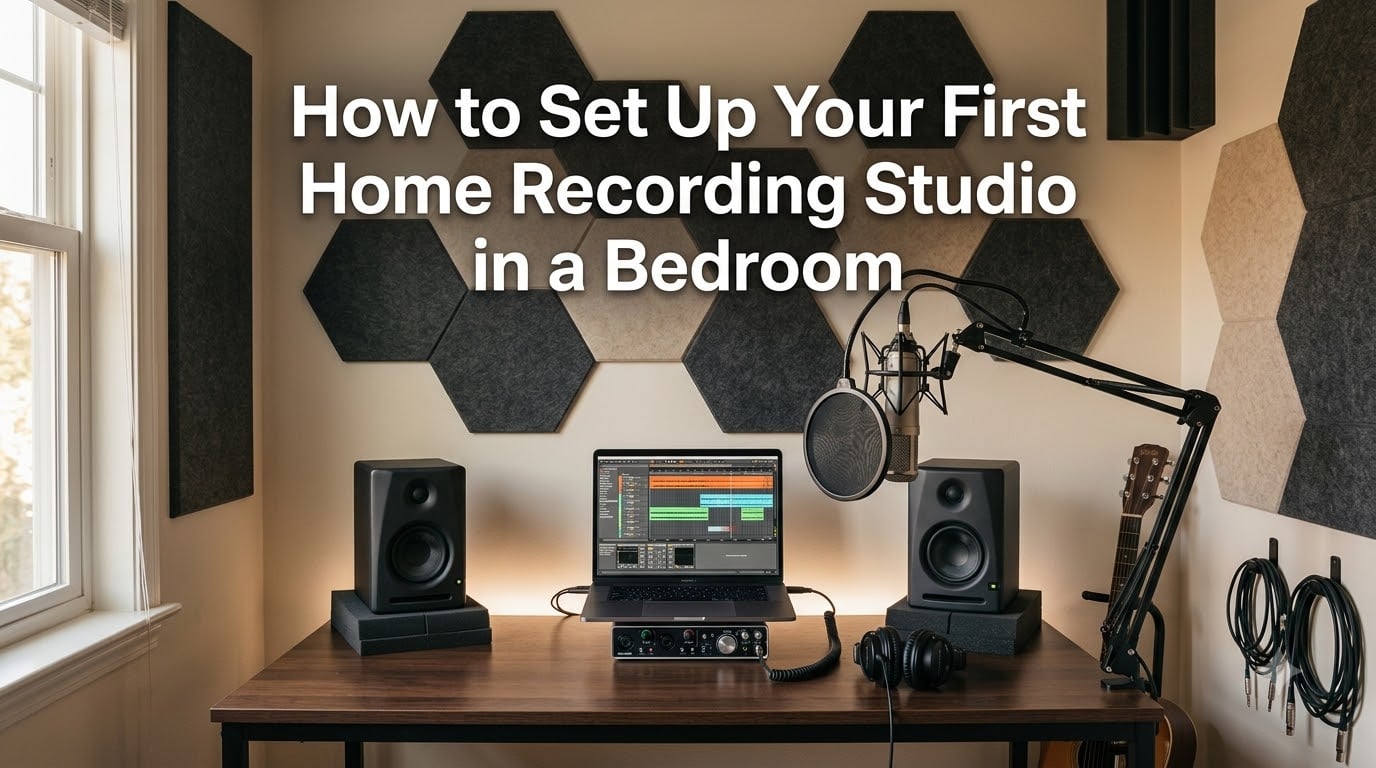
You do not need a rented studio, fancy equipment, or an empty warehouse to make professional-sounding music. Some of the biggest records in recent memory were tracked entirely in a bedroom.
Billie Eilish and her brother Finneas recorded multiple Grammy-winning albums in a small bedroom studio in their parents’ house. That single fact changed how independent musicians think about what is possible at home.
This guide shows you how to set up your first home recording studio in a bedroom, even if you have no prior experience and a tight budget. You will learn what gear is actually necessary, how to tame the acoustics of a small room, and the exact step-by-step process to get signal flowing from your microphone into your computer.
By the end, you will have a complete action plan for a functional bedroom studio that you can build today.
Table of Contents
Why a Bedroom Studio Is the Smartest Way to Start Recording Music at Home
A bedroom studio is the lowest-risk way to learn music production. You keep your costs down, you learn at your own pace, and you avoid expensive studio time while you are still figuring out your sound.
The trade-off is that bedrooms were designed for sleeping, not for capturing clean audio. They have parallel walls that bounce sound back at you, low ceilings that create weird reflections, and thin windows that leak street noise. None of these problems are dealbreakers, but they do shape every decision you make.
Here is the good news. Modern audio interfaces and DAW software have closed the gap between a home setup and a commercial facility more than most beginners realize. A modest bedroom rig with careful acoustic treatment can produce mixes that translate well on any playback system.
The community at r/audioengineering consistently reports the same thing: people who start with minimal setups and focus on learning their tools produce better results than people who buy everything at once and never learn to use it.
The Biggest Acoustic Challenges of Recording in a Small Bedroom
Small bedrooms fight you acoustically in three specific ways. Understanding each one is the first step to fixing them.
Standing waves are the number-one enemy. When two parallel walls are close together, certain low frequencies bounce back and forth and reinforce each other, creating spots where bass notes boom and other spots where they vanish. In a 10-by-12-foot bedroom, this typically happens in the 50 to 150 Hz range, which is exactly where your kick drum and bass sit.
You cannot fully eliminate standing waves with foam. They require mass and depth, which is why professional studios build thick bass traps into corners. In a bedroom, you manage them with strategic absorption and careful listening position.
Flutter echo is the second problem. Sound bounces between hard parallel surfaces like a ping-pong ball, creating a metallic ringing sound when you clap your hands. Bare drywall, large windows, and flat ceilings all contribute. This echo smears detail in your recordings and makes mixing decisions harder.
Background noise is the third challenge. Bedrooms often share walls with neighbors, sit near streets, and have HVAC vents that rumble. A condenser microphone will pick up all of it. Many beginners blame their microphone for noisy recordings when the room itself is the culprit.
None of these problems require a full rebuild. The sections below show you how to address each one with materials you can buy at a hardware store.
How to Pick the Right Room and Orient Your Setup
If you have more than one bedroom option, pick the room with the most irregular shape. A rectangular room is better than a perfectly square one because square rooms produce the worst standing wave buildup. L-shaped rooms or rooms with a closet alcove are actually desirable.
Avoid rooms with large shared walls to noisy neighbors if you plan to record late at night. Corner units in apartment buildings tend to be quieter because they have fewer shared walls.
Once you have your room, orient your desk so your speakers fire down the longer dimension of the room. This gives low frequencies more distance to develop before hitting the wall behind you, which smooths out the bass response at your listening position.
Position your desk against the shorter wall, facing into the length of the room. Sit about 38 percent of the way into the room depth from the front wall, which acoustic engineers consider the most balanced listening spot.
Keep your speakers away from the exact center of the room. The geometric center is where bass buildup peaks, and mixing there will trick your ears into hearing less low end than actually exists.
The 10 Essential Pieces of Bedroom Studio Equipment
Every functional bedroom studio is built from the same ten categories of gear. You can start with fewer items and add more as your needs grow, but this is the complete checklist.
1. A computer. Your laptop or desktop is the brain of the entire operation. Any computer from the last five years with at least 8 GB of RAM and a solid-state drive will handle multi-track recording without choking. An SSD matters more than raw CPU speed for audio work because it eliminates the pops and clicks that come from slow disk access.
2. An audio interface. This is the single most important purchase you will make. An audio interface converts the analog signal from your microphone into digital data your computer can record, and it converts finished audio back to analog for your speakers. Look for an interface with at least one XLR input, phantom power, and direct monitoring to avoid latency while tracking.
3. A microphone. Beginners almost always start with one of two types. A large-diaphragm condenser microphone captures vocals and acoustic instruments with detail and warmth, but it requires phantom power and picks up room noise. A dynamic microphone is less sensitive to background noise and handles loud sources like guitar amps and drums, but it captures less high-frequency detail.
For a first bedroom microphone, a large-diaphragm condenser in the $100 to $200 range covers vocals, acoustic guitar, and voiceover work. Pair it with a dynamic mic later if you start recording louder sources.
4. Studio monitors. These are speakers designed for accuracy rather than hype. Consumer speakers flatter music by boosting bass and treble. Studio monitors aim for a flat frequency response so your mixing decisions translate to earbuds, car stereos, and club systems alike.
Look for nearfield monitors with a 3-inch to 5-inch woofer for bedroom use. Position them so the tweeters point at ear level and form an equilateral triangle with your head.
5. Studio headphones. Closed-back headphones are essential for recording because they prevent microphone bleed while you sing or play. Open-back headphones are better for long mixing sessions because they are more comfortable and give a wider sense of space, but they leak sound.
If you can only afford one pair, buy closed-back. They cover both tracking and rough mixing, and they cost less than buying two pairs.
6. A DAW (Digital Audio Workstation). This is the software where you record, edit, and mix. Several excellent DAWs are free or bundled with audio interfaces. Reaper offers a full-featured unlimited trial for $60. GarageBand comes free on every Mac. Tracktion and Cakewalk are fully free on Windows.
The DAW you start with matters less than you think. Pick one, learn it deeply, and ignore the urge to switch every six months.
7. A MIDI keyboard. If you produce electronic music, program drums, or play virtual instruments, a 25-key or 49-key USB MIDI controller is essential. If you only record live audio, you can skip this entirely and add it later.
8. Microphone stand and pop filter. A sturdy boom stand lets you position a microphone precisely for vocals or instruments. A pop filter clips to the stand and blocks the bursts of air from plosive consonants like P and B that destroy vocal takes.
9. Cables. You need at least one balanced XLR cable to connect your microphone to the interface, and two balanced quarter-inch cables to connect your interface to your monitors. Buy cables at least 10 feet long so you are not tethered to your desk. Balanced cables reject noise over long runs; unbalanced cables pick up hum.
10. Basic acoustic treatment. This is the item beginners skip and veterans insist on. Even a few well-placed panels dramatically improve what you hear from your monitors and what your microphone captures. The DIY section below covers this in detail.
How to Set Up Your First Home Recording Studio: The Step-by-Step Process
Follow these steps in order and you will have signal flowing from microphone to speakers within an afternoon.
Step 1: Place your desk. Set your desk against the shorter wall, facing down the length of the room. Leave at least a foot of space behind the desk if possible, because speakers placed too close to a wall produce boomy, inaccurate bass.
Step 2: Position your monitors. Place your studio monitors on isolation pads or stands at ear level. The tweeters should form an equilateral triangle with your head when you are seated at your listening position. Angle the speakers inward slightly so they point directly at your ears, not past them.
Step 3: Connect the audio interface. Plug your interface into a wall outlet and connect it to your computer via USB or Thunderbolt. Do not use a USB hub for your interface, because hubs introduce latency and power fluctuations. Connect directly to a port on the computer.
Step 4: Connect your monitors to the interface. Run balanced quarter-inch cables from the left and right line outputs on the back of your interface to the inputs on each monitor. Keep the cable lengths equal to avoid phase issues.
Step 5: Set the monitor volume. Turn the monitor output knob on your interface to zero before powering on the speakers. Power up the monitors only after all connections are made to avoid loud pops that can damage the speakers.
Step 6: Connect your microphone. Plug an XLR cable into your microphone and run it to the XLR input on your interface. If you are using a condenser microphone, press the 48V phantom power button on the interface. Never plug or unplug an XLR cable while phantom power is engaged, because the voltage spike can damage the microphone.
Step 7: Install your DAW. Download and install your chosen DAW. Many interfaces ship with a bundled license for a DAW like Ableton Live Lite, Pro Tools First, or Studio One Prime. Register your interface to claim the software before the offer expires.
Step 8: Configure audio settings. Open your DAW preferences and select your audio interface as both the input and output device. Set the sample rate to 48 kHz and the buffer size to 128 or 256 samples for low-latency monitoring while recording.
Step 9: Test your signal. Create an audio track in your DAW, arm it for recording, and speak into the microphone. You should see the input meter move. Adjust the gain knob on your interface so your loudest passages peak around negative 12 dB on the meter. This leaves headroom to prevent clipping.
Step 10: Enable direct monitoring. If your interface has a direct monitoring button, turn it on so you hear your microphone signal with zero latency while recording. Test the full chain by recording a short clip and playing it back through your monitors.
If you hear sound through both speakers and the recording plays back cleanly, your bedroom studio is operational.
Bedroom Studio Budget Breakdown: Under $300, $500, and $1,000
One of the most common questions on r/homestudios is how much a starter studio actually costs. Here is a realistic breakdown at three budget tiers based on what new gear costs in 2026.
The under-$300 tier gets you a working studio for vocals, voiceover, and basic production. You will make compromises, but every component is functional. Allocate roughly $100 to $130 for a single-input audio interface, $50 to $80 for a large-diaphragm condenser microphone, $30 for closed-back headphones, $15 for an XLR cable and adapter, $20 for a desk stand and pop filter, and use a free DAW like GarageBand, Reaper, or Cakewalk. This setup skips studio monitors entirely and relies on headphones for mixing.
The under-$500 tier adds monitors and better quality throughout. Spend $150 to $180 on a two-input interface, $100 to $150 on a condenser microphone, $100 on a pair of entry-level nearfield monitors, $50 on closed-back headphones, $30 on cables, and $30 on a boom stand and pop filter. This is the sweet spot for most beginners and produces recordings that sound genuinely professional with careful mixing.
The under-$1,000 tier gives you a setup you will not outgrow for years. Budget $250 to $300 for a quality interface with multiple inputs, $200 to $300 for a microphone from a respected brand, $300 to $400 for a pair of mid-tier monitors, $100 for quality headphones, $80 for acoustic treatment materials, $40 for cables, and $50 for stands and accessories. At this level, your bedroom studio rivals what independent artists used to pay hundreds of dollars an hour to access.
A note from the forums: many experienced producers recommend buying used equipment to stretch your budget. Reverb and eBay are reliable sources for gently used audio interfaces, microphones, and monitors at 30 to 50 percent below retail.
DIY Acoustic Treatment for Bedroom Studios on a Real Budget
You can dramatically improve your bedroom acoustics without spending hundreds on pre-built panels. The DIY approach uses the same materials professional studios use, at a fraction of the cost.
Build bass traps for your corners. Low-frequency energy accumulates where two walls meet, so corners are the most important places to treat. Buy rigid fiberglass or mineral wool panels, commonly sold as Owens Corning 703 or Rockwool, from a building supply store. Stack two panels in each vertical corner behind a breathable fabric frame. These traps absorb bass frequencies that foam cannot touch.
Make broadband absorbers for your first reflection points. Sit at your listening position and have a friend slide a small mirror along each side wall and the ceiling. Wherever you can see your speaker in the mirror is a first reflection point. Mount a 2-inch rigid fiberglass panel at each of those spots to kill the flutter echo that smears your stereo image.
Avoid the acoustic foam trap. Egg-crate foam and cheap wedge foam sold online looks professional but does almost nothing below 500 Hz. It absorbs high frequencies, which makes your room sound darker without fixing the bass problems that actually hurt your mixes. If you already own foam, it is fine for taming flutter echo on walls, but do not expect it to replace proper bass traps.
Use what you already have. A thick rug on a hard floor, heavy curtains over windows, a bookshelf full of books against one wall, and a sofa or bed in the back of the room all absorb sound. Furnishing your bedroom thoughtfully gets you halfway to a treated room before you build a single panel.
The community consensus on r/audioengineering is clear: treat your room before you upgrade your monitors. A $300 pair of monitors in a treated room outperforms a $1,000 pair in an untreated one.
Common Beginner Mistakes When Building a Bedroom Studio
These are the mistakes that cost beginners money and slow their progress. Every one of them comes from real forum discussions.
Gear Acquisition Syndrome. Beginners buy microphone after microphone, plugin after plugin, hoping the next purchase will make their recordings sound professional. It never does. The weakest link in any bedroom studio is the person operating it, not the equipment. Master what you own before adding more.
Skipping room treatment. This is the most expensive mistake because it is invisible. Untreated rooms give you inaccurate information, which means every mixing decision you make is wrong. You boost bass that does not need boosting, you cut highs that were fine, and your mixes sound completely different on other systems.
Monitoring too loud. Mixing at high volume fatigues your ears within an hour and exaggerates low and high frequencies. The Fletcher-Munson curve explains why: at low volumes your ears hear a flatter balance, and at high volumes bass and treble sound artificially boosted. Mix at conversation volume and your decisions will translate better.
Using unbalanced cables for long runs. Quarter-inch instrument cables are unbalanced and pick up electrical hum when run more than 15 feet. Balanced XLR and TRS cables reject noise over long distances. Use the right cable type for each connection and you eliminate 90 percent of hum and buzz problems.
Placing monitors on the same surface as the desk. Vibrations travel from the speakers through the desk into your microphone stand and back into your recordings. Decouple your monitors with isolation pads or stands, and decouple your microphone with a shock mount.
Recording too hot. Beginners see meters and assume louder is better. If your peaks exceed zero dB, the signal clips and the recording is permanently distorted. Aim for peaks around negative 12 dB. You can always make a recording louder later, but you cannot fix clipping.
Ignoring the noise floor. Before you record, sit in silence with your microphone live and look at the input meter. If there is constant activity, your room is too noisy. Turn off fans, close windows, and record during quiet hours. A clean, quiet recording is far easier to mix than a noisy one.
FAQs
How do you turn your bedroom into a recording studio?
To turn your bedroom into a recording studio, place your desk against the shorter wall, set up studio monitors at ear level in an equilateral triangle, connect an audio interface to your computer, plug in a microphone via XLR cable, install a DAW, and add acoustic treatment at your first reflection points and room corners.
How to set up a bedroom music studio?
Set up a bedroom music studio by following ten steps: position your desk facing down the long dimension of the room, place your monitors on isolation pads, connect your audio interface via USB, wire your monitors with balanced cables, connect your microphone with an XLR cable, enable phantom power for condenser mics, install your DAW, set sample rate to 48 kHz, test your signal, and enable direct monitoring.
What do you need for a bedroom studio?
You need ten essentials for a bedroom studio: a computer, an audio interface, a microphone, studio monitors, closed-back headphones, a DAW, an optional MIDI keyboard, a microphone stand and pop filter, balanced XLR and quarter-inch cables, and basic acoustic treatment including bass traps and first reflection panels.
How much does it cost to set up a home recording studio?
A functional bedroom recording studio costs between $300 and $1,000. A bare-minimum setup with an interface, microphone, headphones, and free DAW runs around $300. A complete setup with monitors and better quality gear costs about $500. A setup you will not outgrow for years runs around $1,000 and includes acoustic treatment.
Do I need acoustic foam for my bedroom studio?
No, acoustic foam is not the most effective treatment for a bedroom studio. Foam absorbs only high frequencies and does nothing for the bass problems that hurt your mixes. You are better off building DIY bass traps from rigid fiberglass or mineral wool and placing broadband absorbers at your first reflection points.
What is the best microphone for a bedroom studio?
The best first microphone for a bedroom studio is a large-diaphragm condenser microphone in the $100 to $200 range. It captures vocals and acoustic instruments with detail and warmth. If your room is noisy or you record loud sources like guitar amps, a dynamic microphone is a better starting choice because it rejects background noise.
Final Thoughts: Build It, Use It, Upgrade Later
Learning how to set up your first home recording studio in a bedroom is less about buying the right gear and more about building a space you actually use. The best bedroom studio is the one that is ready when inspiration hits, not the one with the most expensive equipment gathering dust.
Start with the essentials, treat your room, learn your DAW, and record every day. Upgrade only when you can articulate exactly what your current setup cannot do. That is how bedroom producers go from first recording to finished album.
4 thoughts on “How to Set Up Your First Home Recording Studio in a Bedroom (2026)”